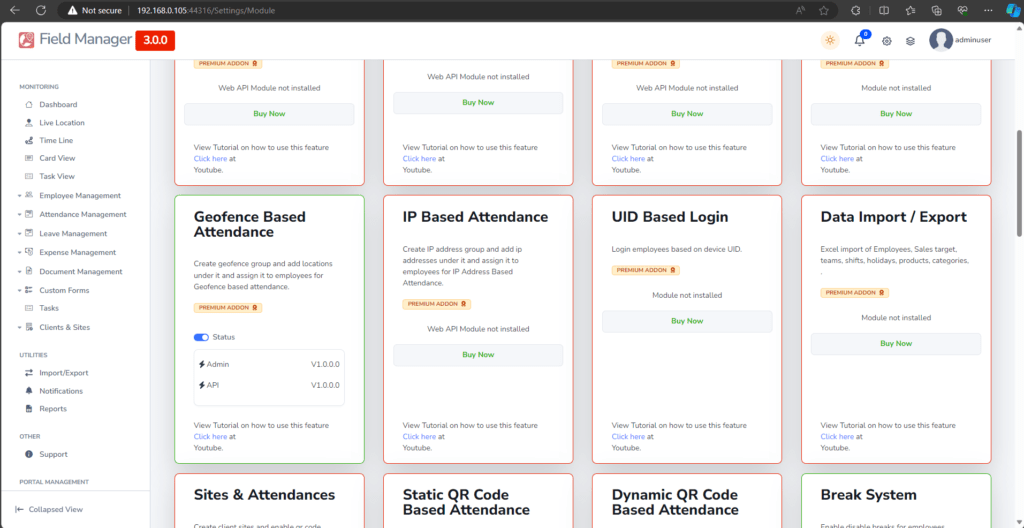
Geofence Attendance
With this addon, employees can fill out custom forms from the mobile app. Which type can be created dynamically from the admin panel.
Note: You need to purchase the Custom Forms add-on from this link.
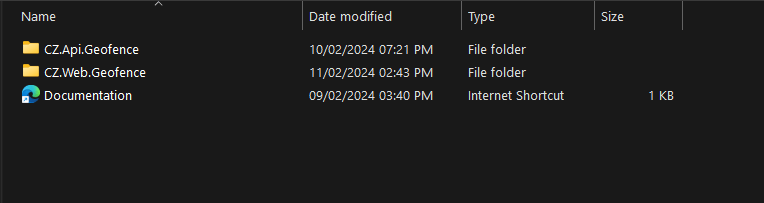
Extracting the downloaded files #
Step 1: Extract the downloaded zip and open the Geofence Attendance addon folder.

Step 2: Copy the CZ.Api.Geofence and CZ.Web.Geofence folders
Step 3: Paste it in the root directory of the Field Manager Server Project.

Configuring the WebApi #
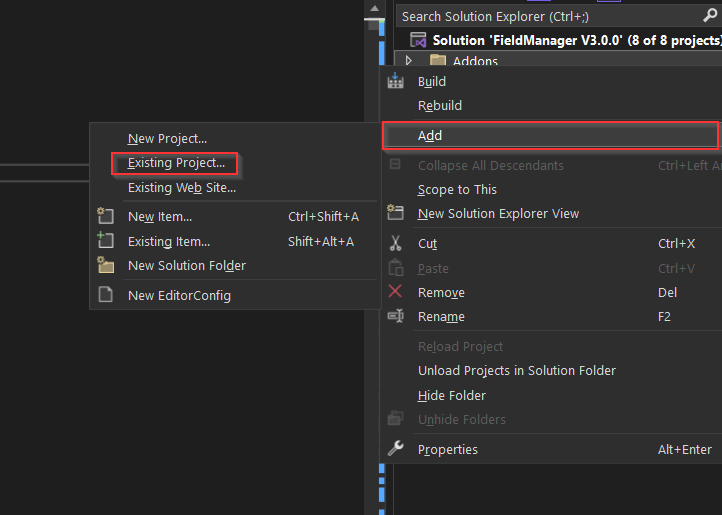
Step 1: Open Field Manager Vx.x.x.sln file in Visual Studio. Right-click on the Addons folder and select Add -> Existing Project.
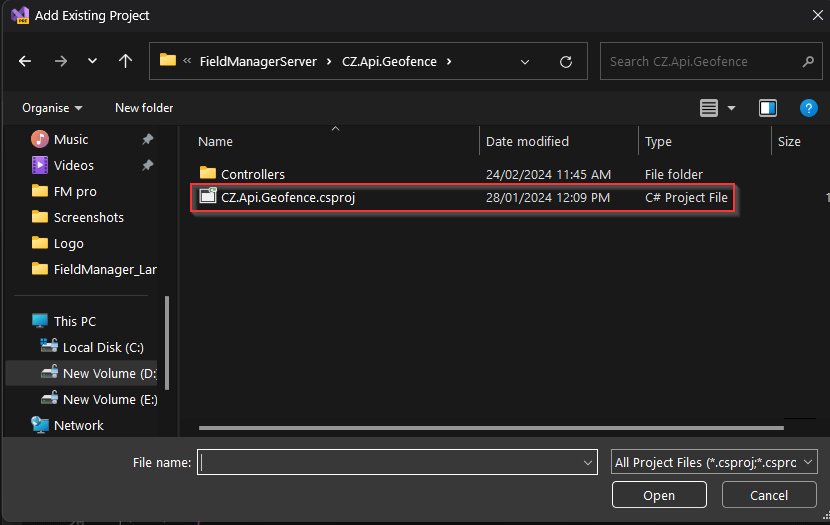
Step 2: Go to the Field Manager Server project root and open the CZ.Api.Geofence folder.
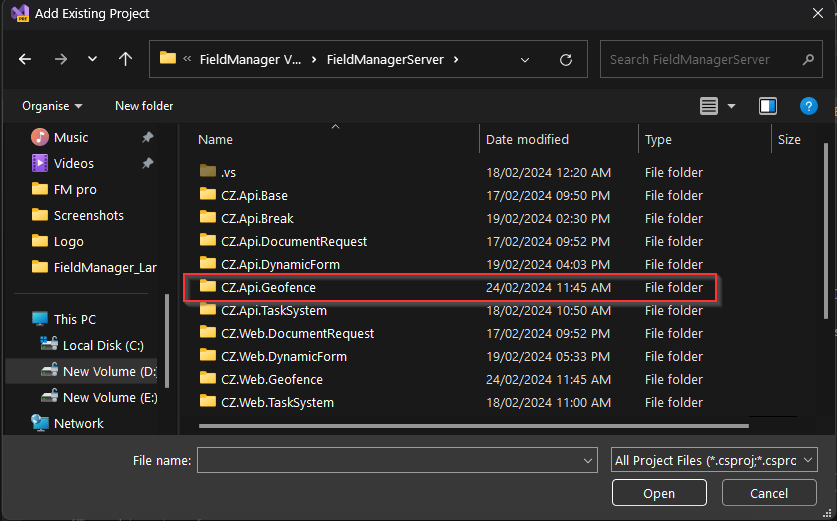
Step 3: Select the CZ.Api.Geofence.csproj file and click open to import the project into solution.
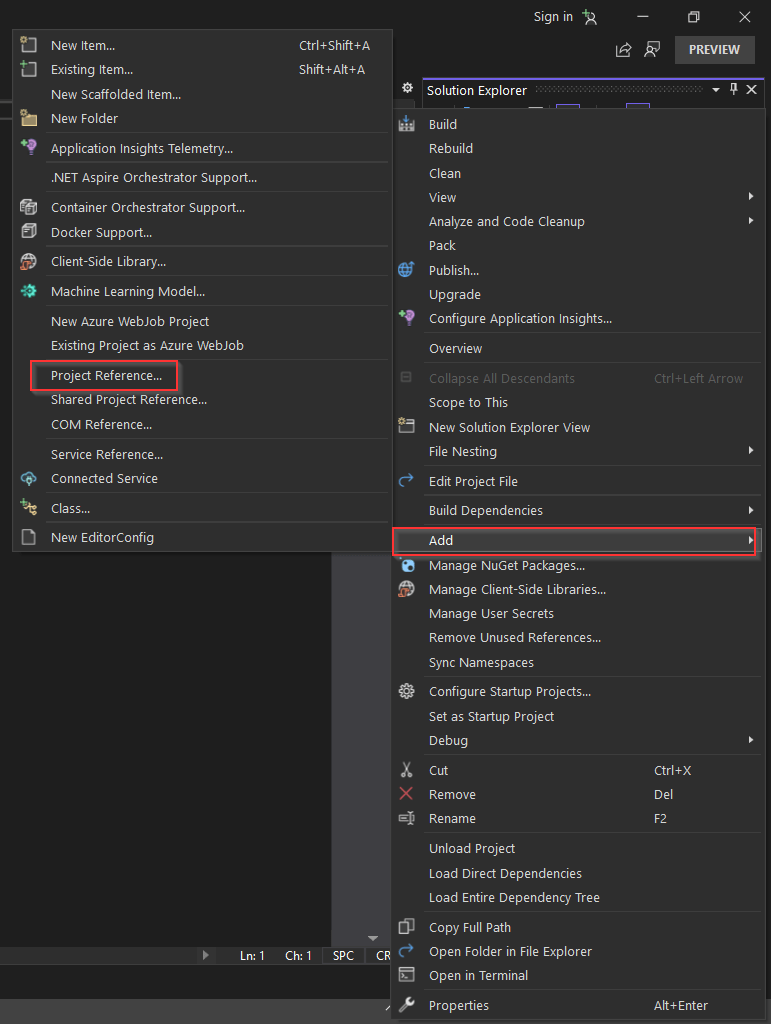
Step 4: Now, right-click on the ESSWebApi project and select the Add -> Project Reference.
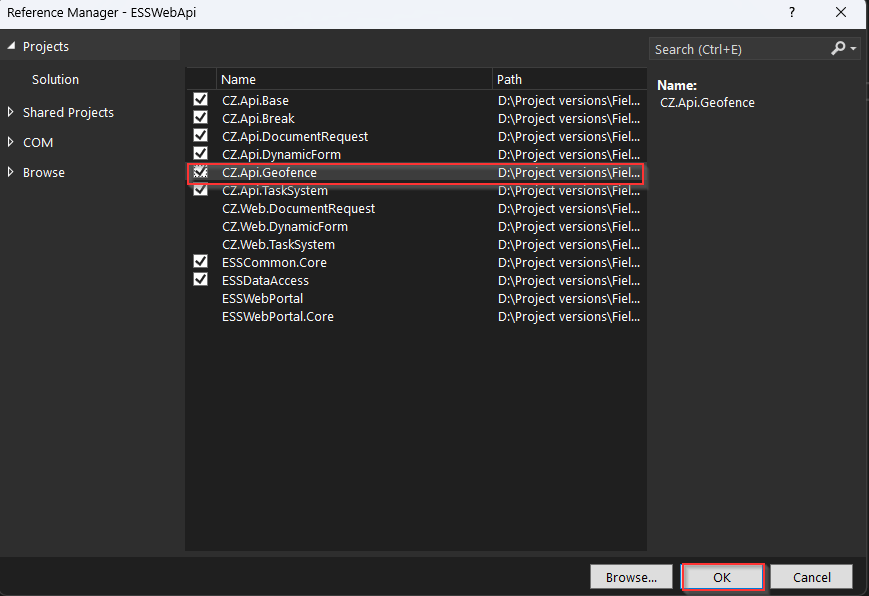
Step 5: Select the CZ.Api.Geofence project and Click OK.
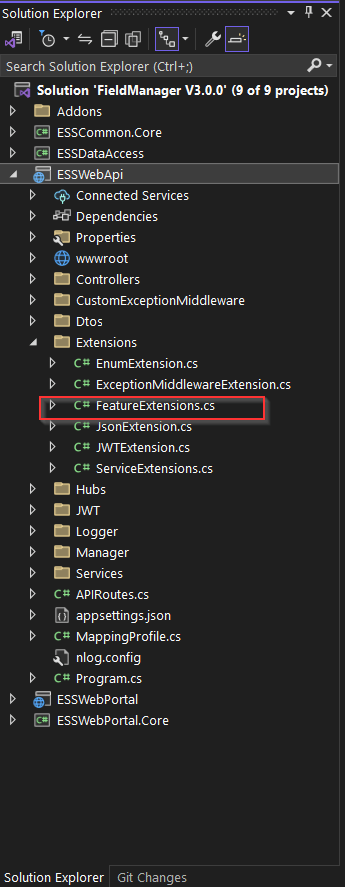
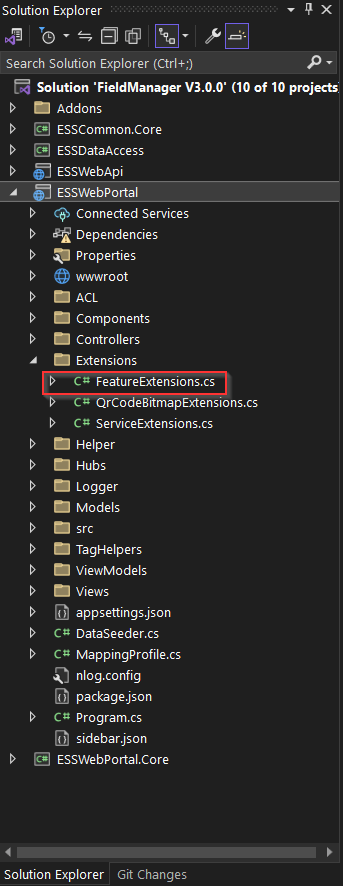
Step 6: Open FeatureExtensions.cs from the ESSWebApi -> Extenstions folder.
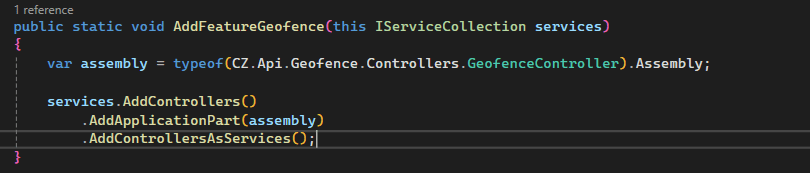
Step 7: Paste the below-mentioned code inside the AddFeatureGeofence method.
  var assembly = typeof(CZ.Api.Geofence.Controllers.GeofenceController).Assembly;

services.AddControllers()
    .AddApplicationPart(assembly)
    .AddControllersAsServices();
After pasting the code will look like this
Configuring the Web Portal #
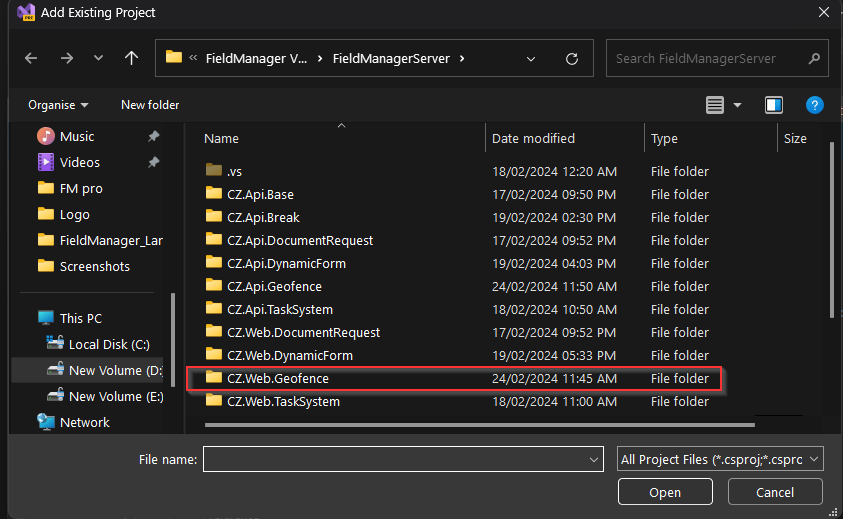
Step 1: Open Field Manager Vx.x.x.sln file in Visual Studio. Right-click on the Addons folder and select Add -> Existing Project.
Step 2: Go to the Field Manager Server project root and open the CZ.Web.Geofence folder.
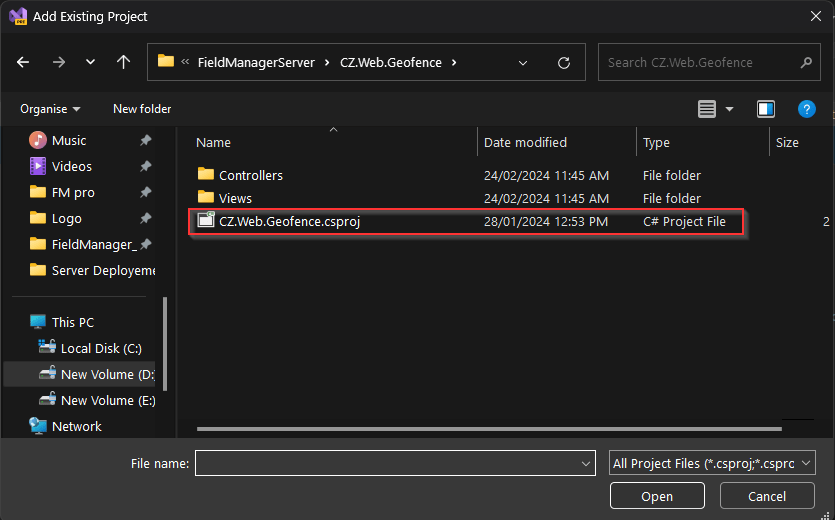
Step 3: Select the CZ.Web.Geofence.csproj file and click open to import the project into solution.
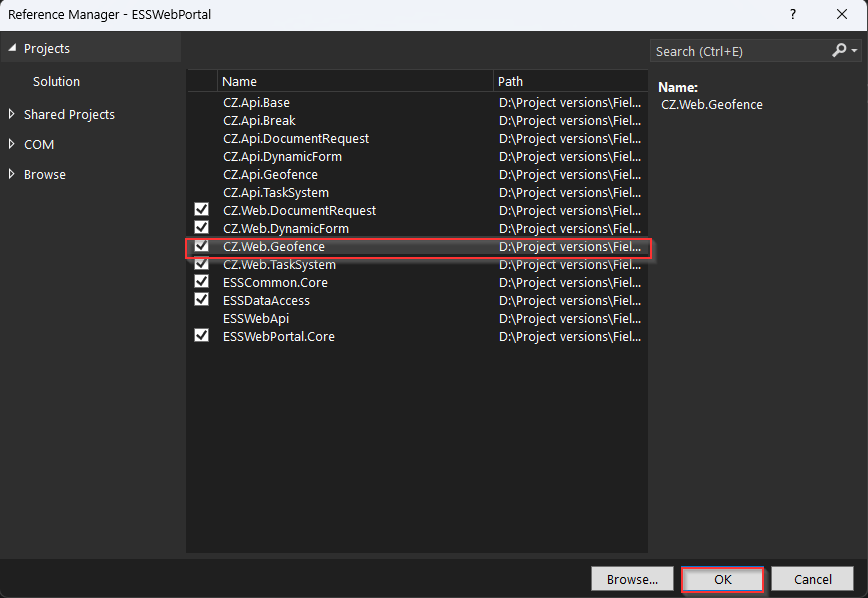
Step 4: Now, right-click on the ESSWebPortal project and select the Add -> Project Reference.
Step 5: Select the CZ.Web.Geofence project and Click OK.
Step 6: Open FeatureExtensions.cs from the ESSWebPortal -> Extenstions folder.
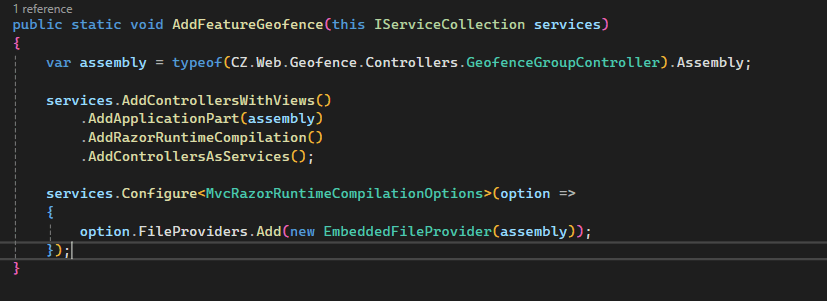
Step 7: Paste the below-mentioned code inside the AddFeatureGeofence method.
var assembly = typeof(CZ.Web.Geofence.Controllers.GeofenceGroupController).Assembly;
services.AddControllersWithViews()
.AddApplicationPart(assembly)
.AddRazorRuntimeCompilation()
.AddControllersAsServices();
services.Configure<MvcRazorRuntimeCompilationOptions>(option =>
{
option.FileProviders.Add(new EmbeddedFileProvider(assembly));
});After pasting the code will look like this
Verifying the addon installation #
In the Field Manager Vx.x.x solution run both API & Web projects in the Flutter test profile. Once the project launches. Login using the admin credentials and click on the module section in the top right corner to open the add-ons page. If you can see the addon version, then your Addon is now activated. If there is any error kindly make sure that all the above-mentioned instructions are followed correctly.