Settings
Table of Contents
Admins have extensive control, configuring General and Company Settings like company details, logo, and favicon. They manage App Settings, including app version, Privacy Policy URL, and Terms & Conditions URL. Loyalty Settings are customizable, allowing adjustments to conversion rates, feature enablement, cash redemption, and referral programs. Dedicated WooCommerce Settings facilitate seamless integration management. This comprehensive administrative access ensures full platform control and customization.
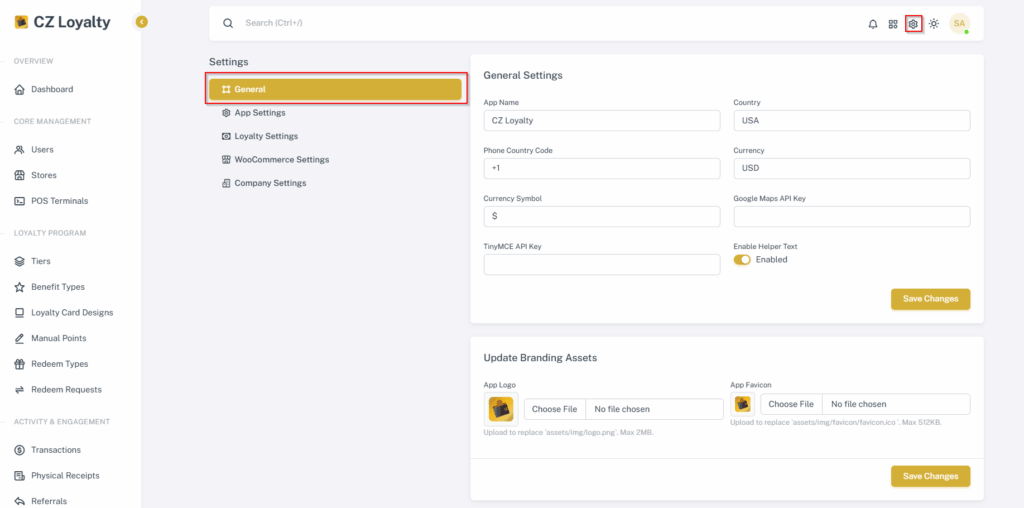
GENERAL SETTINGS SETUP #
- Go to CZ Loyalty panel, Select “Setting icon” on top right corner of the dashboard.
- Select “General” option
- Enter the following details:
- Enter App Name
- Add Country and Phone code
- Add Country’s currency and currency’s symbol
- Enter Tiny MCE API Key
- Enable or disable the helper text
- Upload the logo and thumbnail, respectively.
- Then Click the “Save Changes” button.
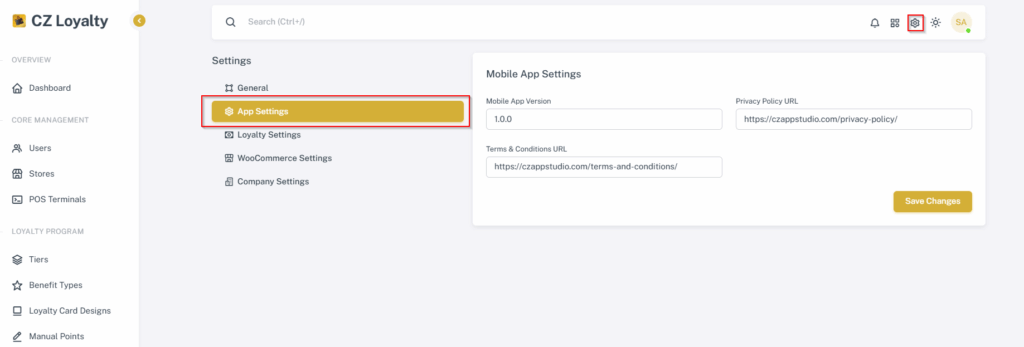
APP SETTINGS SETUP #
- Go to CZ Loyalty panel, Select “Setting icon” on top right corner of the dashboard.
- Select “App” option
- Set Mobile App Version
- Add Privacy policy URL
- Add Terms & Conditions URL
- Then Click the “Save Changes” button.
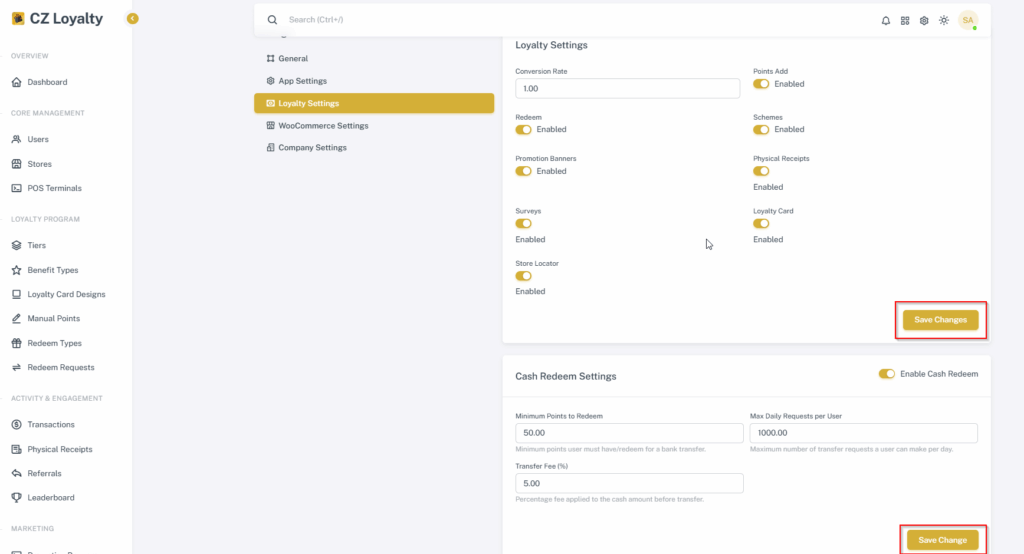
LOYALTY SETTINGS SETUP #
- Go to CZ Loyalty panel, Select “Setting icon” on top right corner of the dashboard.
- Click “Loyalty settings”.
- Enter the details for Loyalty settings:
- Enter the conversion rate
- Enable or disable the Loyalty programs option.
- Then Click the “Save Changes” button.
- Enter the details for Cash Redeem Settings:
- Enable the cash redeem option.
- Set the minimum points to be redeem by the user
- Set the maximum daily requests per user
- Enter the transfer fee percentage
- Then Click the “Save Changes” button.
- Enter the details for Referral system Settings:
(Refer to section 21.1. Steps to enable Referral system)

WOOCOMMERCE SETTINGS SETUP #
(Refer to section 13.1. Steps to enable WooCommerce)
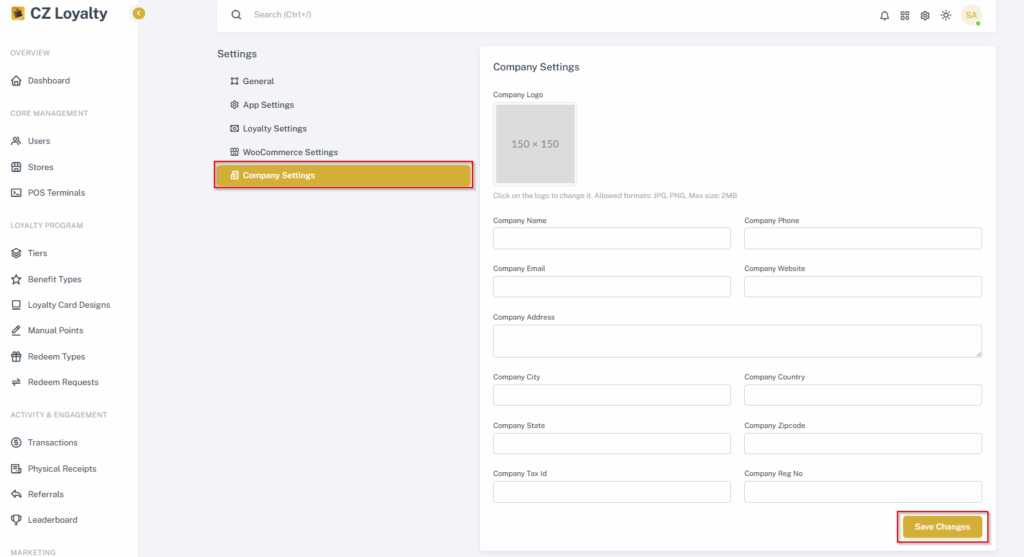
COMPANY SETTINGS SETUP #
- Go to CZ Loyalty panel, Select “Setting icon” on top right corner of the dashboard.
- Select “Company Settings” option
- Enter the following details:
- Add the company logo
- Enter Company Name
- Add detailed address of the Company respectively
- Enter the Company’s Tax id & Reg number
- Then Click the “Save Changes” button.