Cpanel Setup
In this section, you can find the complete instructions on how to set up and configure your Admin Panel using Cpanel.
Database Setup #
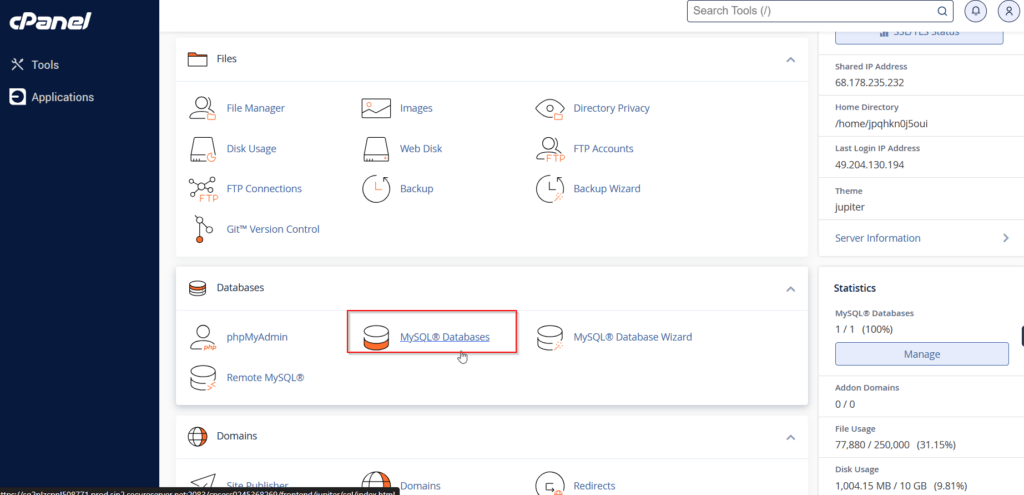
Step 1: Log in to your CPanel account and head over to the Databases and Open the MySQL Databases.
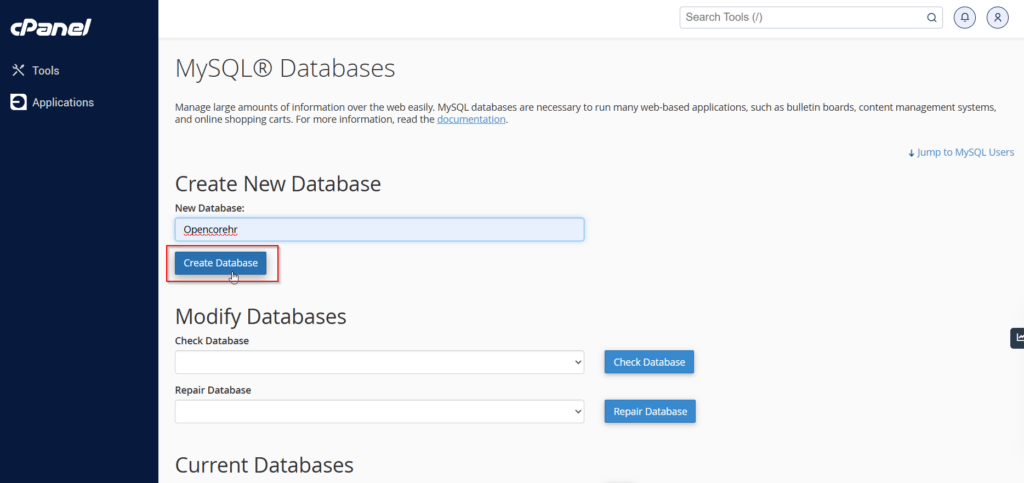
Step 2: Create New Database and user.
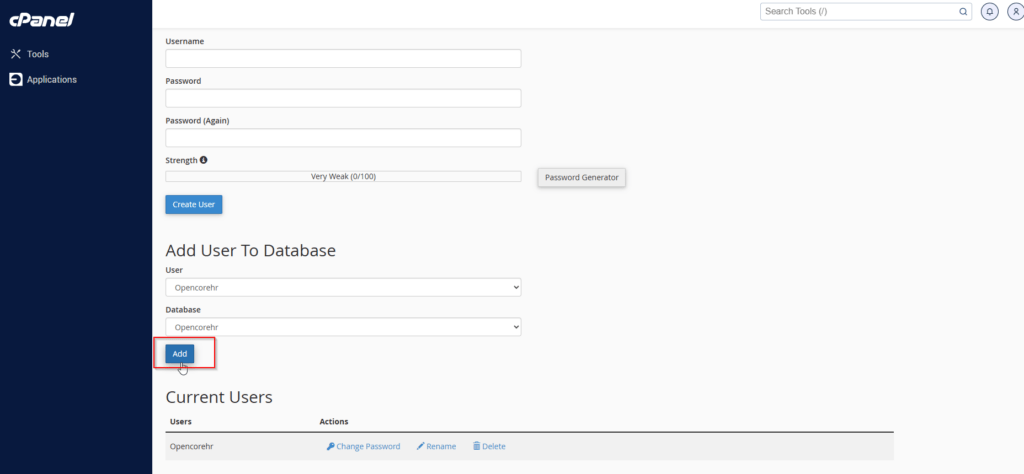
Step 3: Create a new user and add the user to database.
File Uploading #
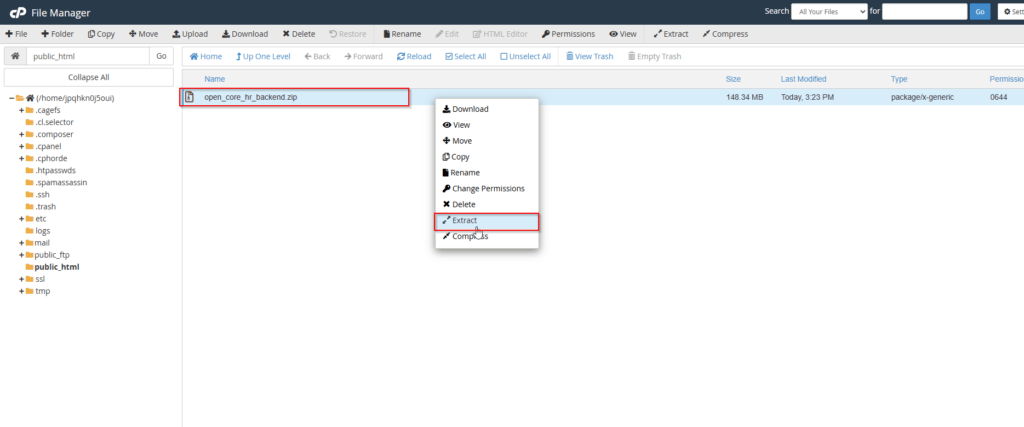
Step 1: Extract the downloaded zip file from your local application.

Step 2: Open the open_core_hr_backend folder in Visual Studio code.

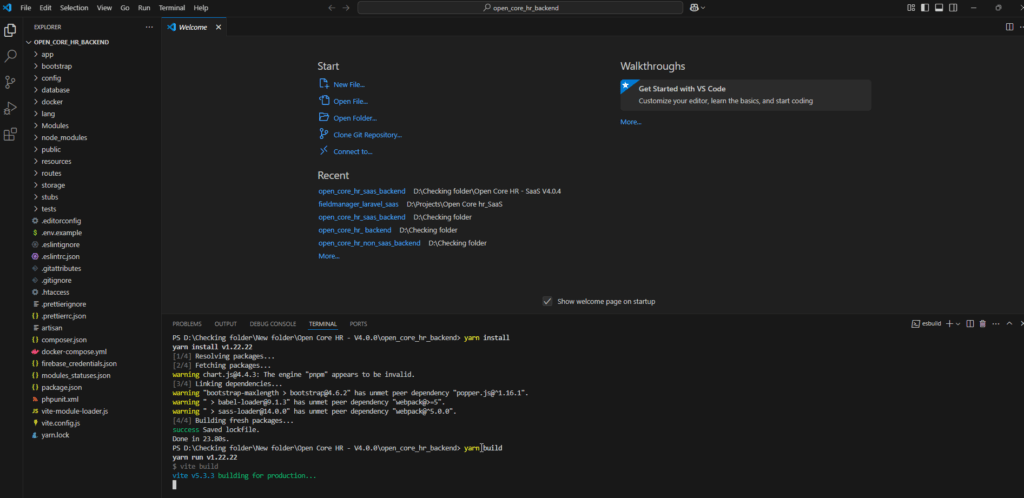
Step 3: Now run the following commands in terminal.
- yarn install
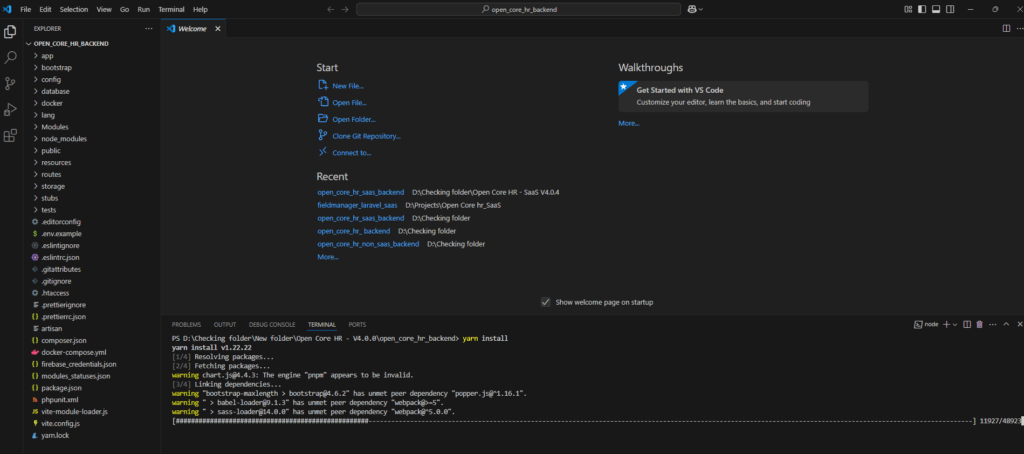
- yarn build
Step 4: Then save the changes and zip the open_core_hr_backend folder.

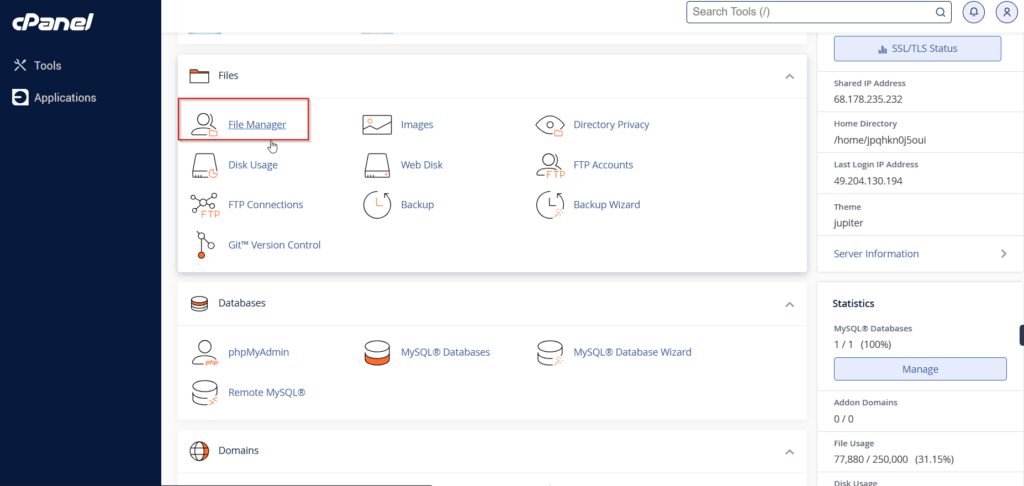
Step 5: Log in to your cpanel, navigate to the Files section, and click on File Manager.
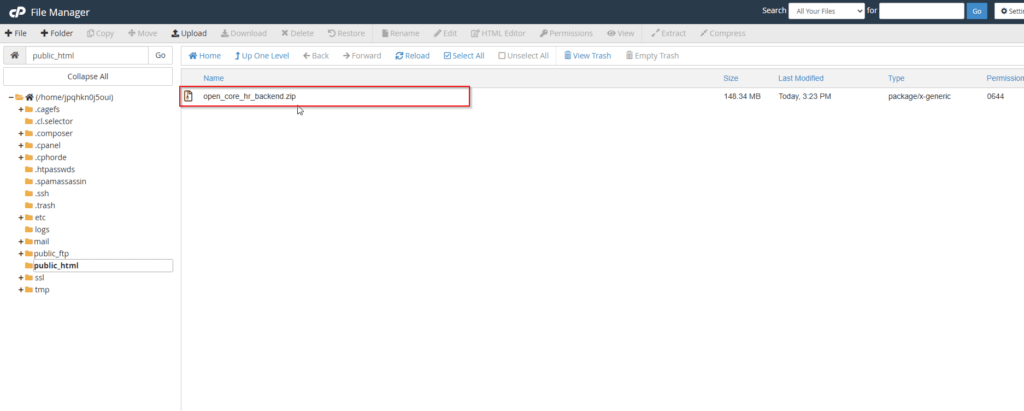
Step 6: Upload the zipped open_core_hr_backend folder to the file manager.
Step 7: Extract them in the same folder you created by right-clicking on the zip file.
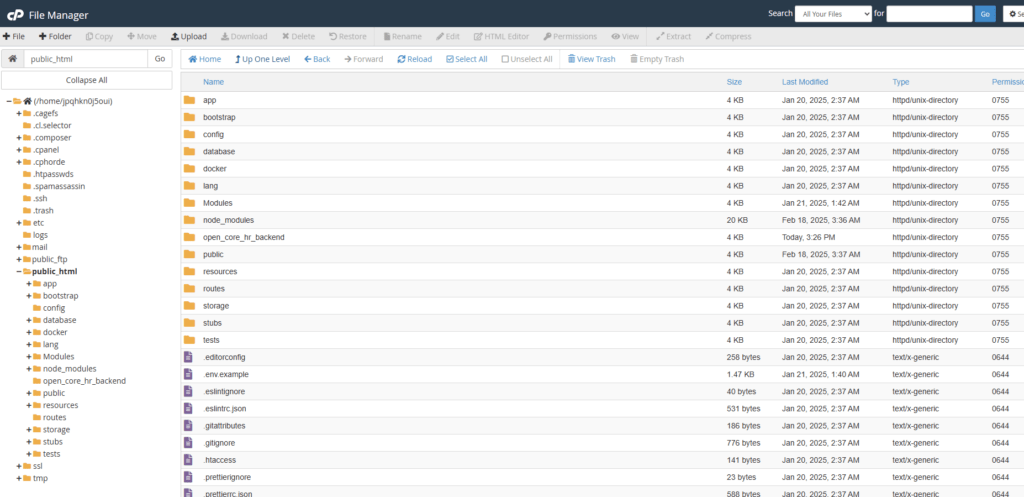
Step 8: Now move all the files to public_html folder.
NOTE: Make sure that you moved all server files to public_html folder
Setup #
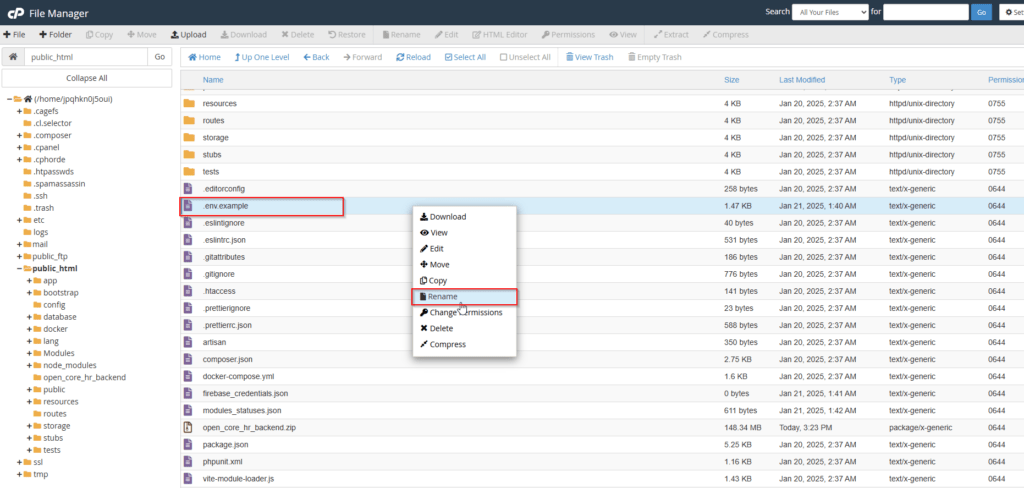
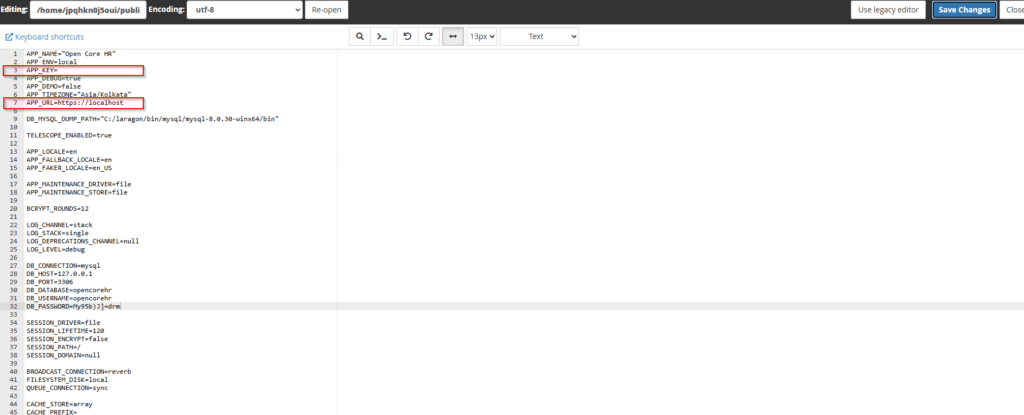
Step 1: Change the .env.example file name into .env
Step 2: Fill in the Database details Accordingly.
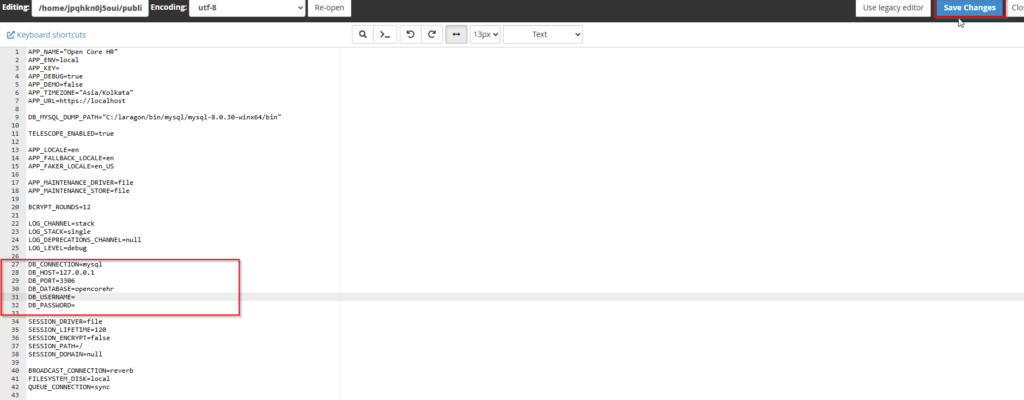
Step 3: Add the app url.
Step 4: To install Composer, open the terminal in cPanel and run the following command
composer install
Set files permission

sudo chmod -R 775 public

sudo chmod -R 777 storage

sudo chmod -R 777 modules_statuses.json

sudo chmod -R 777 Modules
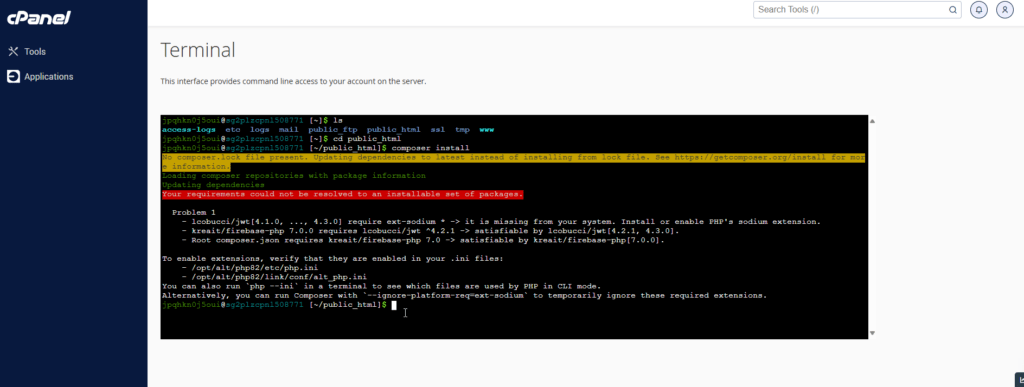
NOTE: If you face any issues while running the above command run this composer install --ignore-platform-reqs

Step 5: Generate jwt secret key.
php artisan jwt:secret

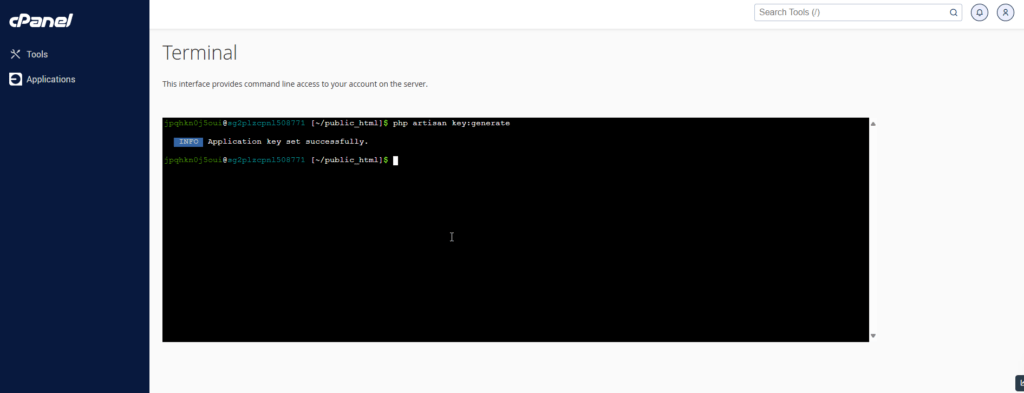
Step 6: Generate Application Key by entering the following command in the terminal.
php artisan key:generate
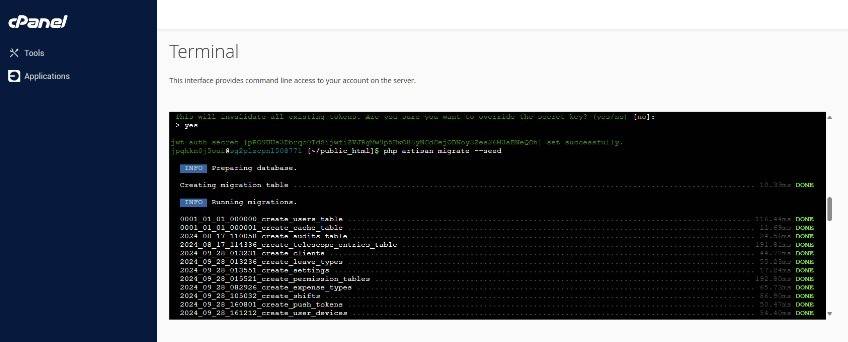
Step 7: Open the terminal /ssh from cPanel and enter the following command to migrate and seed the demo data.
php artisan migrate --seed
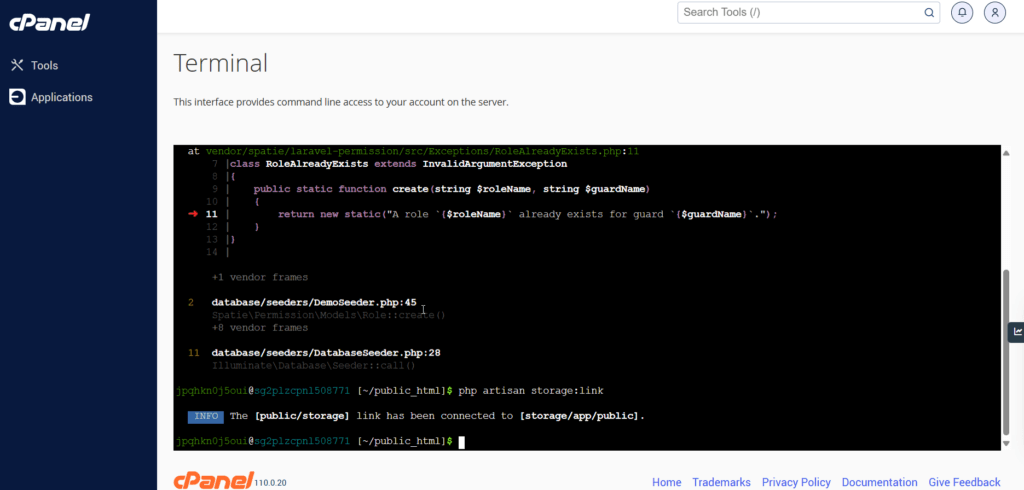
Step 8: Now enter the following command in the terminal to link storage.
php artisan storage:link
Step 9: The application is now live
Login Credential
Username: [email protected]
Password: 123456