In this section, you can find the complete instructions on how to set up and configure your Admin Panel using Cpanel.
Database Setup #
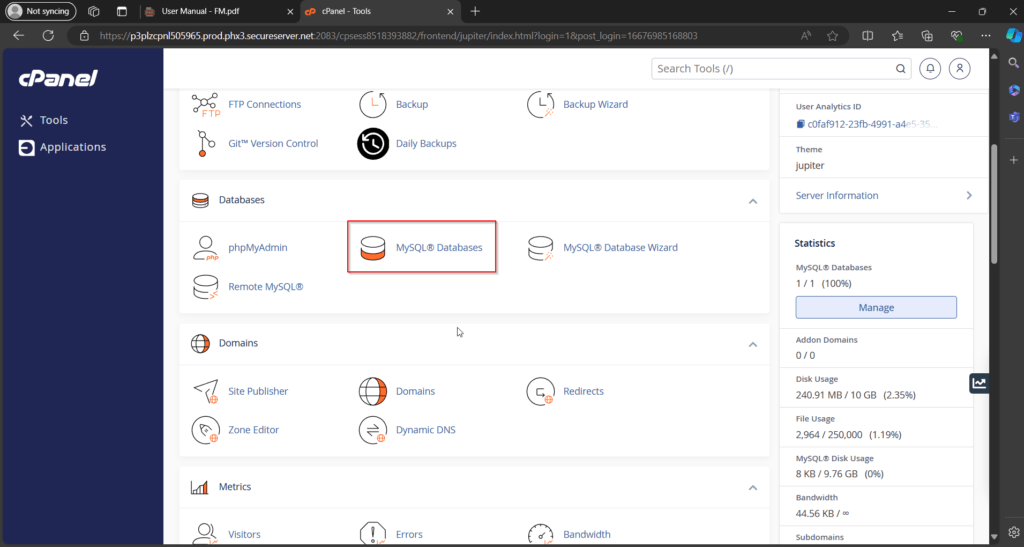
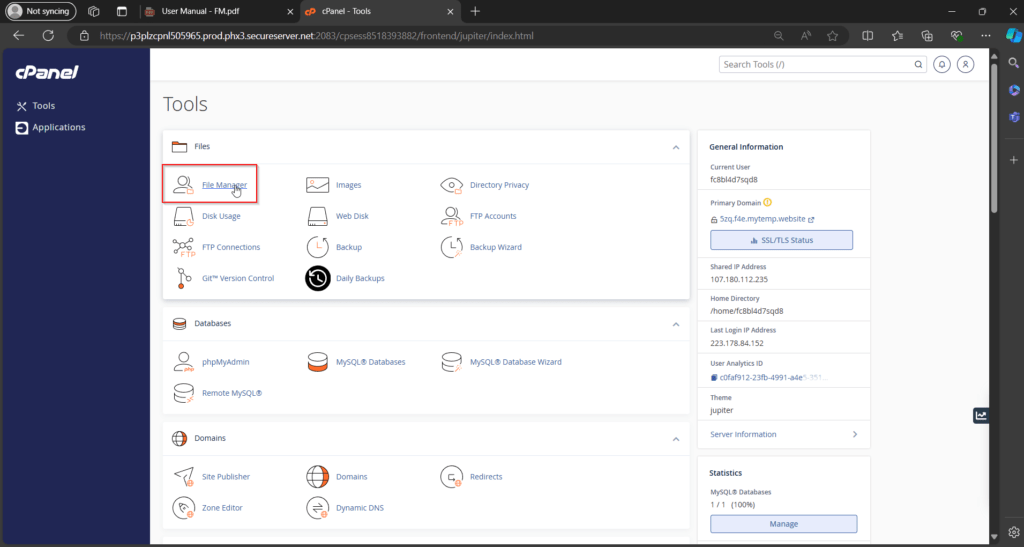
Step 1: Log in to your CPanel account and head over to the Databases and Open the MySQL Databases.
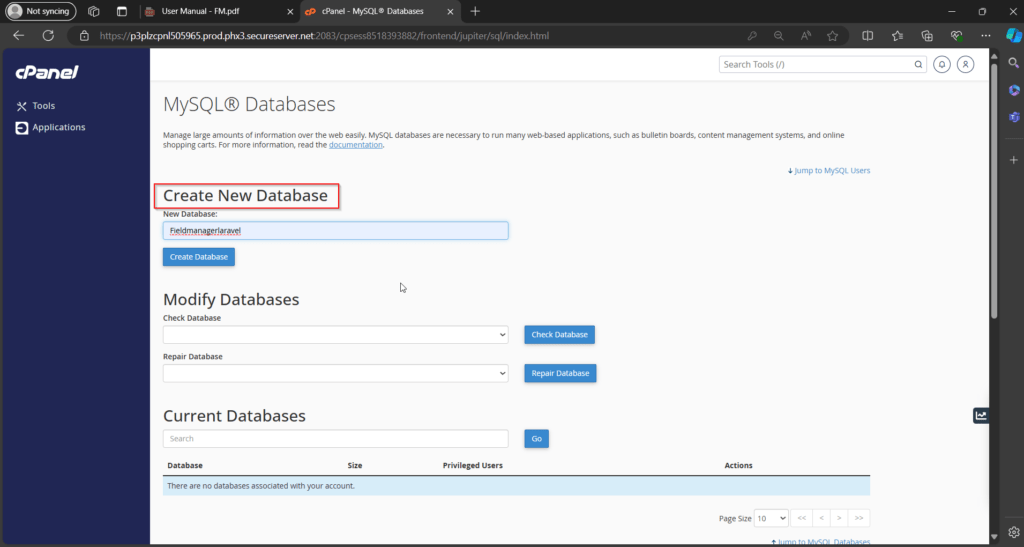
Step 2: Create New Database and user.
File Uploading #
Step 1: Extract the downloaded zip file in your local application.

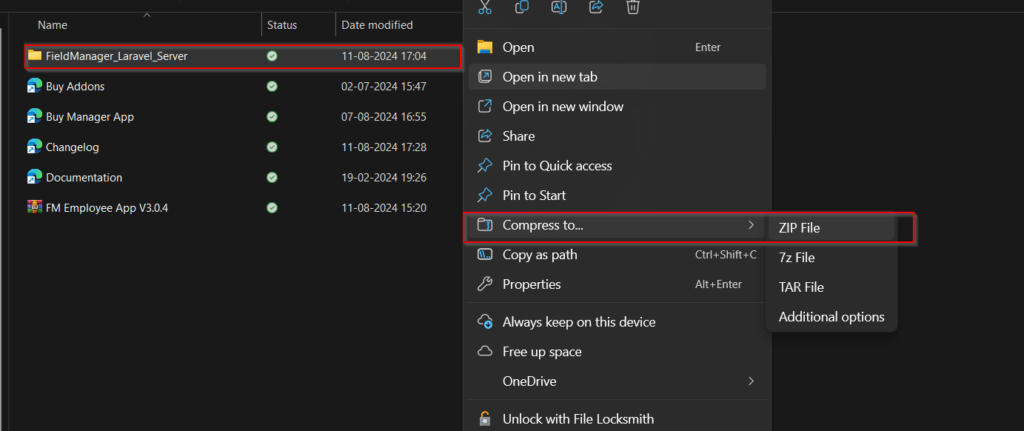
Step 2: Then compress the field manager server file.
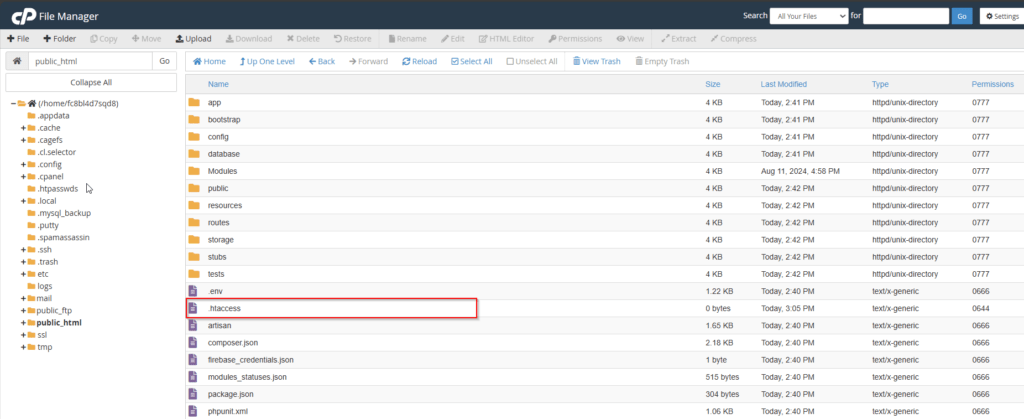
Step 3: Now log in to your cpanel, navigate to the Files section, and click File Manager.
Step 4: Upload the zipped field manager Server in the file manager.
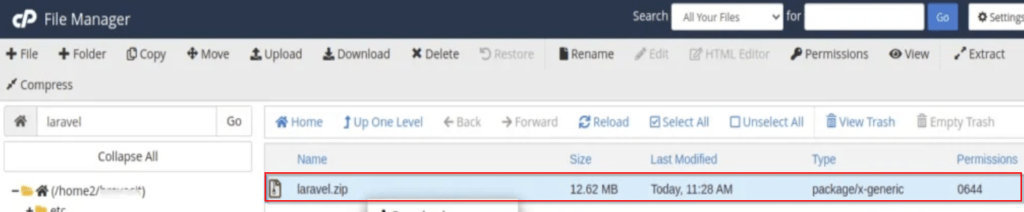
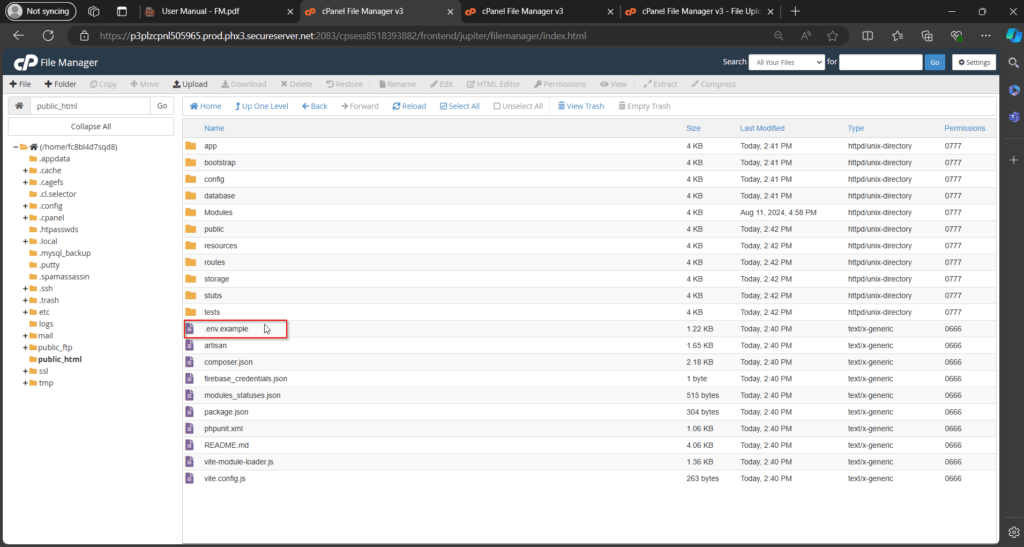
Step 5: Extract them in the same folder you created by right-clicking on the zip file. Then move all files to public_html folder.
Make sure that you moved all server files to public_html folder.

Setup #
Step 1: Change the .env.example file name into .env .
Step 2: Fill the Database details Accordingly.
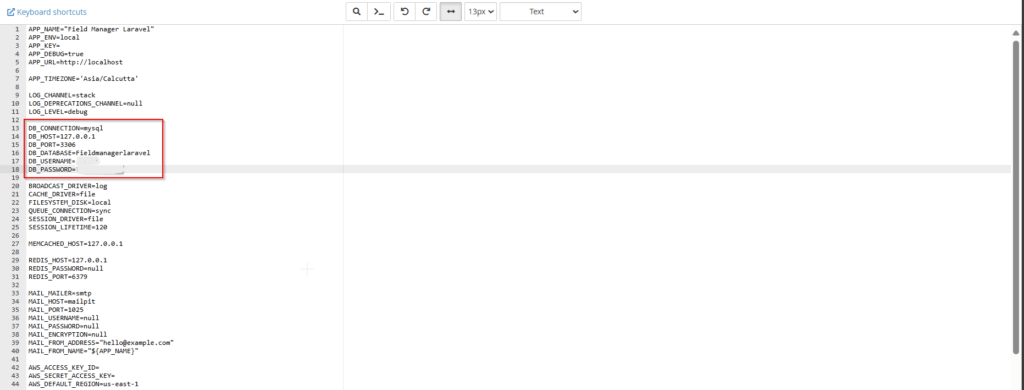
Step 3: Add the app url.
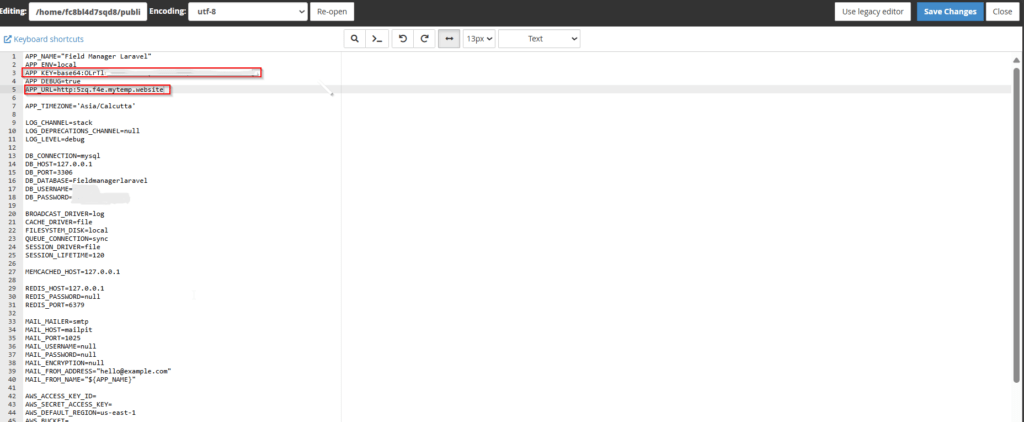
Step 4: Inside the public_html folder, create a new file named .htaccess .
Step 5: Open the .htaccess file and paste the following line of code.
Replace example.com with your domain name
RewriteEngine on
RewriteCond %{HTTP_HOST} ^example.com
RewriteCond %{HTTP_HOST} ^www.example.com
RewriteCond %{REQUEST_URI} !public/
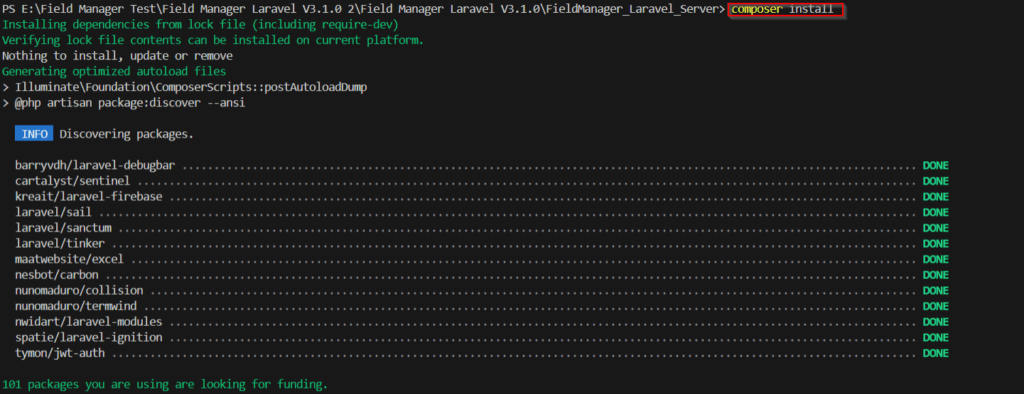
RewriteRule (.*) /public/$1 [L]Step 6: To install Composer, open the terminal in cPanel and run the following command.
composer install
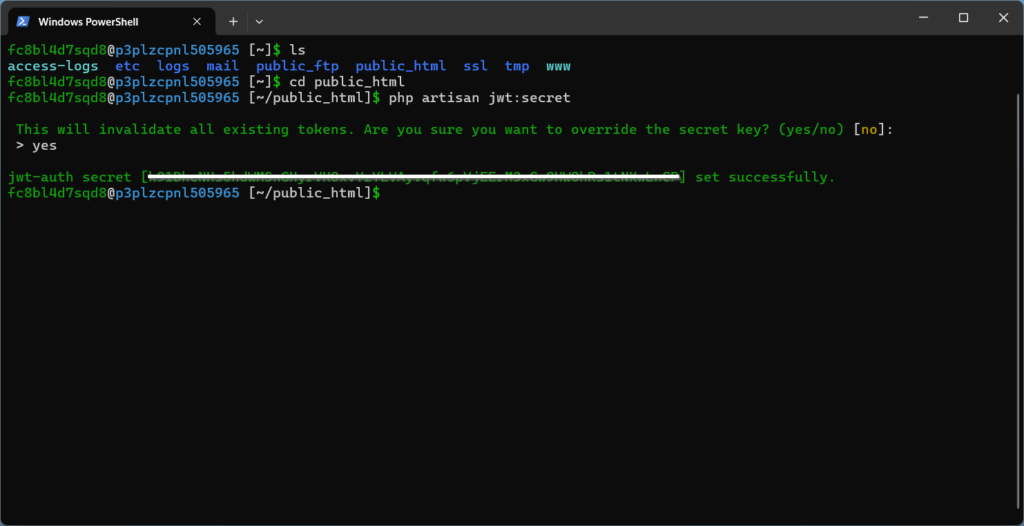
Step 7: Then, enter the following command in the terminal.
php artisan jwt:secret
Step 8: Generate Application Key by entering the following command in the terminal.
php artisan key:generate

Step 9: Add the google map’s api.

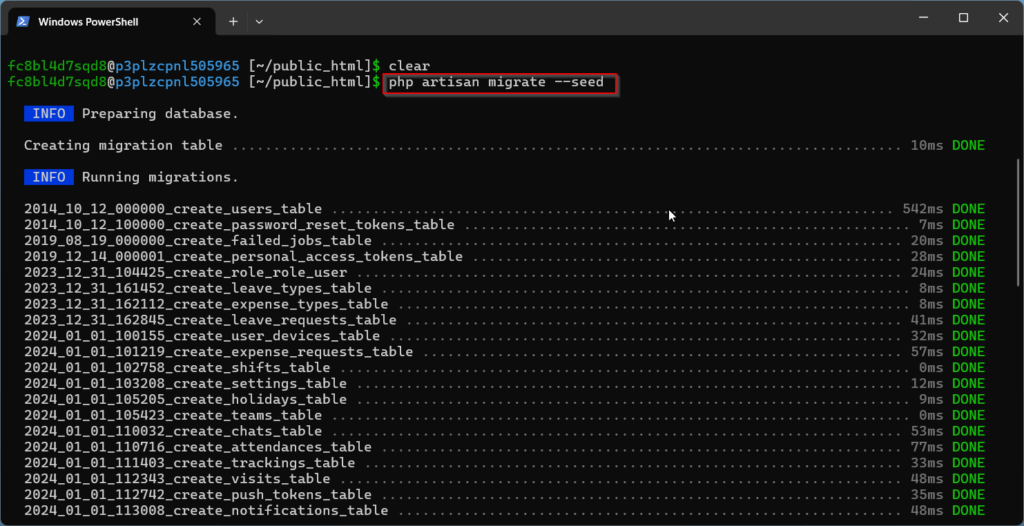
Step 10: Open the terminal /ssh from cPanel and enter the following command to migrate and seed the demo data.
php artisan migrate --seed
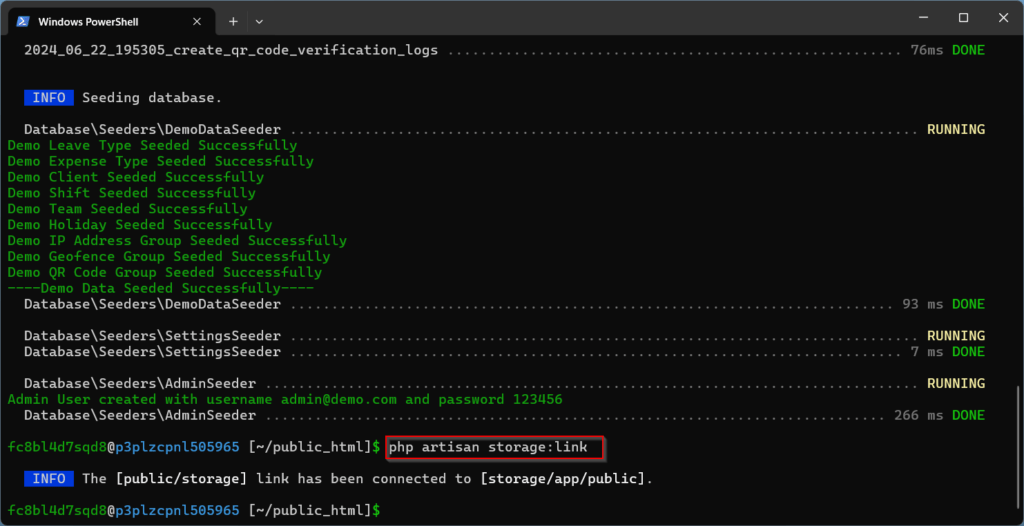
Step 11: Now enter the following command in the terminal to link storage.
php artisan storage:link