
جميع الأدلةالوحدات الإضافية
Announcements
Post announcements to employees and read the announcements sent to you.
The Announcements screen lists the notices you've posted for the organization — either to everyone or to a particular location. Open it from Announcements in the left menu.
Steps
- Open Announcements from the left menu.
- Use the Search announcements... box to find an announcement by title, description, or audience.
- Click a column header to sort. ID, Title, Description, For and Expiry Date are sortable.
- To post a new announcement, click Add New. See Posting an announcement.
- To change one, click the edit (pencil) icon. To remove one, click the trash icon.
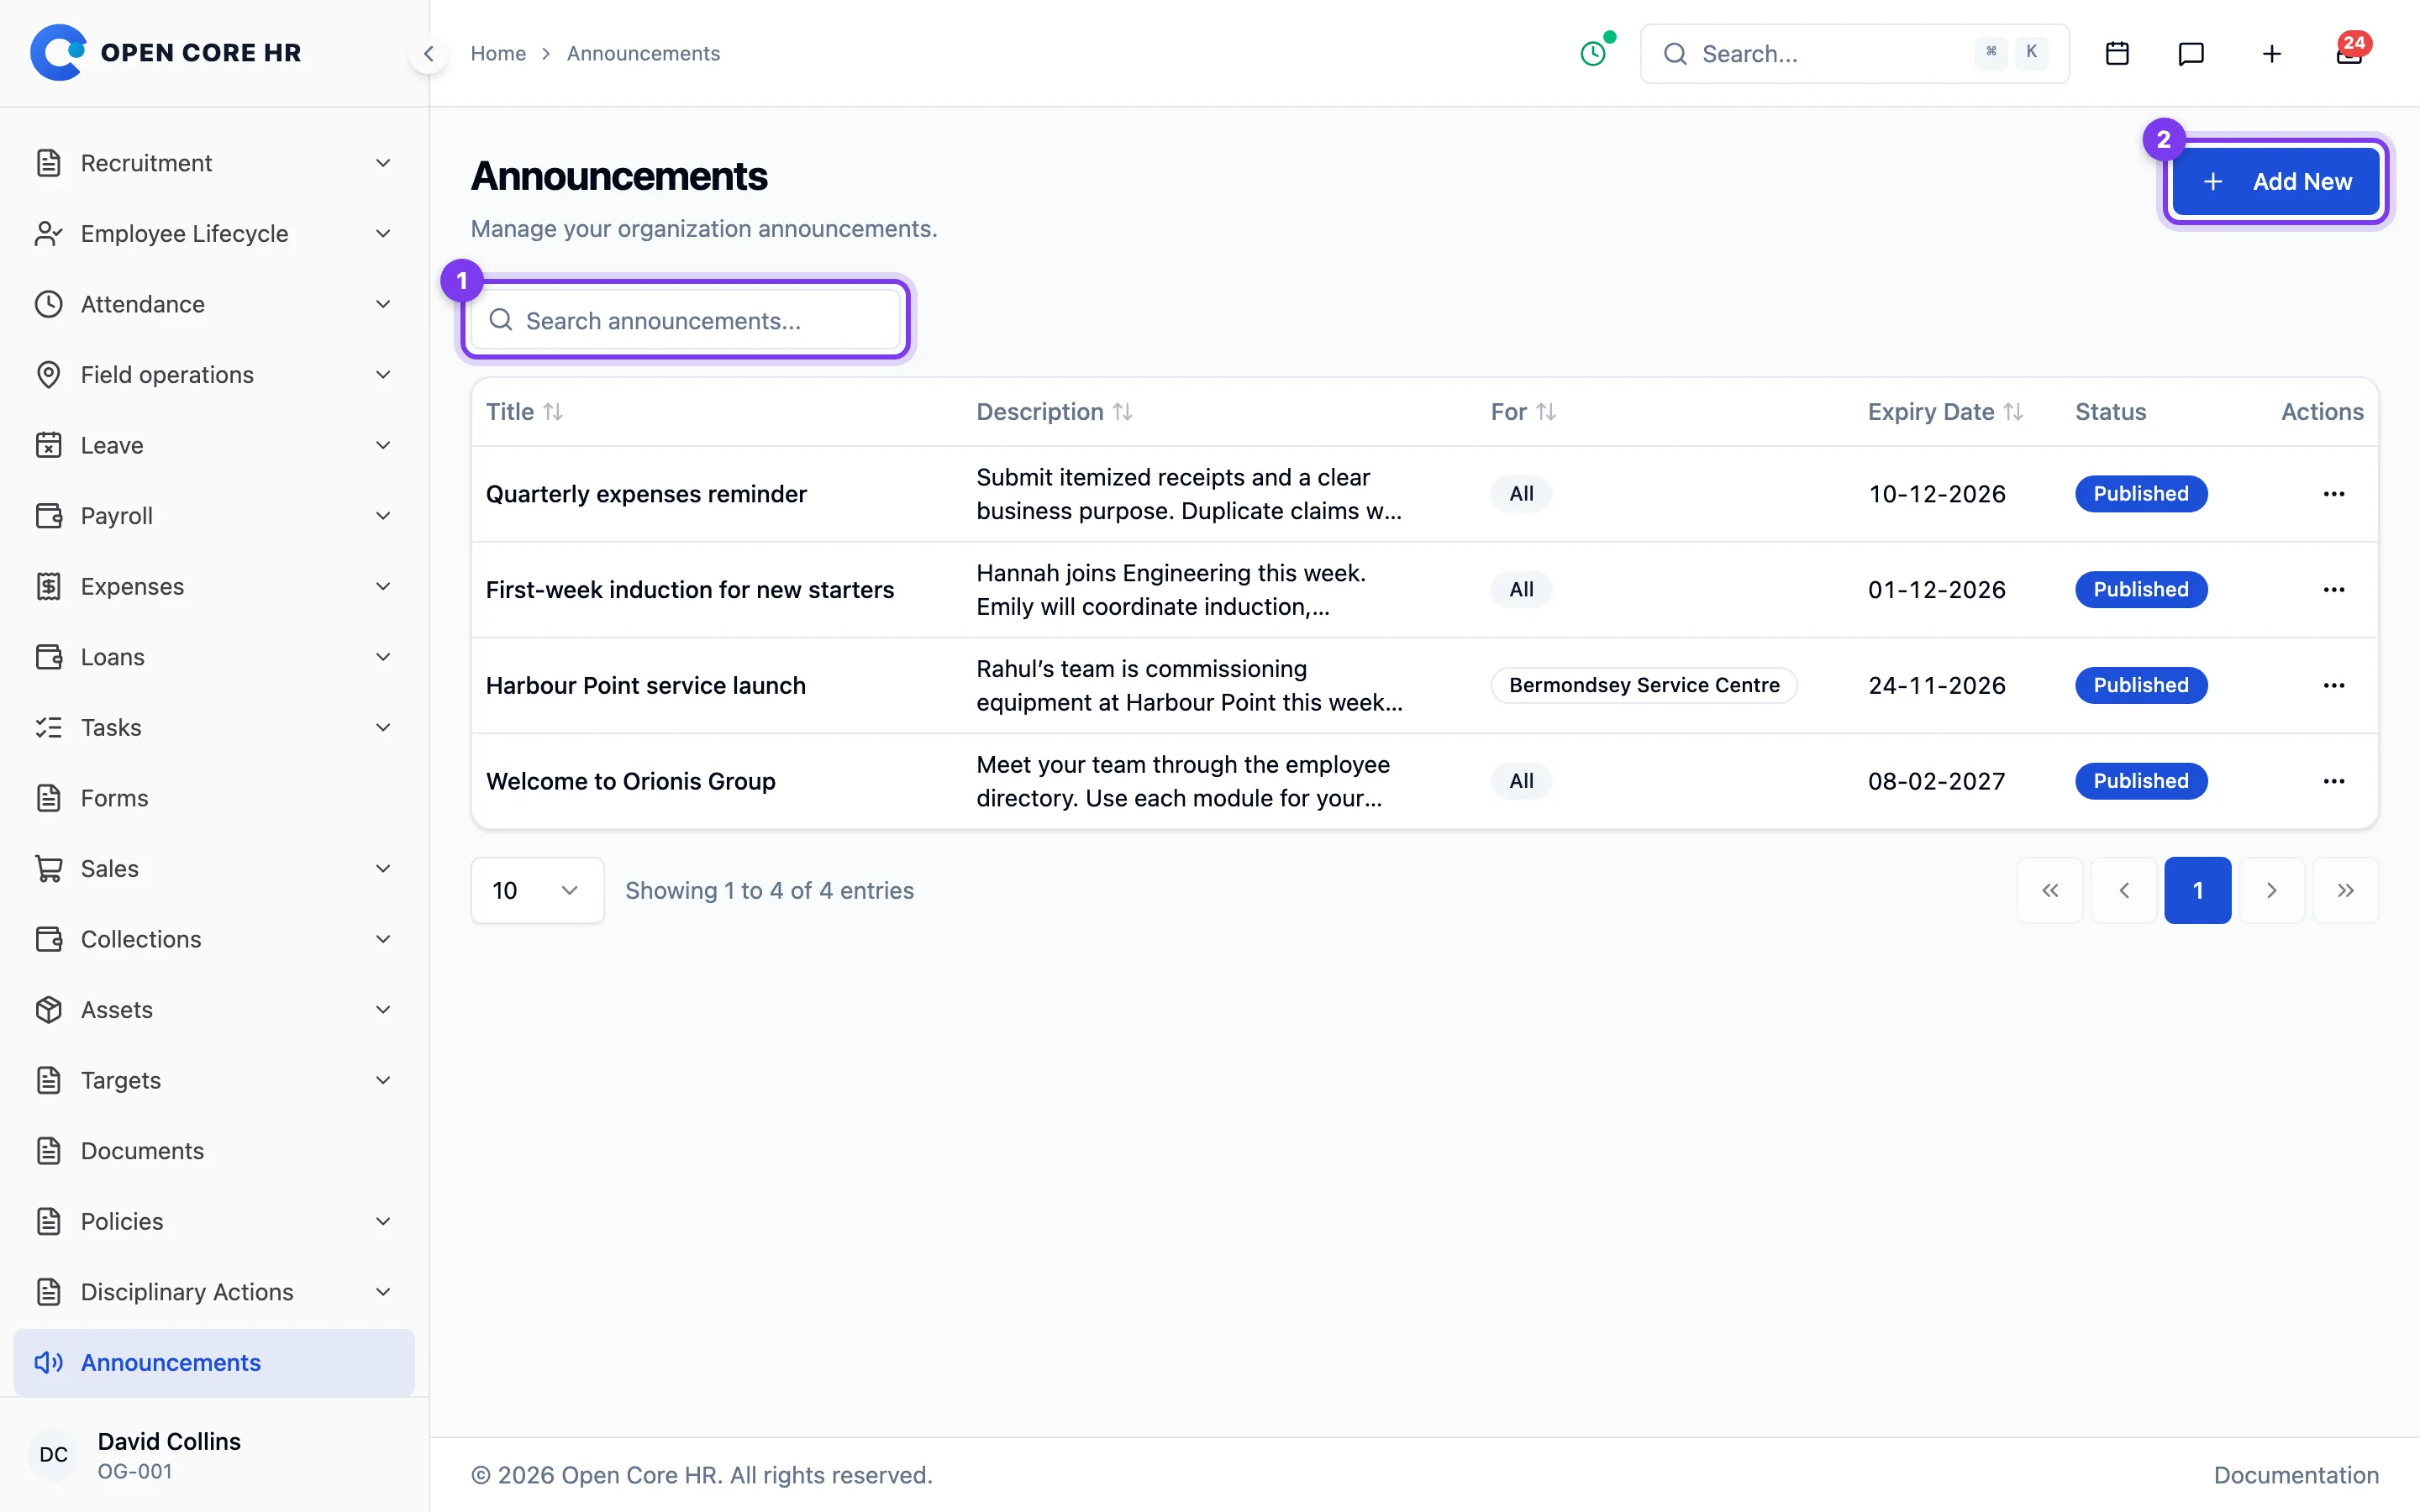
Checking the audience
Check whether an announcement applies to everyone or a specific location. The expiry date determines when it stops showing.
Tips
- Deleting an announcement can't be undone. You'll be asked to confirm first.
Posting an announcement
Post a notice for the whole organization or for a single location, with an optional expiry date.
Steps
- Open Announcements from the left menu and click Add New (the form panel opens).
- Choose Announcement For:
- All — everyone sees it.
- Location — only that location sees it. A Location field appears; pick the location (required).
- Enter the Title (required).
- Enter the Description (required) — this is the message body.
- Optionally pick an Expiry Date of today or later. After this date the announcement no longer shows.
- Click Create. Use the panel close control to discard.
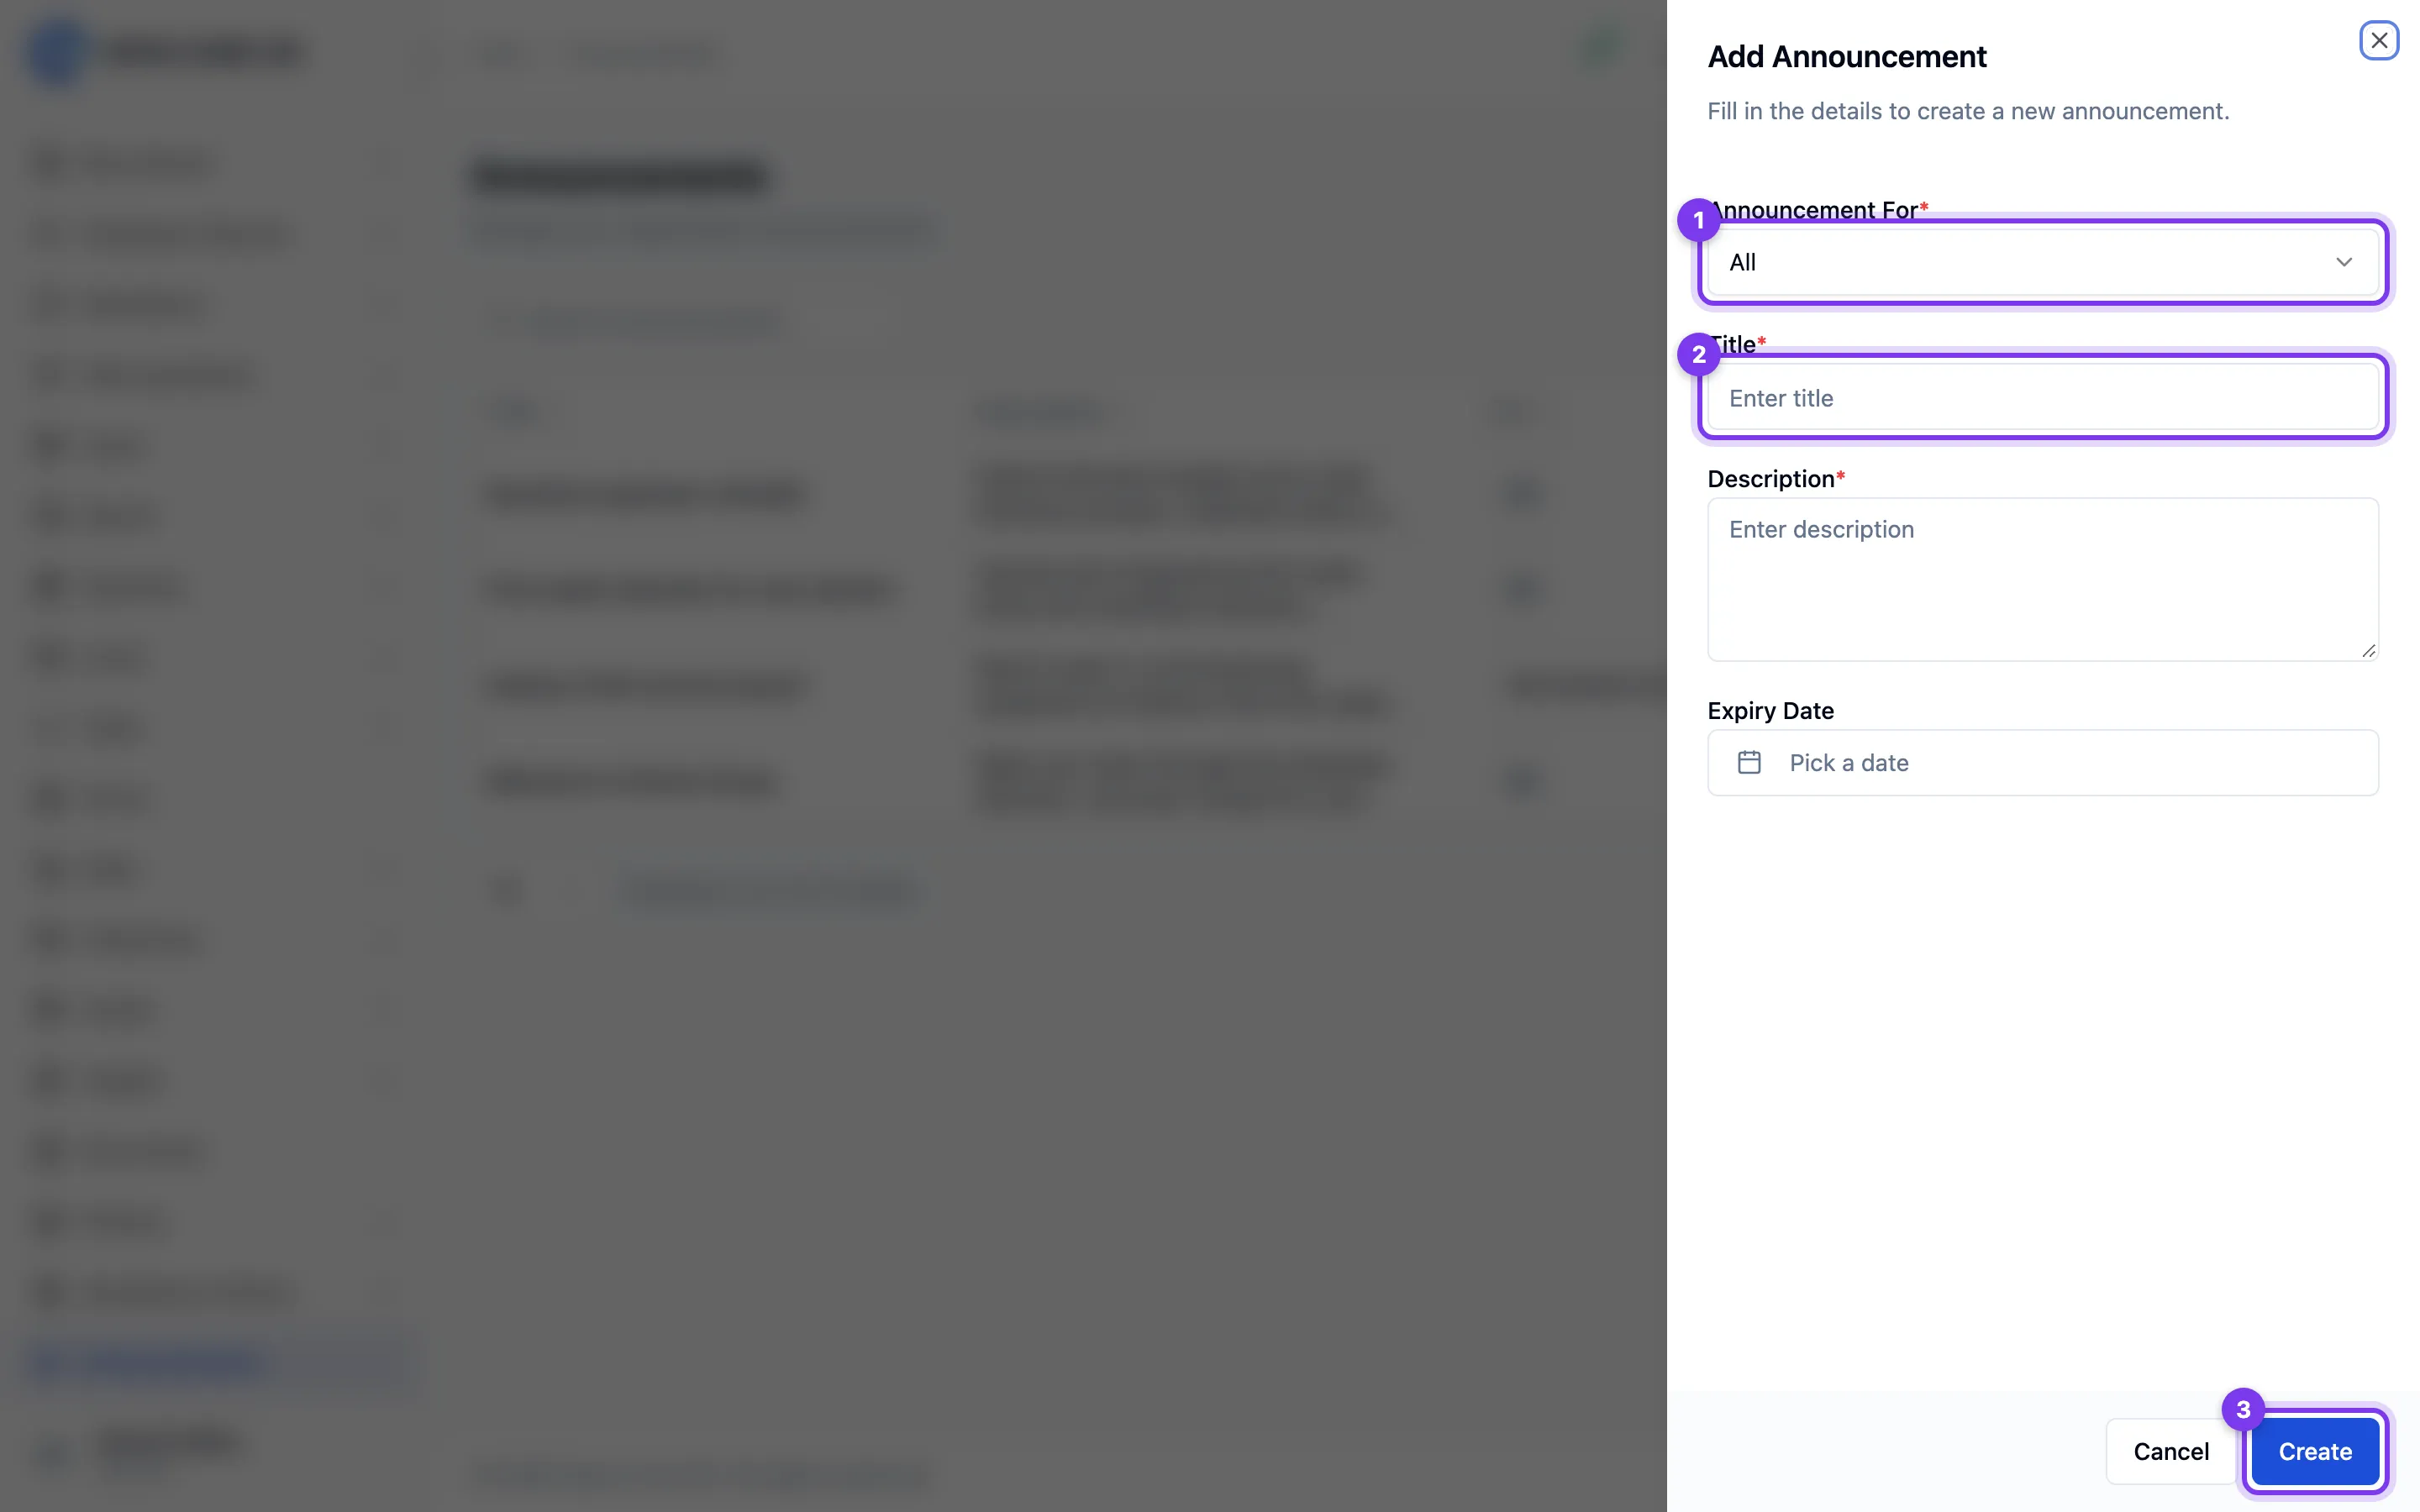
Who gets told
Publishing sends a notification to everyone in the audience you picked — it appears under the bell icon, is pushed to the mobile app, and is emailed if your deployment has email configured. Inactive employees and the system bot account are skipped.
Only Create notifies. Editing an announcement afterwards, or switching it between Active and Inactive, changes what people see on the noticeboard but does not notify anyone again.
Editing an announcement
- On the Announcements list, click the edit (pencil) icon.
- Change the audience, location, title, description, or expiry date.
- Click Update.
Changing whether it's active
New announcements are Active. An announcement can also be Inactive so it stops showing without being deleted. Making one Active again does not re-notify.
Note: The create and edit form has no status control. An announcement's active or inactive state is changed from the Status column on the Announcements list.
Tips
- Only the location you pick will see a location-targeted announcement; switching back to All clears the location.
- To remove an announcement entirely, use the trash icon on the Announcements list. See Announcements.
Reading announcements as an employee
The announcements page shows company notices for everyone and for your location. Open Announcements in the module menu.
- Announcements — Open Announcements from the menu.
Reading a notice
Use Read more to open the full announcement and Download to save an attachment. See Reading an announcement.
Tips
- The newest announcements appear first.
- You only see announcements meant for everyone or for your location.
Reading an announcement
Most announcements show their full text right on the Announcements card. For longer ones, you can open the complete announcement in a pop-up window.
Steps
- Open Announcements in the module menu.
- On an announcement that has a Read more link, click Read more.
- The full announcement opens in a window showing:
- The title.
- Posted on — the date and time it was published.
- Expires — the end date, if the announcement has one.
- The complete text.
- Click Close when you're done.


Tips
- Shorter announcements don't have a Read more link — their full text is already on the card.