
All guidesAdministration
Approvals
Work through the approval inbox, approve, reject or reassign requests and configure approval workflows.
The approval inbox is your queue for requests waiting on your decision, including leave, expenses, loans and other enabled request types. It shows only current approval steps that you are eligible to act on.
Review pending requests
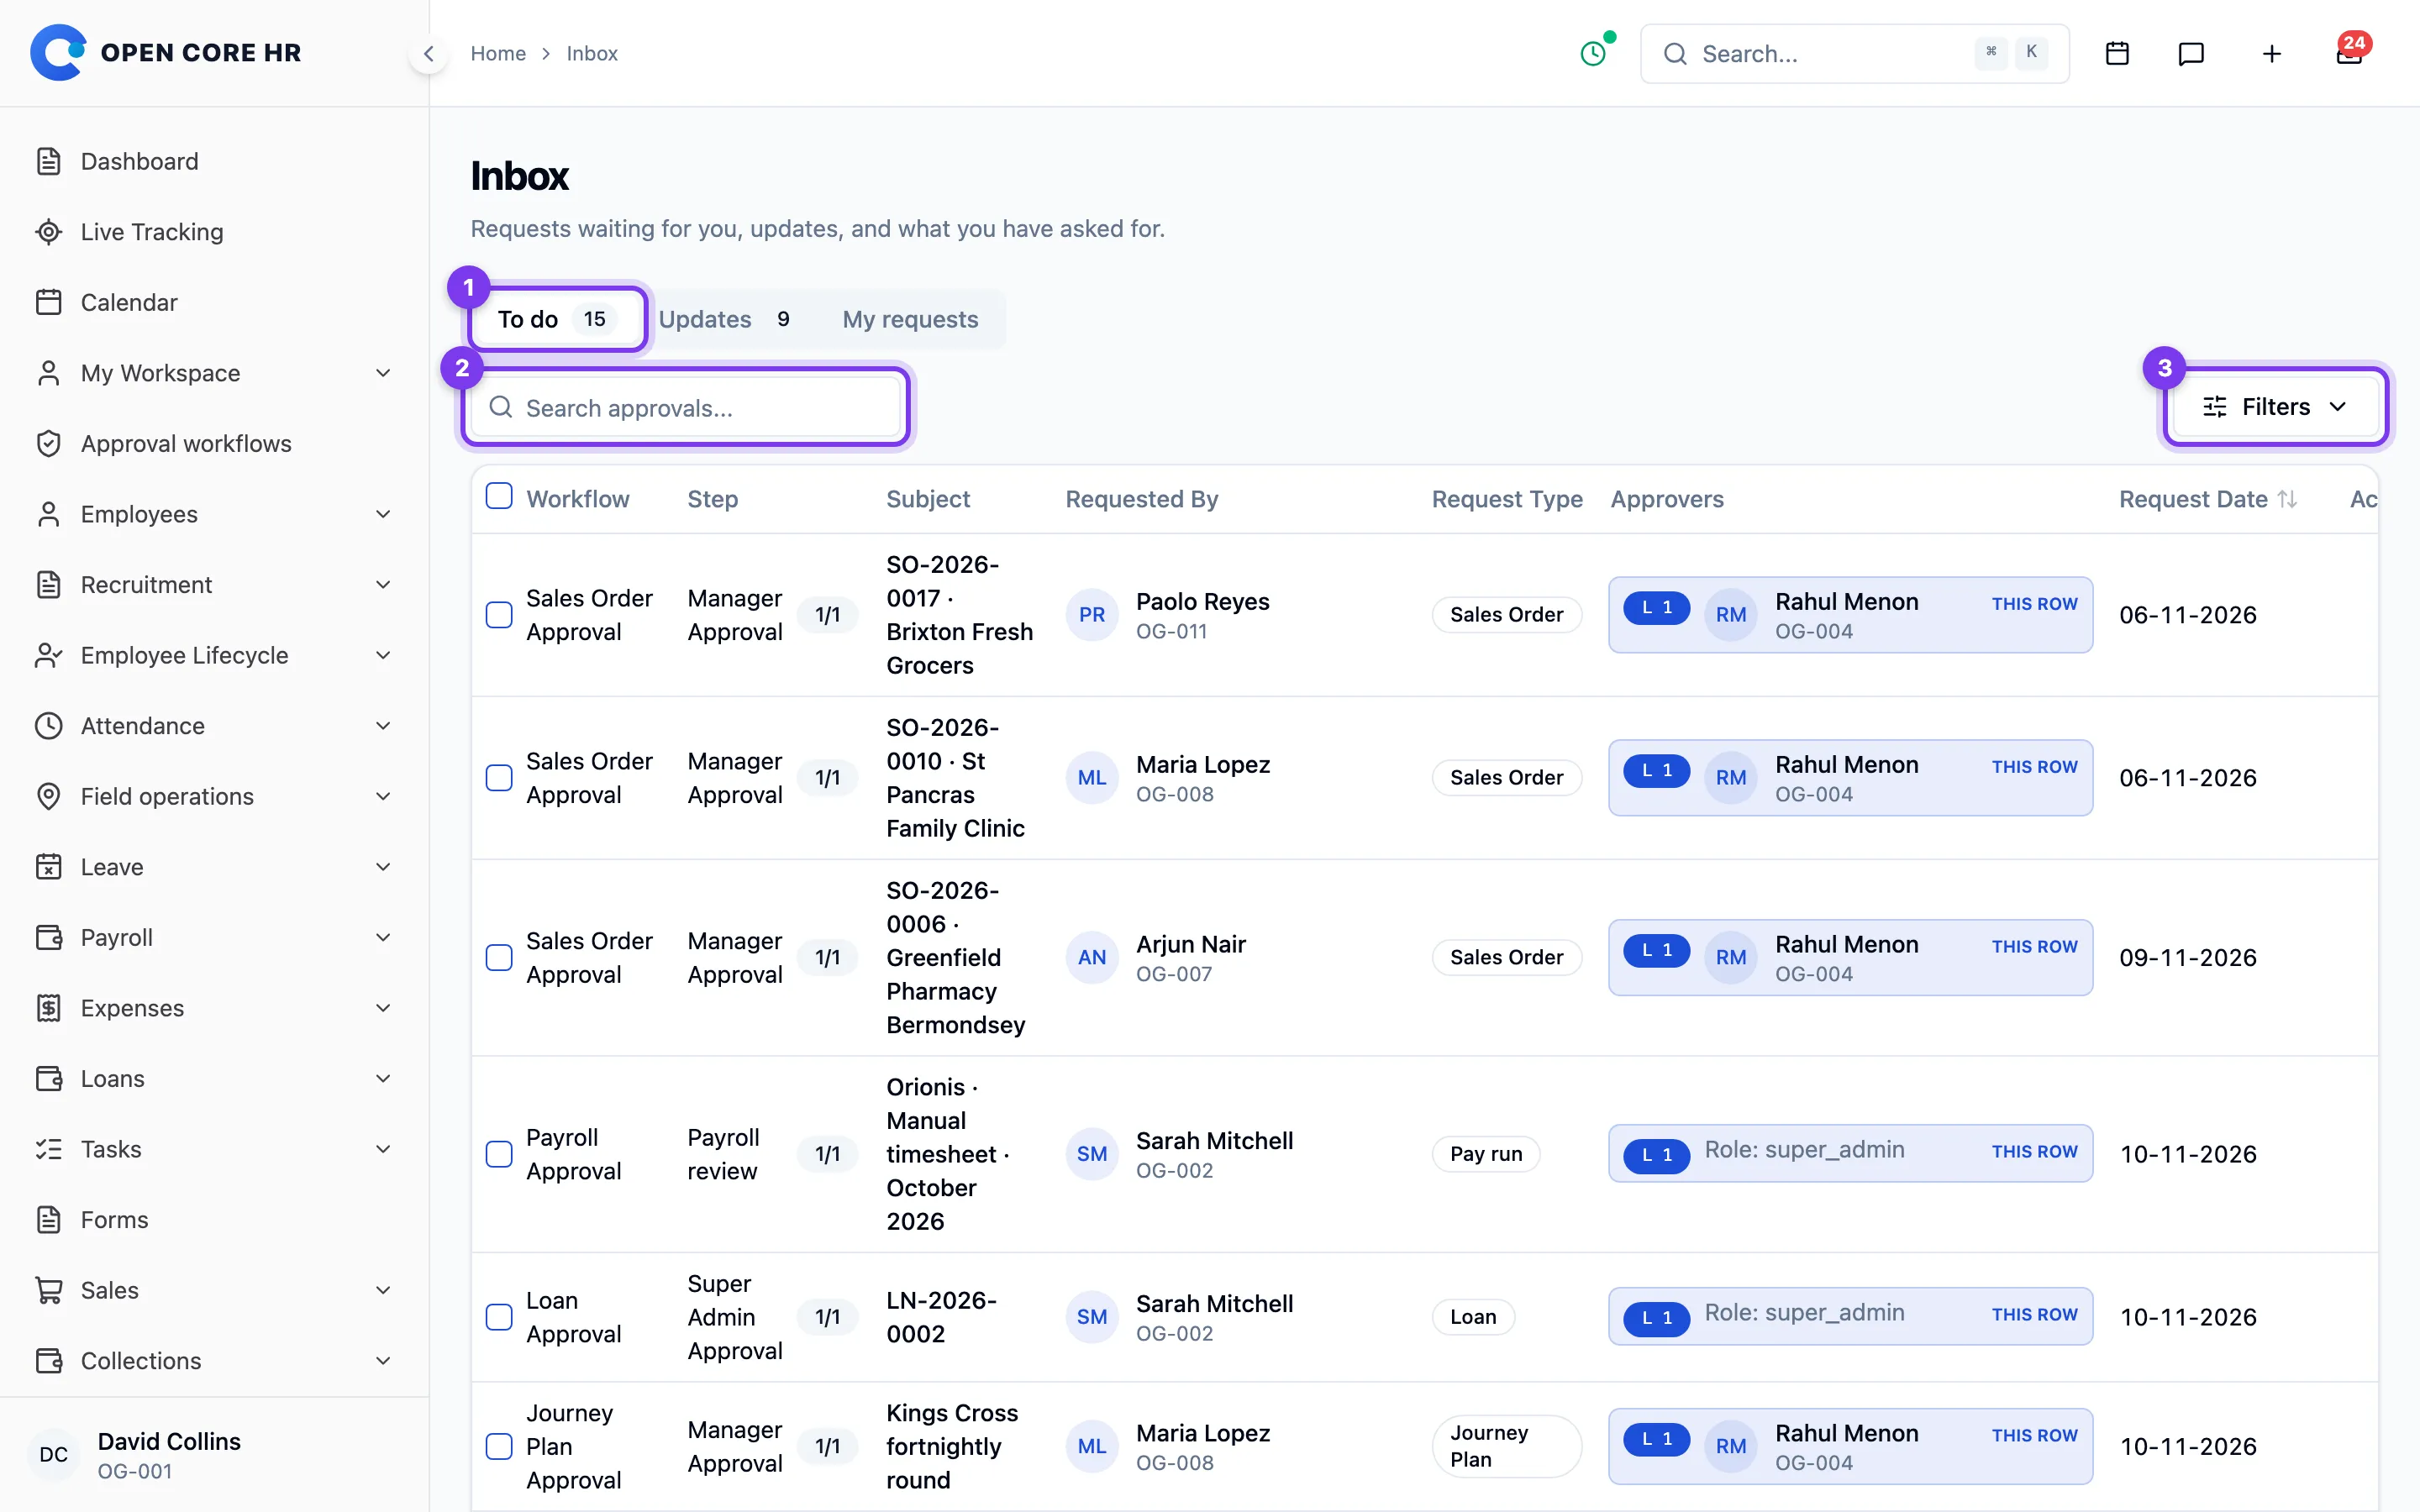
- Open the Inbox from the top bar and choose To do.
- Search by requester name or code, workflow name, or step name. Use Filters to narrow by request type, workflow, requester or request date.
- Check the requester, subject and current approval level. Choose View from the request's actions menu to review its details, where available.
- Approve or reject from the actions menu, or select several rows for a shared decision. See Approving and rejecting requests.
Who can act
A step assigned to a specific person is available to that person. Holding the same role does not grant access to someone else's assigned step. An unassigned role-based step can be handled by an eligible member of that role. Super administrators retain their existing administrative access, subject to the request's business rules.
If the system cannot resolve an approver, an administrator may need to reassign the step. See Reassigning an approval.
Later approval levels
A request appears only when it reaches your level. Approving your step may pass it to another reviewer. If you are also the next approver, it appears again after the inbox refreshes and requires a separate decision.
Approving and rejecting requests
Approving a step moves the request to its next approval level, or completes it if this is the final level. Rejecting ends the workflow and skips any remaining approval steps. The requester is informed of the outcome.
Act on one request
- Open Inbox → To do.
- Open the request's actions menu and choose View to review its details, where available.
- Choose Approve and optionally enter Remarks, or choose Reject and enter the required reason in Notes. For request types that support it, such as expense claims, you can instead choose Return for correction and describe what needs to change.
- Confirm your decision. Remarks and reasons can contain up to 1,000 characters.
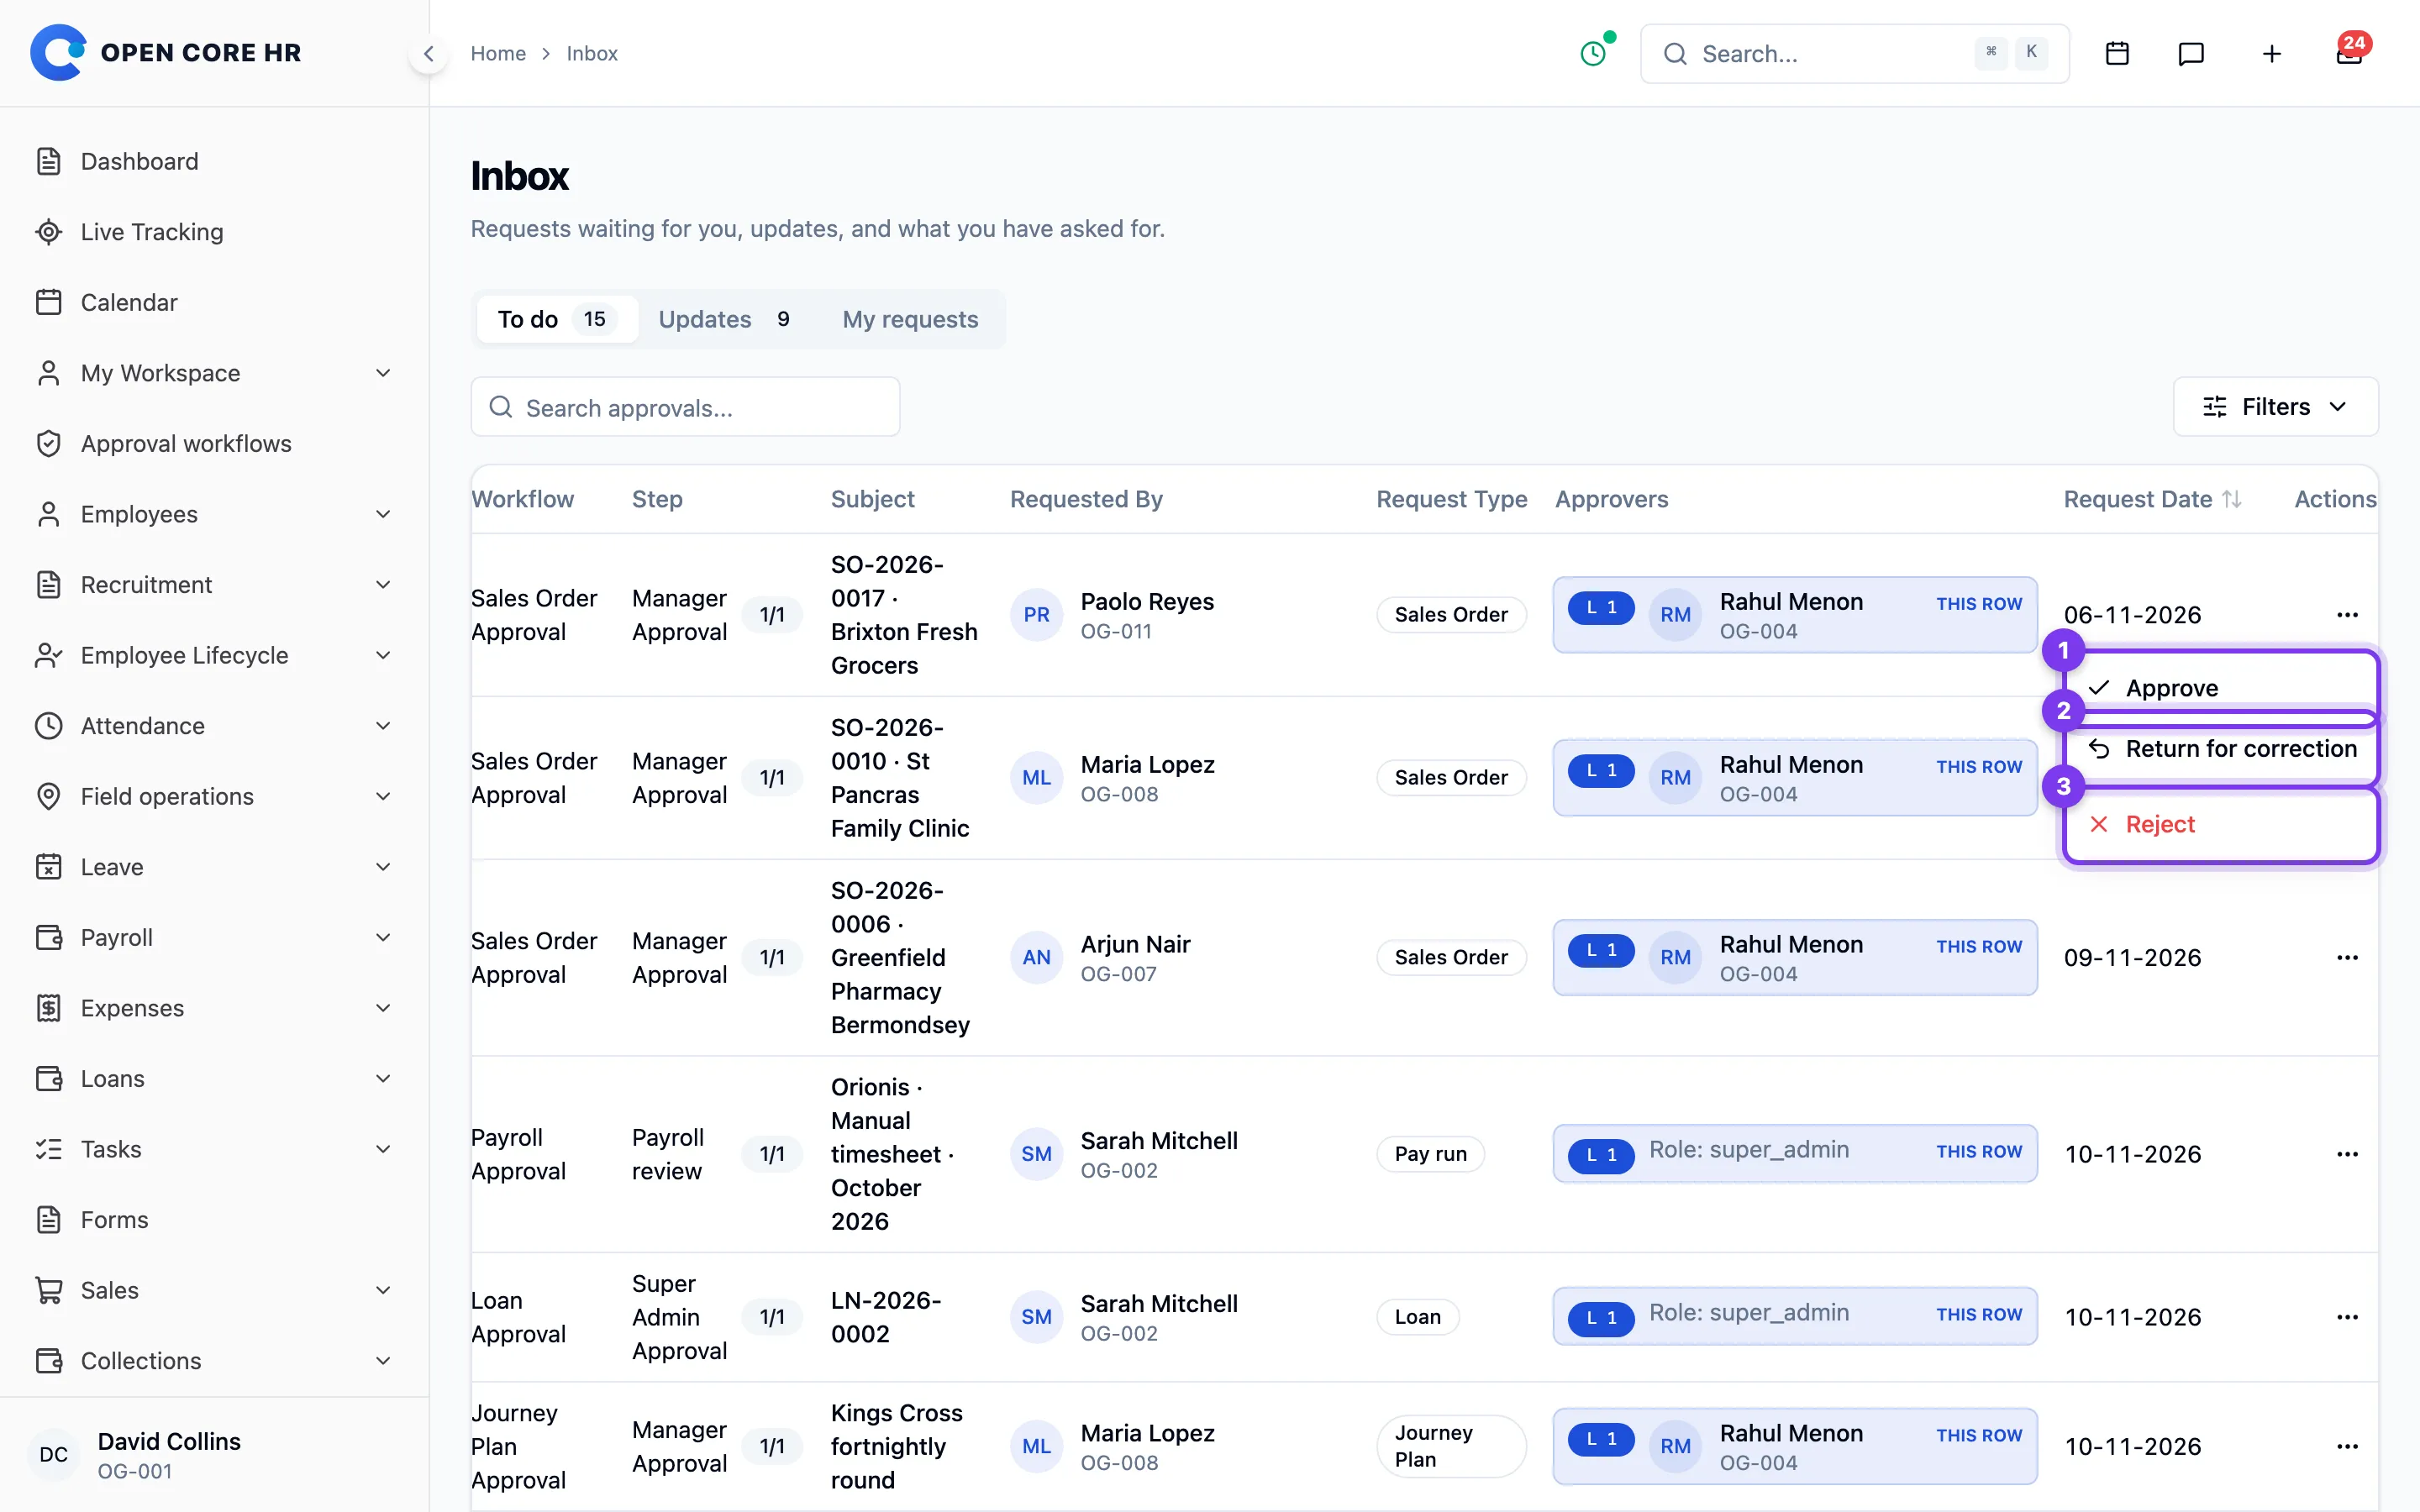
Returning a request ends the current review without rejecting it. The requester corrects and resubmits it, and the resubmission starts again at the first approval level. Returning is available one request at a time.
After a single approval, the confirmation message names the next step when another review is needed. If you are also the next approver, the request can reappear in your inbox.
Act on several requests
- Review the requests you intend to approve or reject.
- Select their checkboxes. The checkbox in the table heading selects only the current page, with a maximum of 100 requests per batch.
- Choose Approve selected or Reject selected.
- Check the selected count. Optional approval remarks or the required rejection reason will be saved against every selected step.
- Confirm the decision. A successful batch clears the selection and refreshes the inbox.
Changing the page, search, filters or sorting clears the selection. Each batch acts only on the currently selected steps; it does not approve later levels automatically.
All selected requests must still be available for your decision. If a request has changed, you lack authorization, or a request cannot complete its action, the entire batch is refused and none of its decisions are saved.
Recover from an error
- A rejection needs a reason. Enter text in Notes before confirming.
- A request has already changed or been completed. Cancel the confirmation, reload the inbox, review the remaining requests and select them again.
- An action fails. The confirmation retains your notes and selection so you can correct the issue or retry. Check the reported reason before submitting again.
Reassigning an approval
Sometimes an approval needs to move to a different person — for example, when the configured approver role has nobody assigned to it and the request is stuck.
What you can do today
The Inbox → To do tab does not have a button to hand an approval to a specific person. What it does instead, for HR admins and admins, is surface the stuck requests so they can be acted on:
- Open Inbox → To do from the left menu.
- If a request's approval level couldn't be matched to anyone (for example, the workflow points to a role that no one currently holds), it still appears in the inbox for HR admins and admins.
- From there you can approve or reject it directly — see Approving and rejecting a request — so the request doesn't stall.
To change who normally approves a given type of request, edit the relevant flow on the Approval workflows page — see Approval workflows.
Note: The Inbox To do tab offers view, approve and reject. There is no per-row reassign control on this screen, even though a "reassign approvals" permission exists.
Approval workflows
A workflow decides who reviews a particular kind of request and in what order. There's one workflow per request type — leave, expenses, loans, warnings, promotions, separations, and so on — and each workflow is a list of approval levels. On this page you adjust the levels of an existing workflow.
Opening the page
Open Approval workflows from the left menu.
Expand a workflow to review its approval levels and approvers before editing.
Editing a workflow's steps
You need the workflow management permission for this. If you don't, the edit button isn't shown.
- On the Approval Workflows page, find the workflow you want to change.
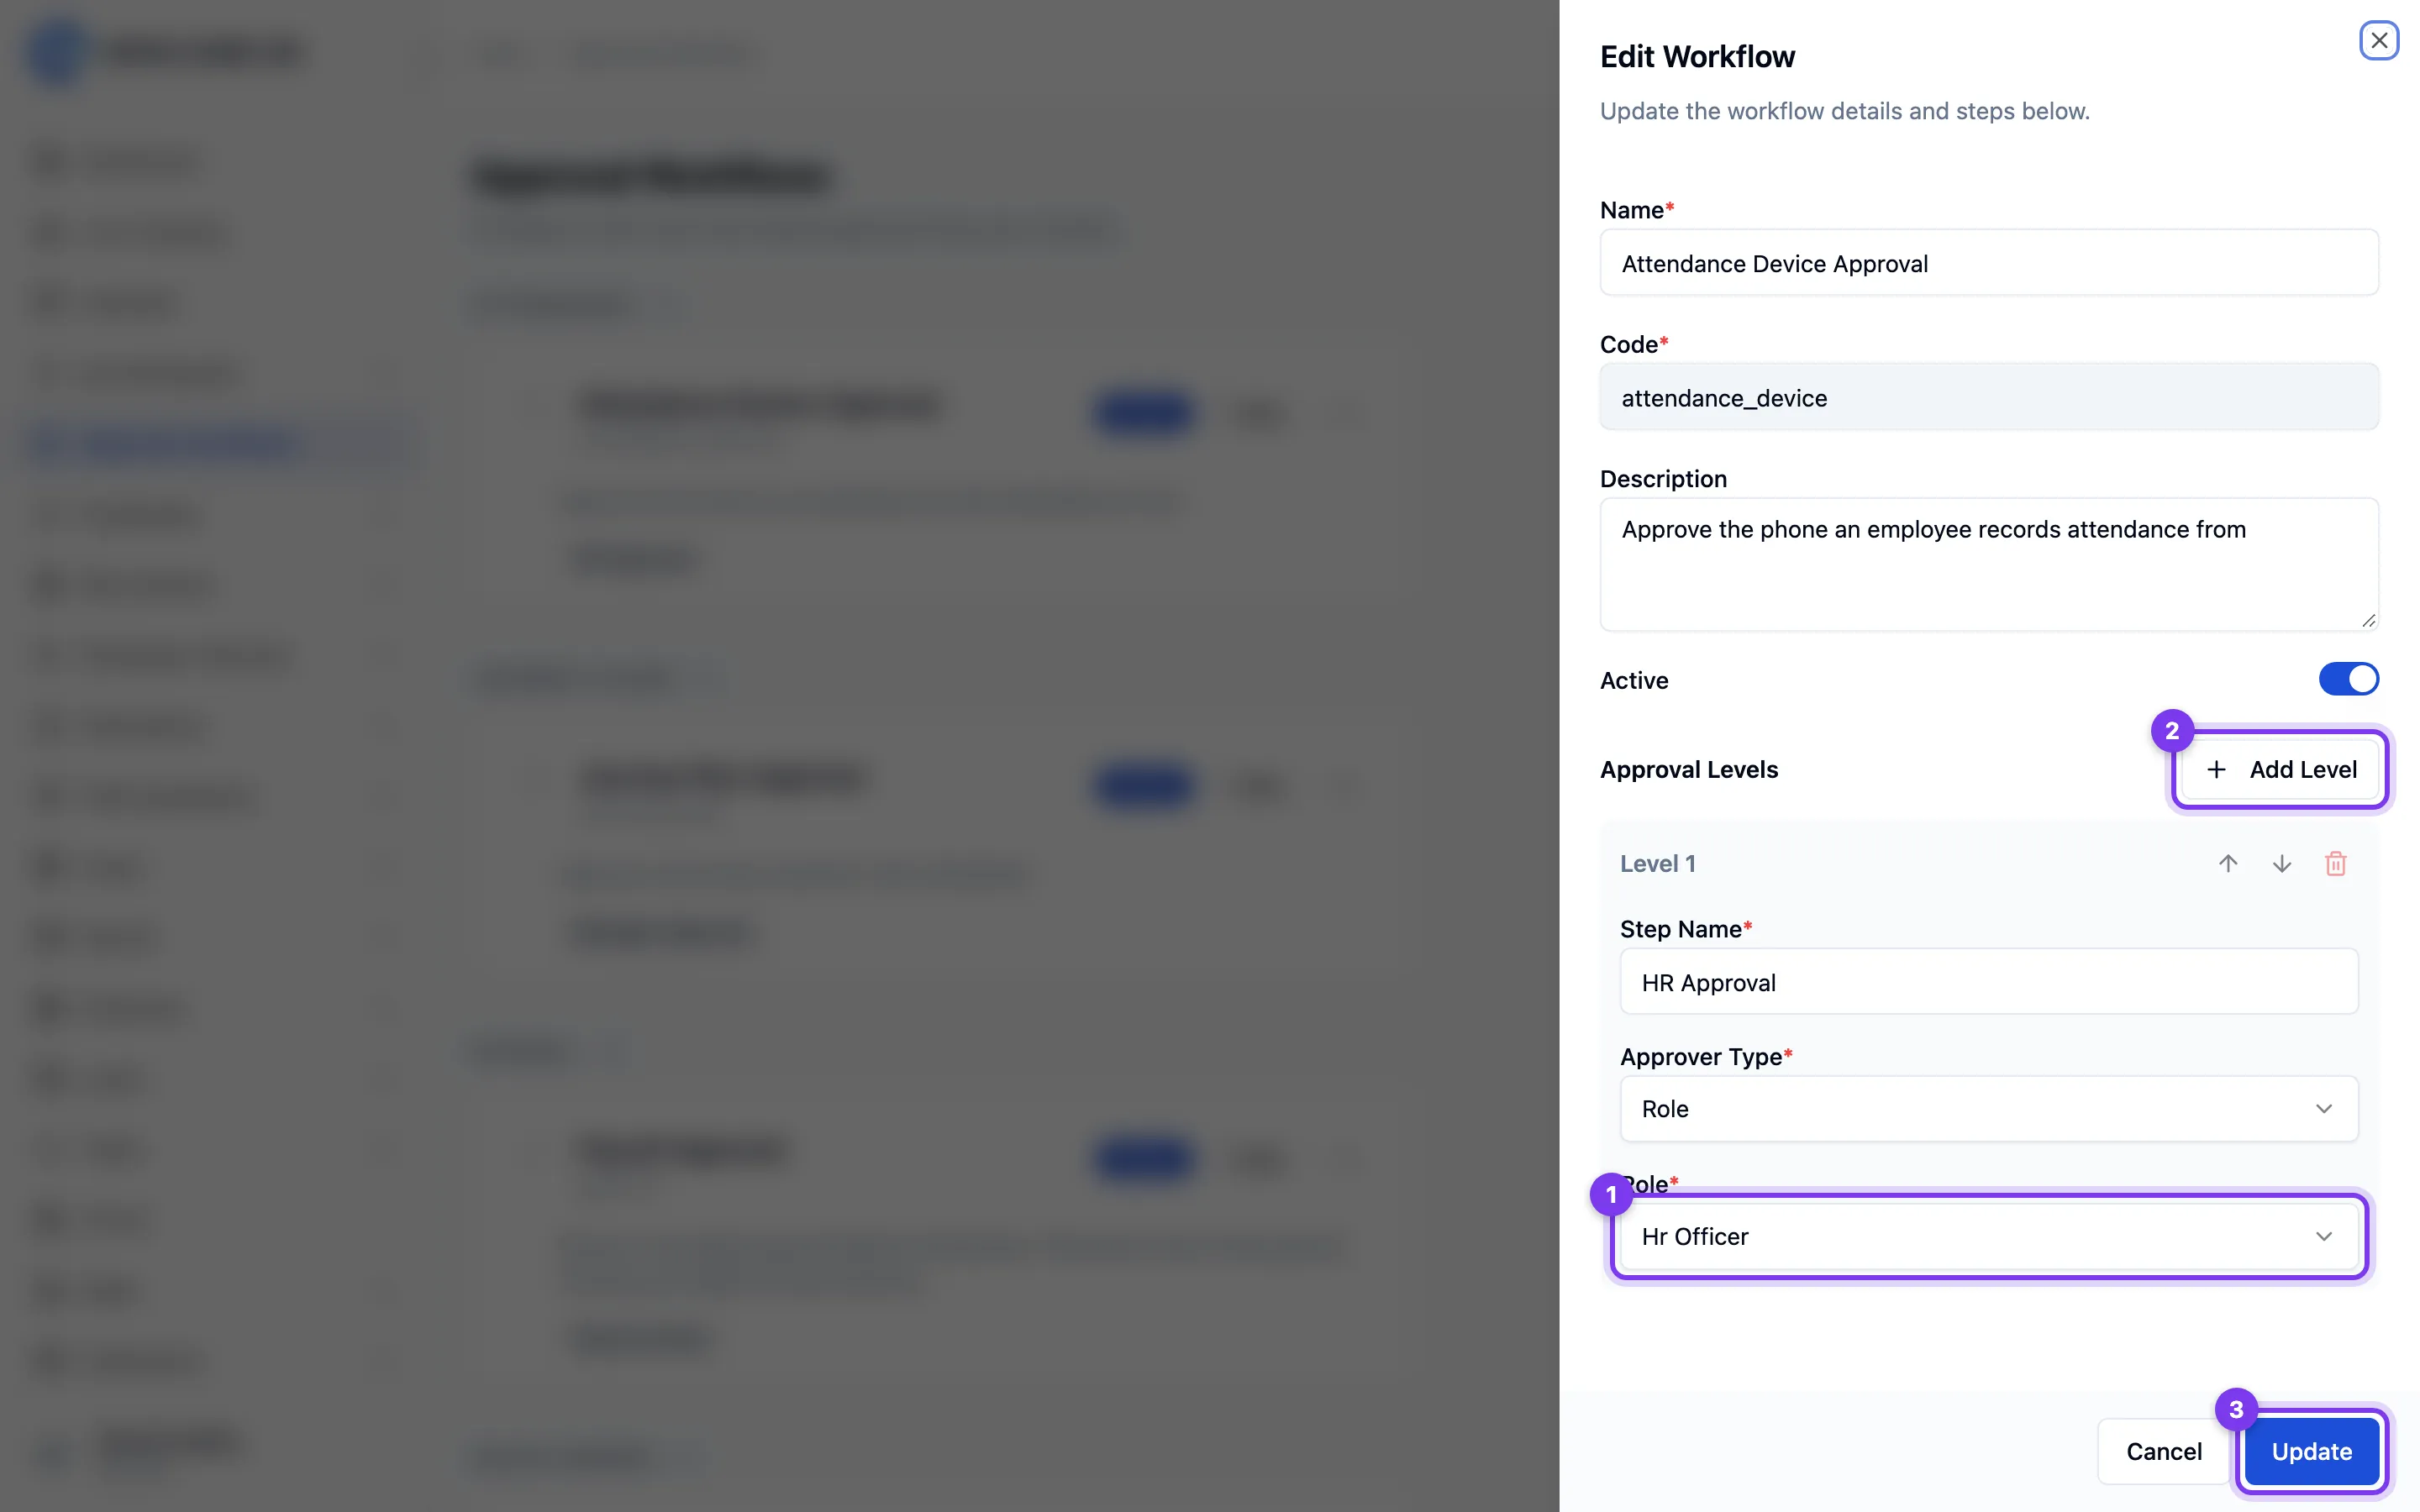
- Click the pencil (edit) button on its card. The Edit Workflow panel slides in from the right.
- Update the details as needed:
- Name — the display name of the workflow.
- Code — fixed once the workflow exists; it can't be changed here.
- Description — optional explanatory text.
- Active — turn the workflow on or off. While it's off, requests of that type can't be submitted through it.
- Adjust the Approval Levels:
- Each level has a Step Name (for example, "HR Manager Approval") and an Approver Type. The approver type currently offered is Role, with a Role picker to choose which role approves at that level.
- Use the up and down arrows on a level to reorder it.
- Use Add Level to add another level, or the delete (trash) button to remove one. A workflow must keep at least one level.
- Click Update to save.
After you finish
- Requests submitted from now on follow the updated levels. In-progress requests continue on the flow they started.
Tips
- There's no "Add Workflow" button — the set of workflows matches the request types Open Core HR supports, so you edit the steps of the existing ones rather than creating new flows.
- A workflow that's set to Inactive blocks new submissions of that request type. If issuing a warning or submitting a request is being refused, check that the matching workflow is active. This includes leave and compensatory off requests: employees can't apply for either while its workflow is inactive.
- New installations start the Leave and Compensatory Off workflows with HR Officer as the approver. Installations set up earlier keep their original approver, which this screen shows with an empty Approver Type. Choose a role and click Update to set it.
Note: The workflow editor offers Role as the approver type. Other approver types exist in the system but are not selectable on this screen.