
All guidesSelf-service
Leave
Apply for leave, follow your requests, cancel them and check your leave balance.
Applying for leave
Use the Apply for Leave form to request time off. Open it from My Workspace > Apply Leave, or from the Apply Leave button on the My Leaves or Leave Balance screens.
Steps
- Go to My Workspace > Apply Leave.
- Pick a Leave Type. Each type shows how much you have available next to its name.
- Choose the From Date and To Date.
- The form shows how many working days that range works out to (it skips weekends and holidays). If you have less balance than the days requested, it shows a Breakdown with how many are Paid and how many would be LOP (loss of pay).
- If you only need part of a day, turn on Half Day Leave and choose First Half or Second Half. A half day must be for a single date.
- Enter the Reason for your leave.
- If the leave type needs proof, a Supporting Document field appears. Attach a PDF, JPG, or PNG (up to 5 MB).
- If you'll be Travelling Abroad, turn that on and enter the location.
- Optionally fill in an Emergency Contact name and Emergency Phone number.
- Click Submit Leave Request. You'll be taken back to the My Leaves list, where the request appears with a Pending status.
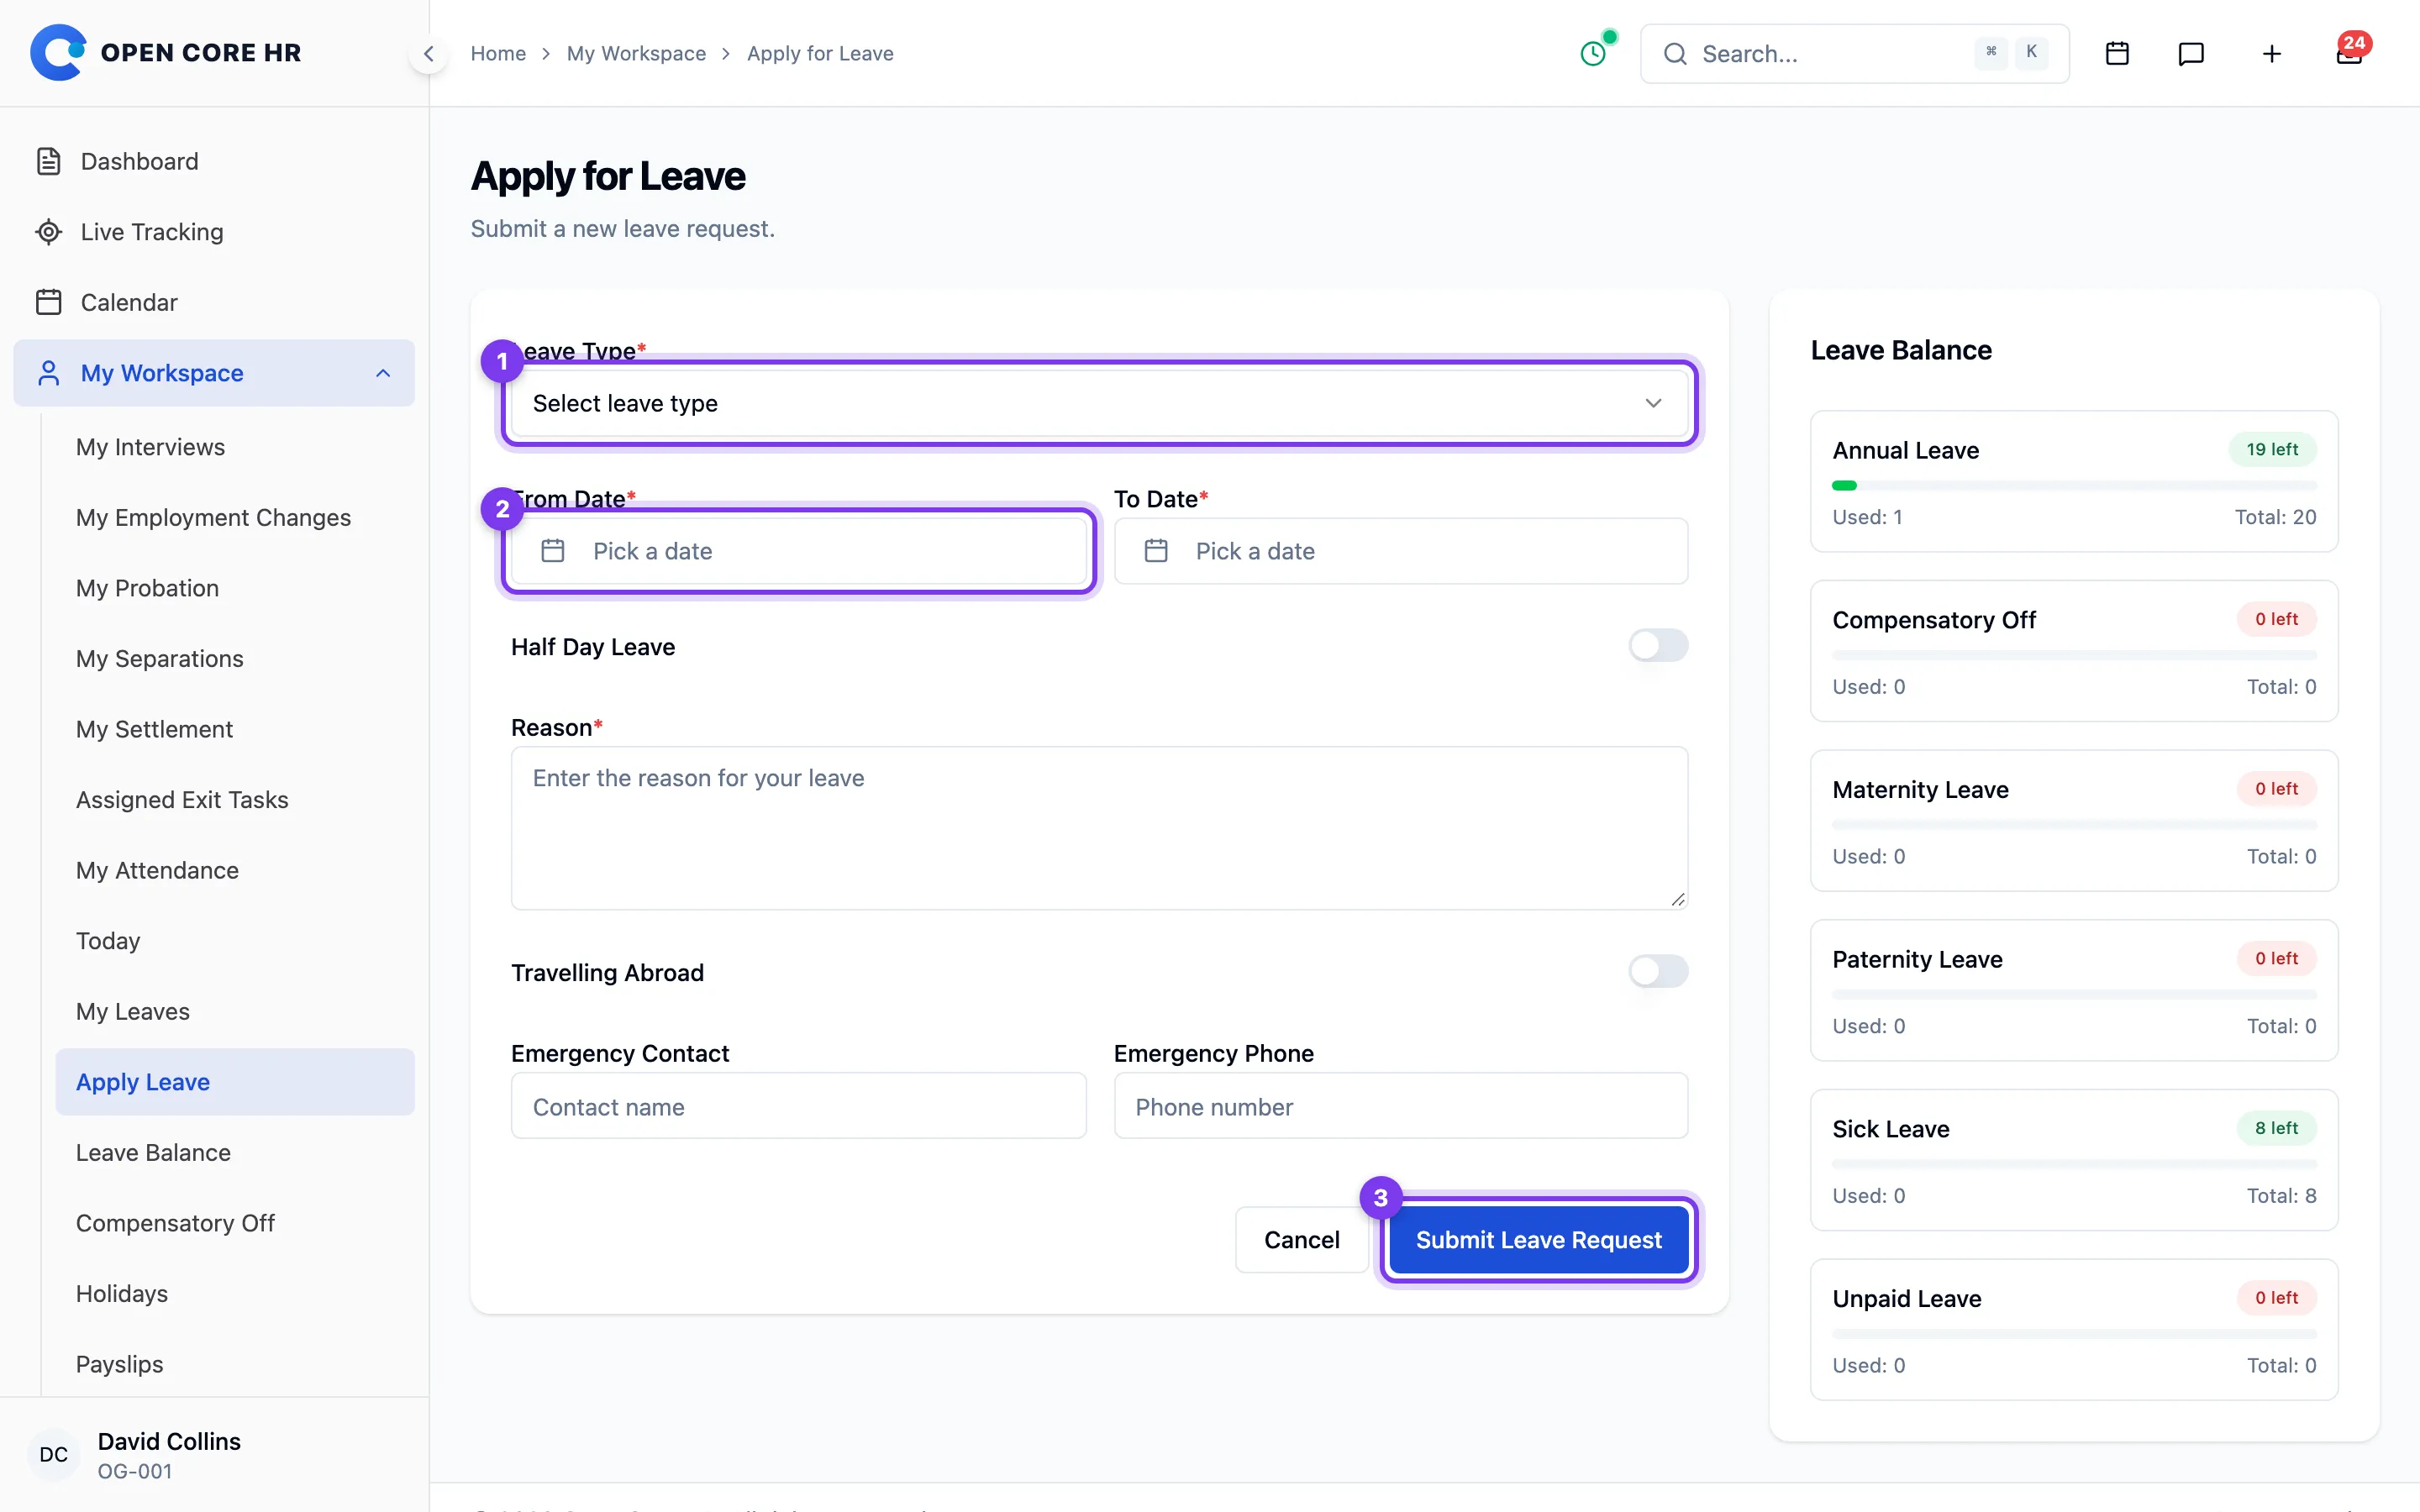
Checking the day count
Review the day count and Paid/LOP breakdown after setting your dates and any half-day option.
Troubleshooting
- "Half-day leave must be for a single date." — Set the From Date and To Date to the same day.
- "You already have a leave request for the selected dates." — You already have a pending or approved request that overlaps those dates. Cancel or adjust it first.
- Supporting document errors — Only PDF, JPG, and PNG files are allowed, and the file must be under 5 MB. For sick leave, a document may be required only for the second and later requests in the same month.
- Other messages about advance notice, monthly or yearly limits, or balance come from your organisation's leave rules. Adjust your dates or leave type and try again, or check with HR.
Your leave requests
The My Leave Requests screen lists every leave request you've made, with its current status. Open it from My Workspace > My Leaves.
Tracking a decision
Check each request’s status and any Paid/LOP breakdown. Open a request to review the decision and supporting details.
Steps
Filter the list
- Use the Status and Leave Type dropdowns above the table.
- Use the From Date and To Date pickers to limit by date.
- Type in the Search leave requests... box to search the table.
- Click Clear to reset the filters.
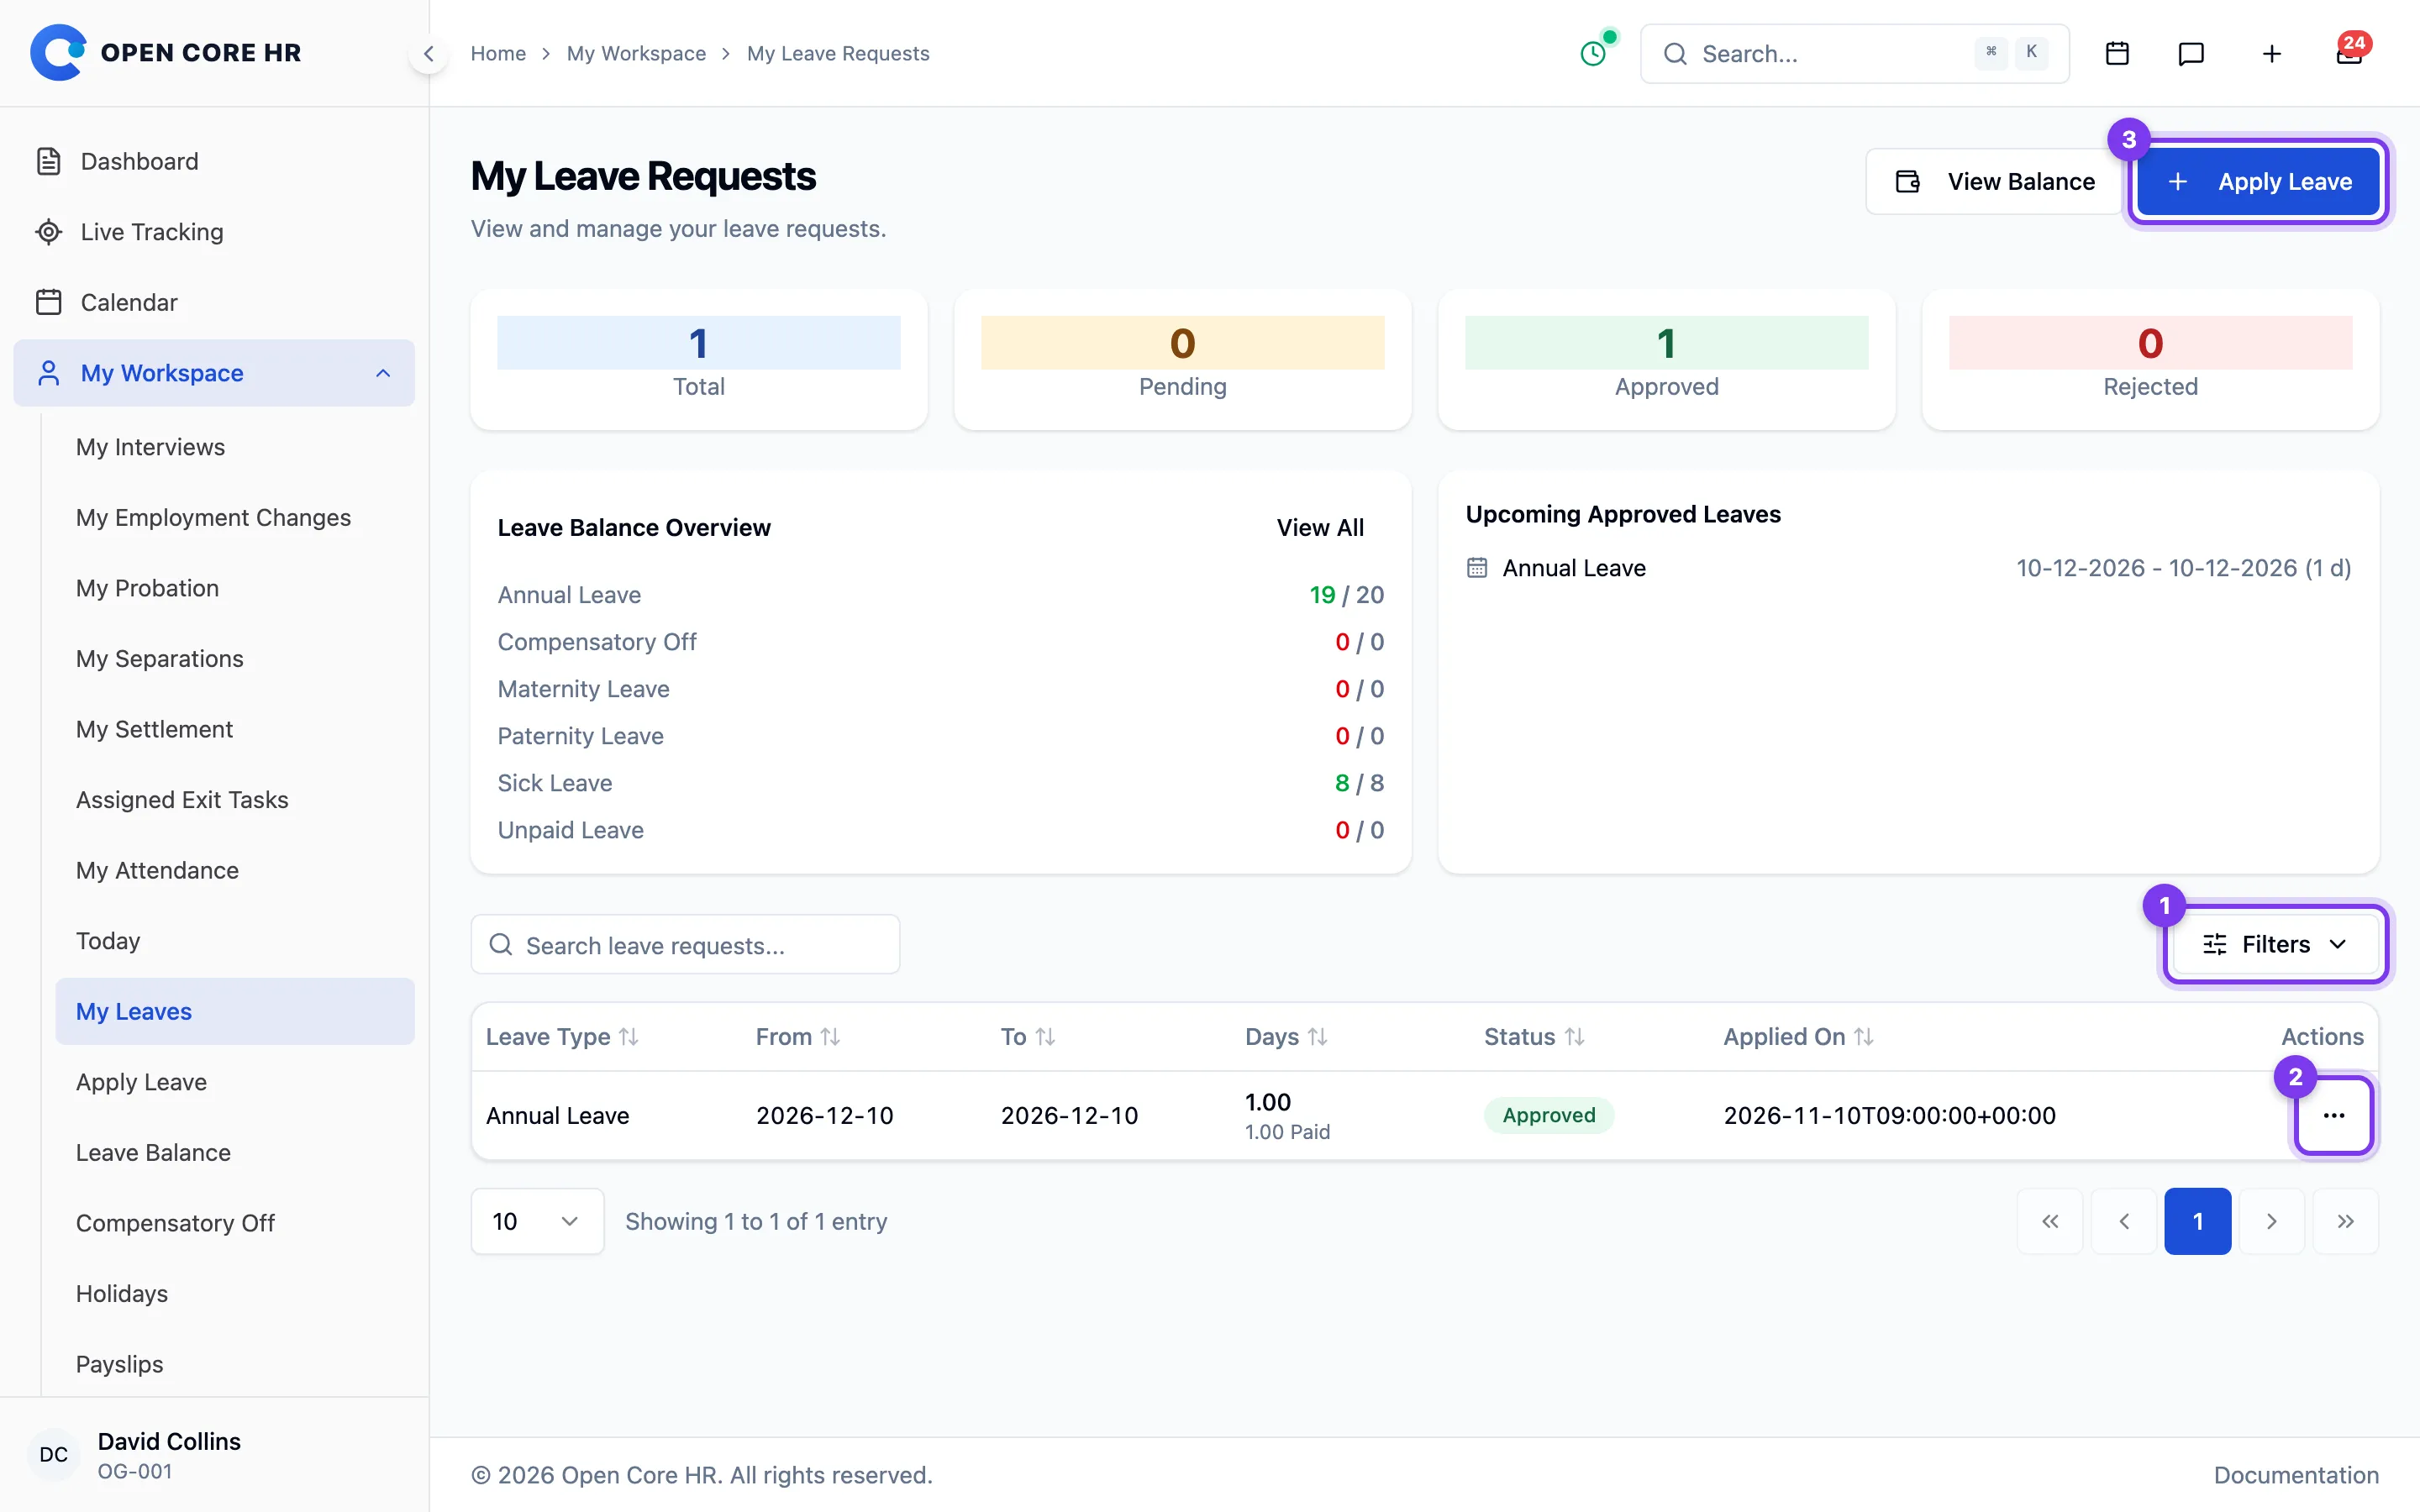
Open, cancel, or apply
- Click the view (eye) button in the Actions column to see a request's full details. See Viewing a leave request.
- For a Pending request, an extra cancel button appears in the Actions column. See Cancelling a leave request.
- Use the Apply Leave button (top right) to make a new request, or View Balance to open your leave balance.
Viewing a leave request
You can open any leave request to see its full details and current status.
Steps
- Go to My Workspace > My Leaves.
- Find the request in the table and click the view (eye) button in the Actions column.
- The Leave Request Details window opens.
Checking your request
Review the dates, day count, status, and Paid/LOP breakdown. Check who approved the request and download supporting proof when needed. If it is still Pending, use Cancel Leave Request to cancel it.
Cancelling a leave request
You can cancel a leave request you no longer need. You can cancel a Pending request at any time, and an Approved request only if it hasn't started yet.
Steps
- Go to My Workspace > My Leaves.
- For a Pending request, click the cancel button in the Actions column. (You can also open the request with the view button and use the Cancel Leave Request button at the bottom of the details window.)
- In the Cancel Leave Request confirmation, click Yes, Cancel Leave to confirm, or No, Keep It to back out.
- The request's status changes to Cancelled.
After you finish
- If the leave was already approved, your leave balance is returned to you when it's cancelled.
Troubleshooting
- "Cannot cancel approved leave that has already started or passed." — Approved leave can only be cancelled before its start date. Talk to HR if you need to change leave that has already begun.
- If the cancel button isn't shown for a request, it isn't in a state that you can cancel yourself.
Your leave balance
The Leave Balance screen shows how much leave you have for the current year, broken down by leave type. Open it from My Workspace > Leave Balance, or from the View Balance button on the My Leaves screen.
- Leave — Open the Leave group in the menu.
- Leave Balance — Then choose Leave Balance.
Understanding your balance
Review Entitled, Carried Forward, Additional, Used, and Available days for each leave type. LOP means loss of pay. Check available compensatory offs and their expiry dates before planning leave.
Tips
- Use the Apply Leave button at the top right to start a new request.
Balance for a leave type
Every leave type's balance is shown on the Leave Balance screen — there's no separate page for a single type. Open the screen from My Workspace > Leave Balance.
Where to find it
- Go to My Workspace > Leave Balance.
- Each leave type has its own card showing:
- A bar showing Used out of the type's total.
- Entitled, Carried Forward, Additional, and Available.
- An LOP note if loss-of-pay days were taken against that type.
- The Detailed Breakdown table lower on the page lists the same numbers for every type in one place, including the Total for each.
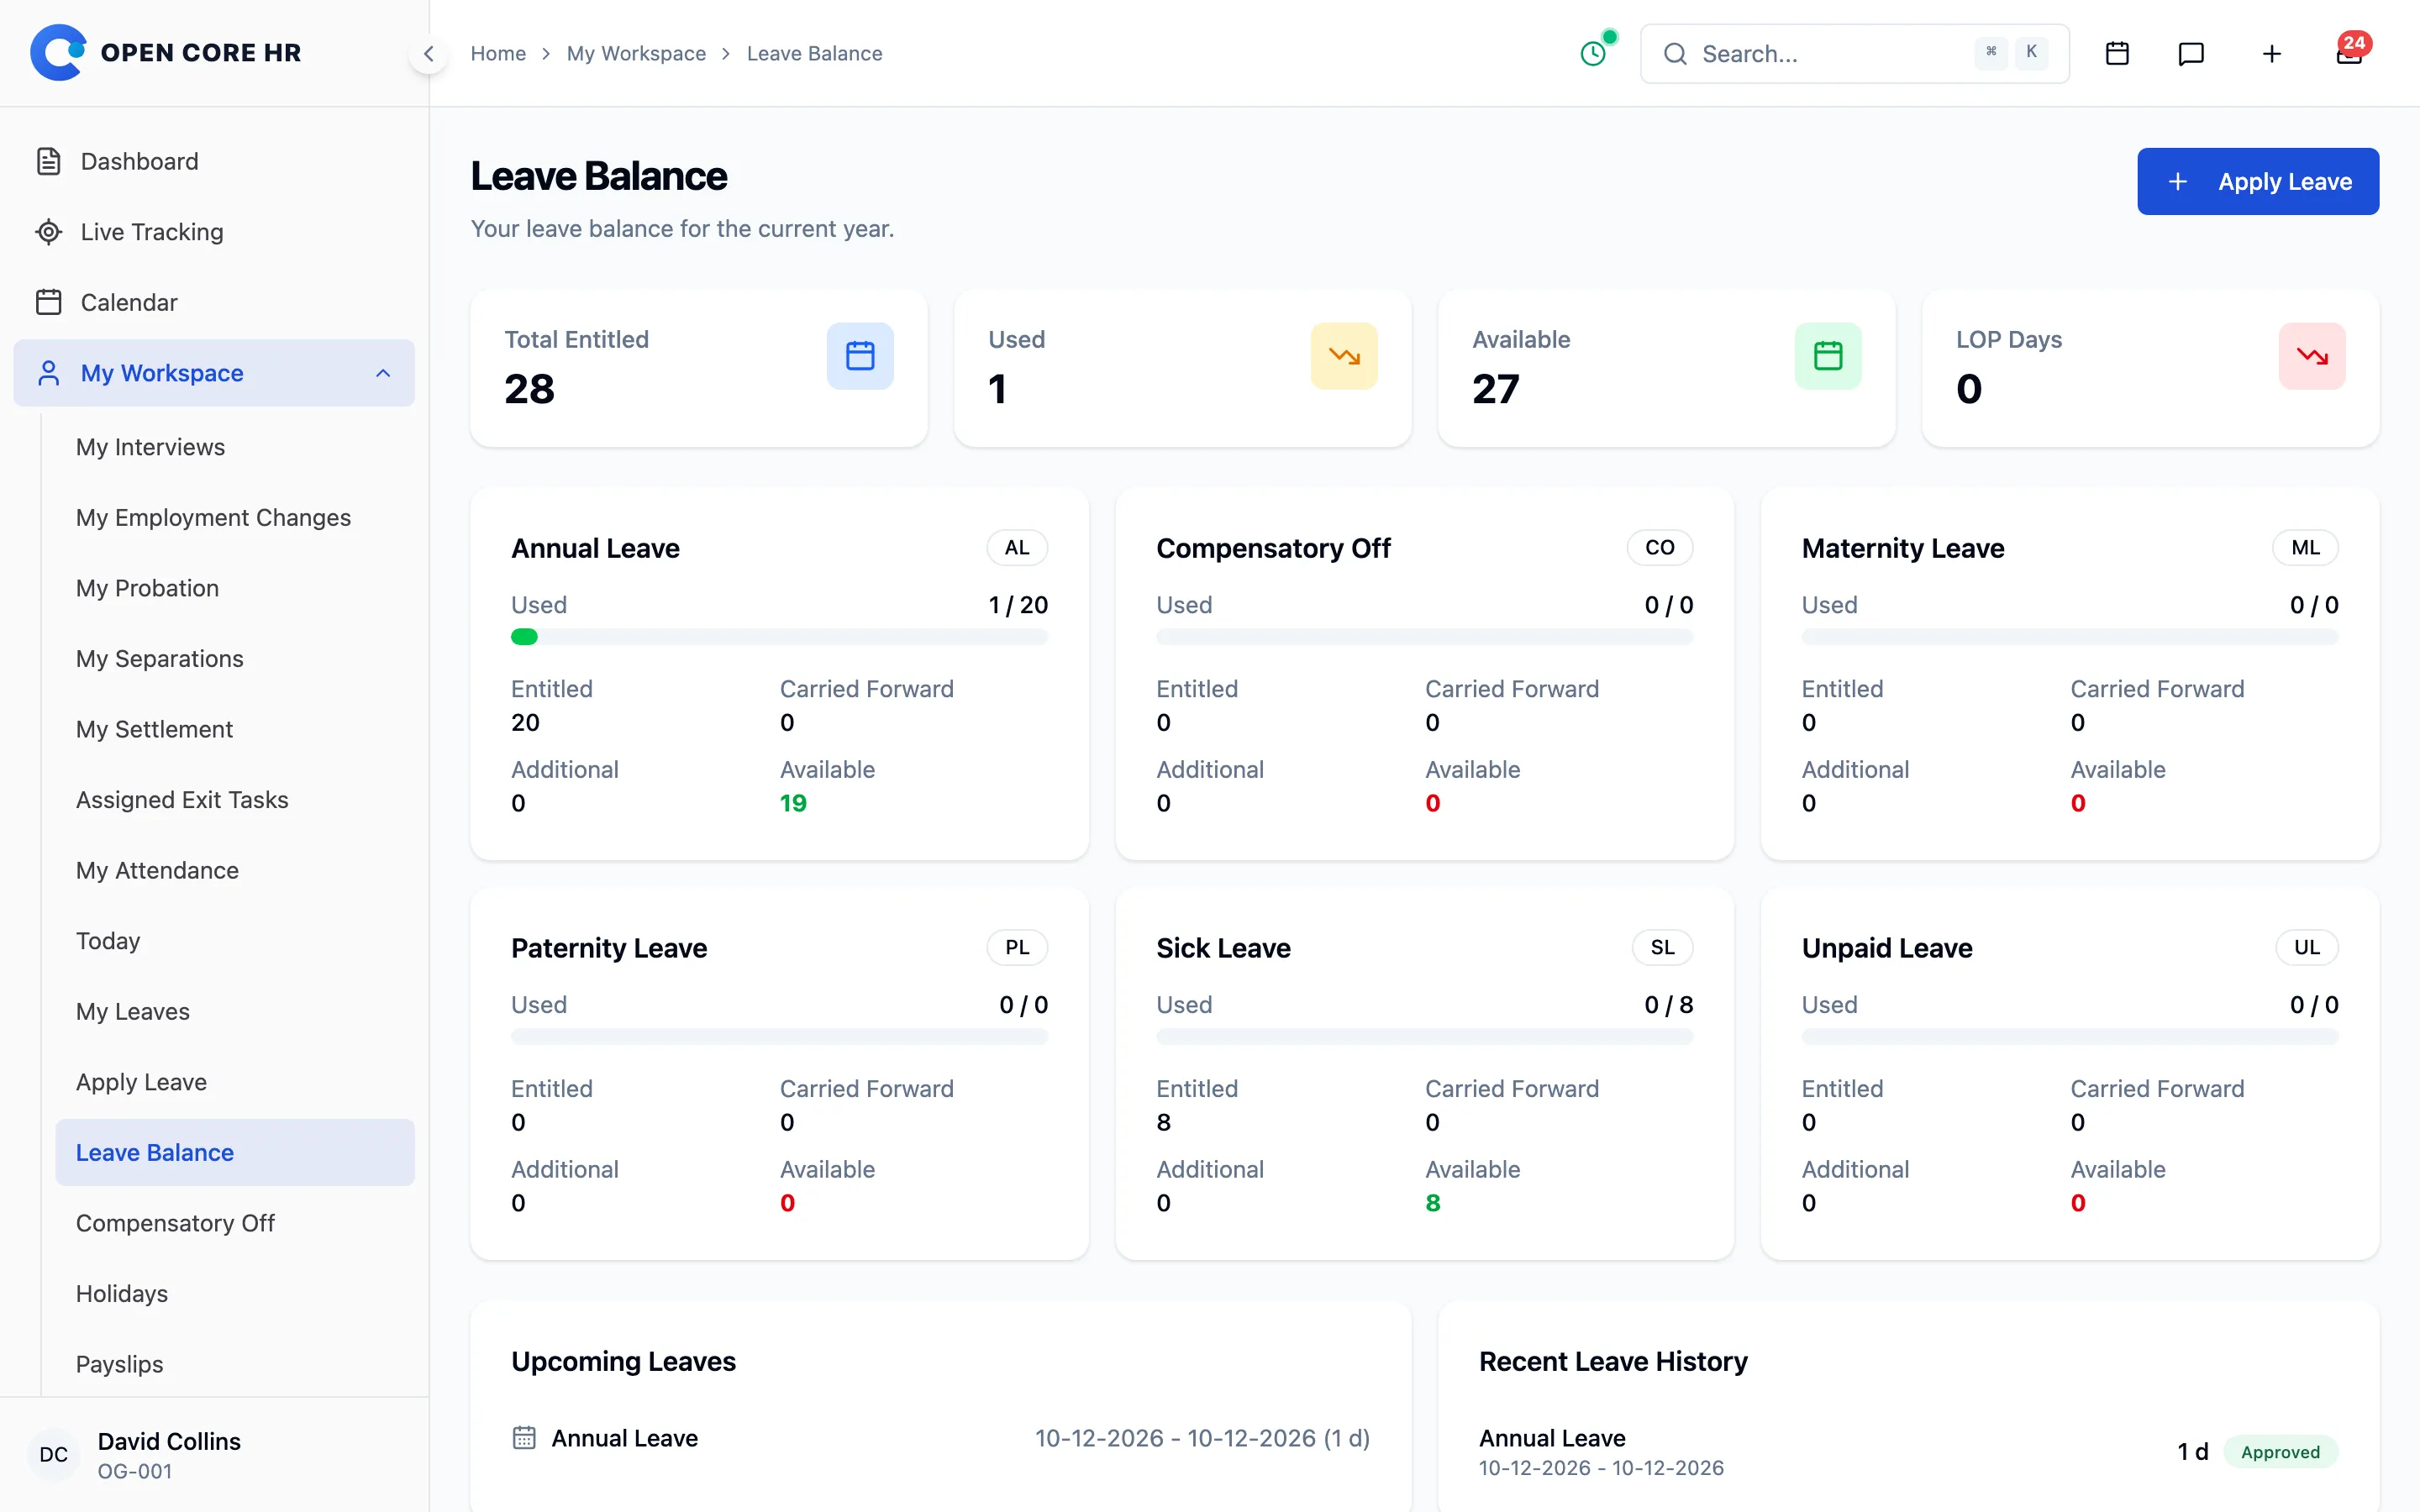
When you go to apply for leave, the Apply for Leave form also shows the available balance next to each leave type and, in its sidebar, a per-type balance with a usage bar.