
All guidesAdministration
Leave requests
Review leave requests, create leave for employees, use the leave calendar and manage compensatory offs.
The All Leave Requests screen lists employee leave requests so you can filter and review them. Pending requests are approved or rejected in the approval inbox. Open Leave Management → All Leave Requests from the left menu.
Steps
- Open Leave Management → All Leave Requests.
- Use the filters above the table to narrow the list:
- Employee — pick one person, or leave it on All Employees.
- Status — Pending, Approved, Rejected, Cancelled, or All Statuses.
- Leave Type — pick a leave type, or leave it on All Leave Types.
- From Date / To Date — limit to requests whose leave dates fall in that range.
- Use the Search leave requests... box to find requests by ID, status, reason text, employee name or code, or leave type name.
- To open a request, choose View from the row's actions menu.
- If you have permission, the Add Request button at the top right lets you create a request for an employee — see Creating leave for an employee.
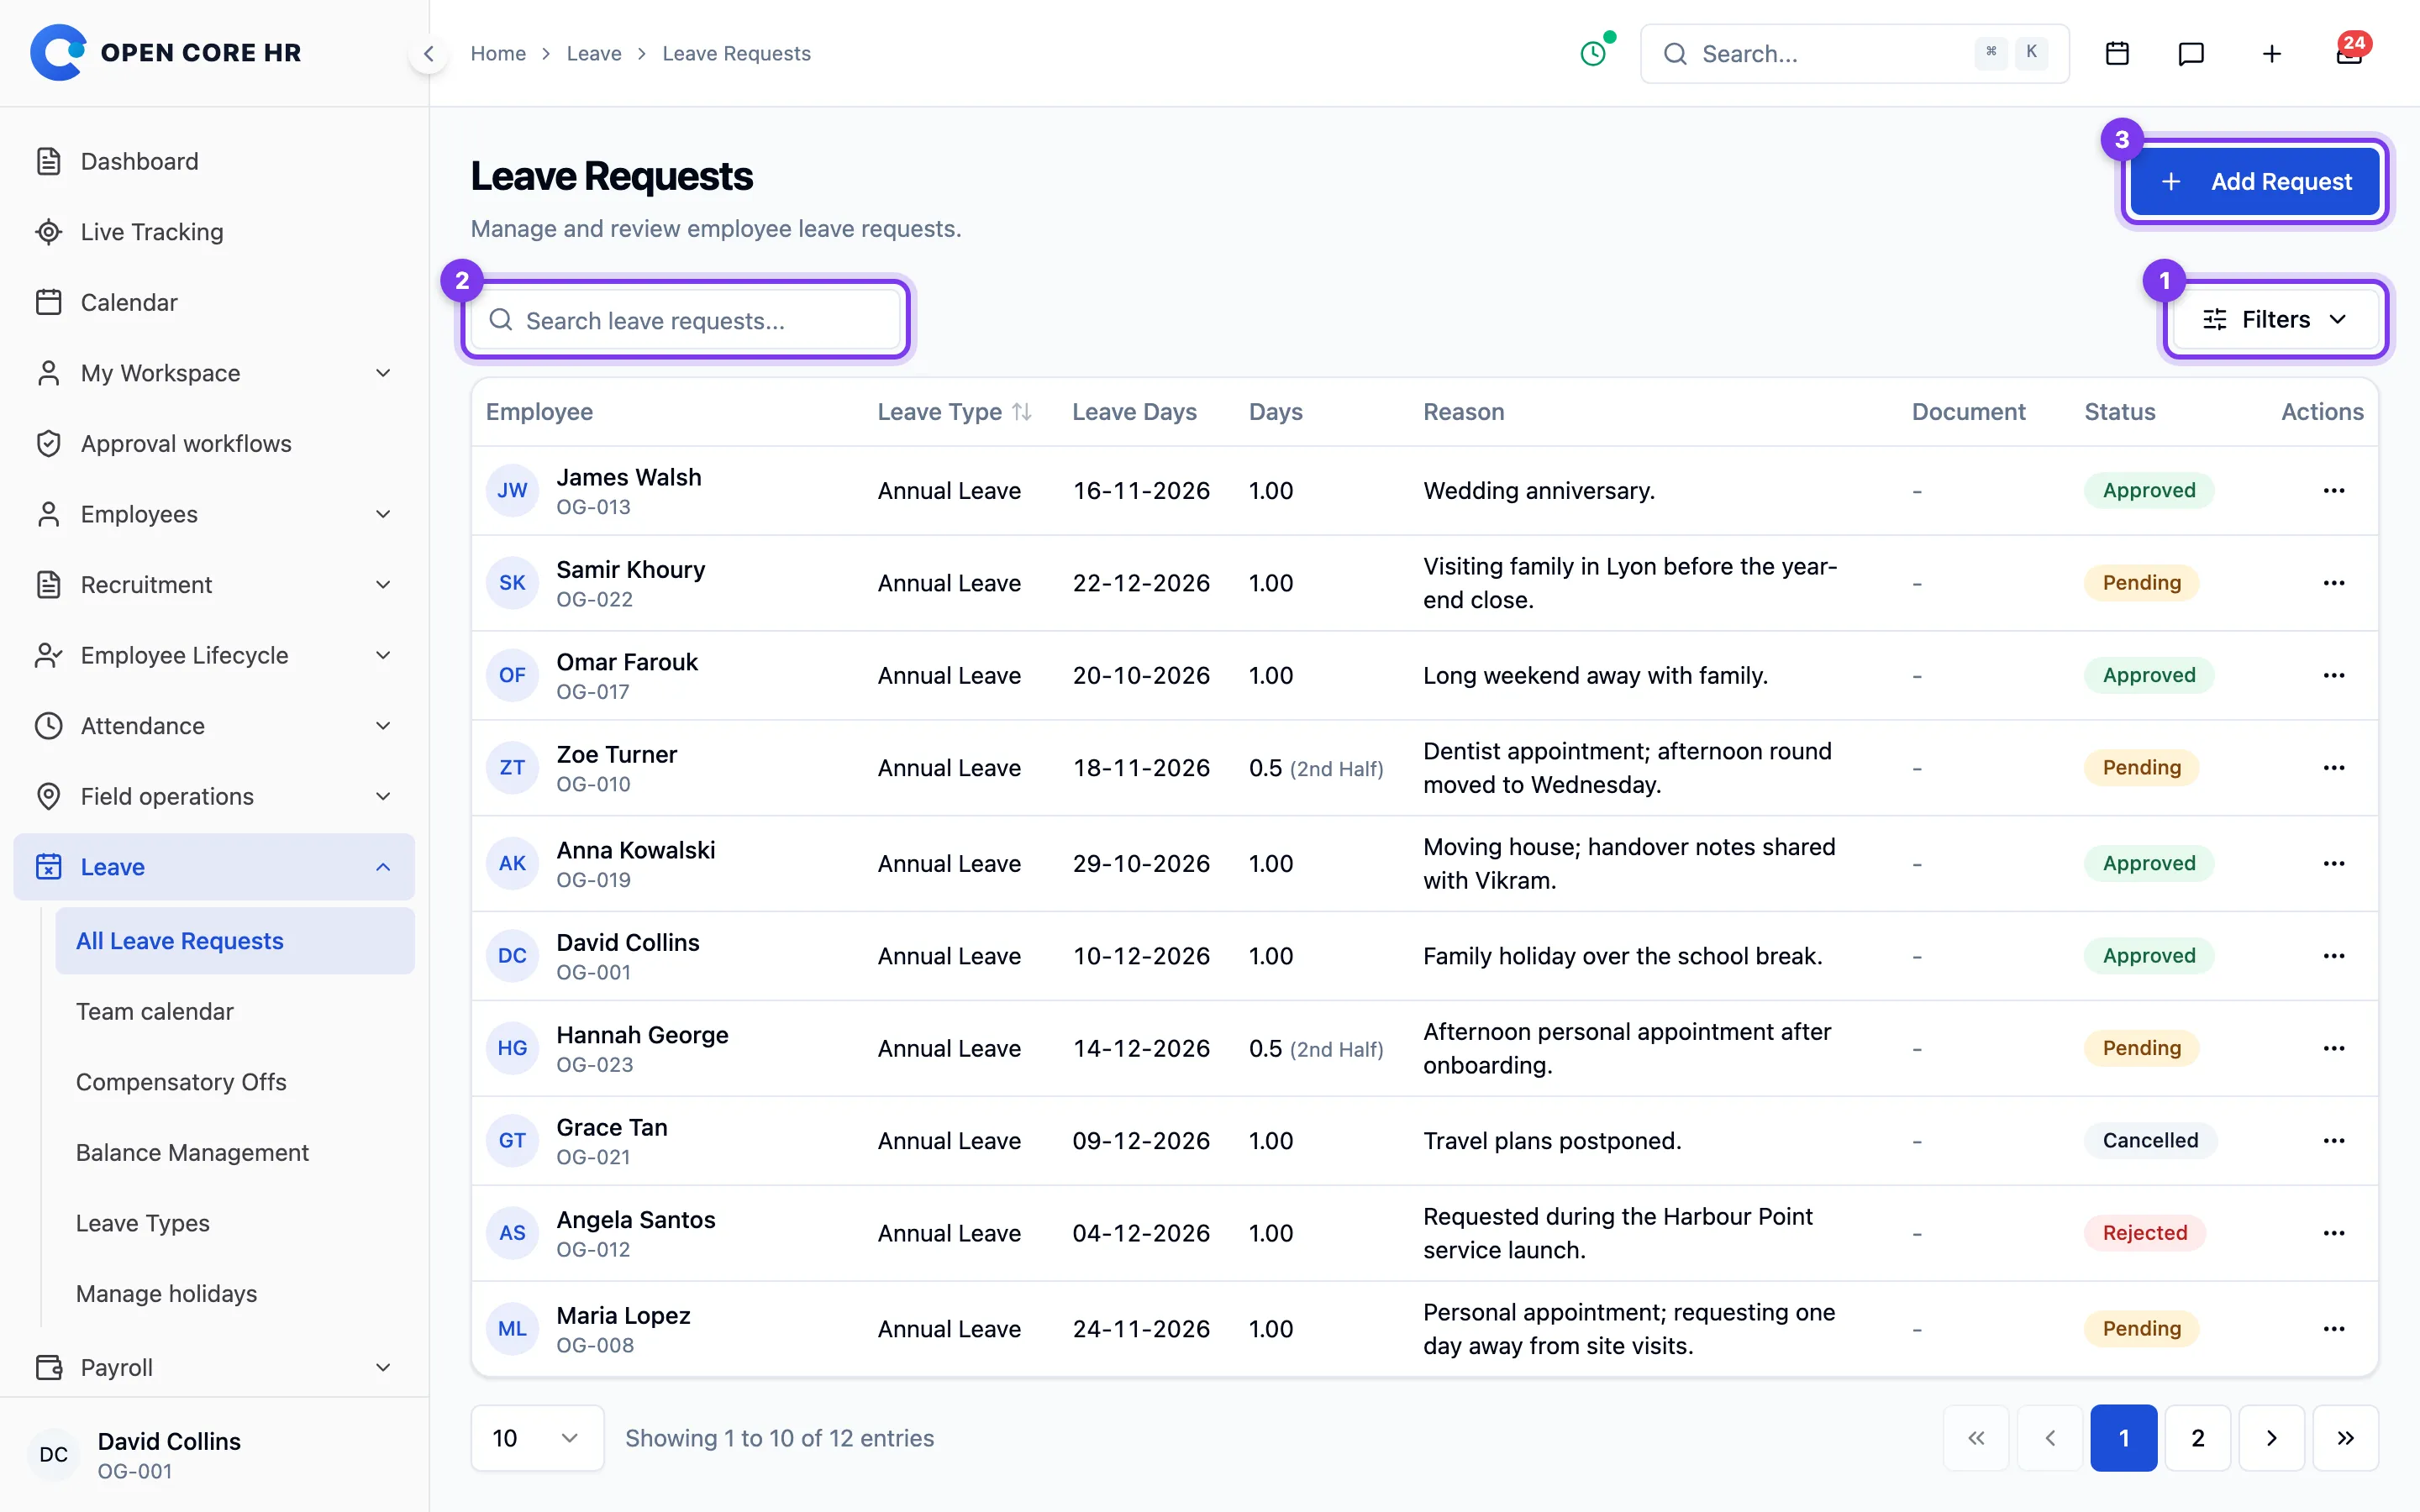
Reviewing requests
Check the dates, day count, reason, supporting document, and status. Approve or reject pending requests from Inbox → To do; cancel an approved request from its details page. See Reviewing a leave request.
Tips
- What you can see and do depends on your role. People who can only view their own leaves see just their requests; a team leader sees their team's requests.
A leave request's details
Open a leave request to see its dates, type, reason, the employee's leave balance, the approval timeline, and recent leave history.
Steps
- Open Leave Management → All Leave Requests.
- Choose View from the actions menu of the request you want. The Leave Request # page opens.
Reviewing the request
Check the dates, duration, reason, supporting proof, and available balance. Review the timeline and recent leave history for context. Approve or reject a pending request from the approval inbox, and cancel an approved one from this page. See Reviewing a leave request.
Tips
- The Edit button (when shown) opens a slide-over to change the dates, half-day setting, reason, supporting document, emergency contact, and abroad details. The leave type itself can't be changed there.
Reviewing a leave request
Pending leave requests are approved or rejected in the approval inbox. A request that's already approved can be cancelled from its detail page.
Steps
Approve a request
- Open Inbox → To do and find the leave request.
- Click Approve for that request.
- Optionally add Remarks in the dialog.
- Click Approve.
When approved, the leave days are deducted from the employee's balance, any comp-off days they chose to use are marked as used, and the employee is notified.
Reject a request
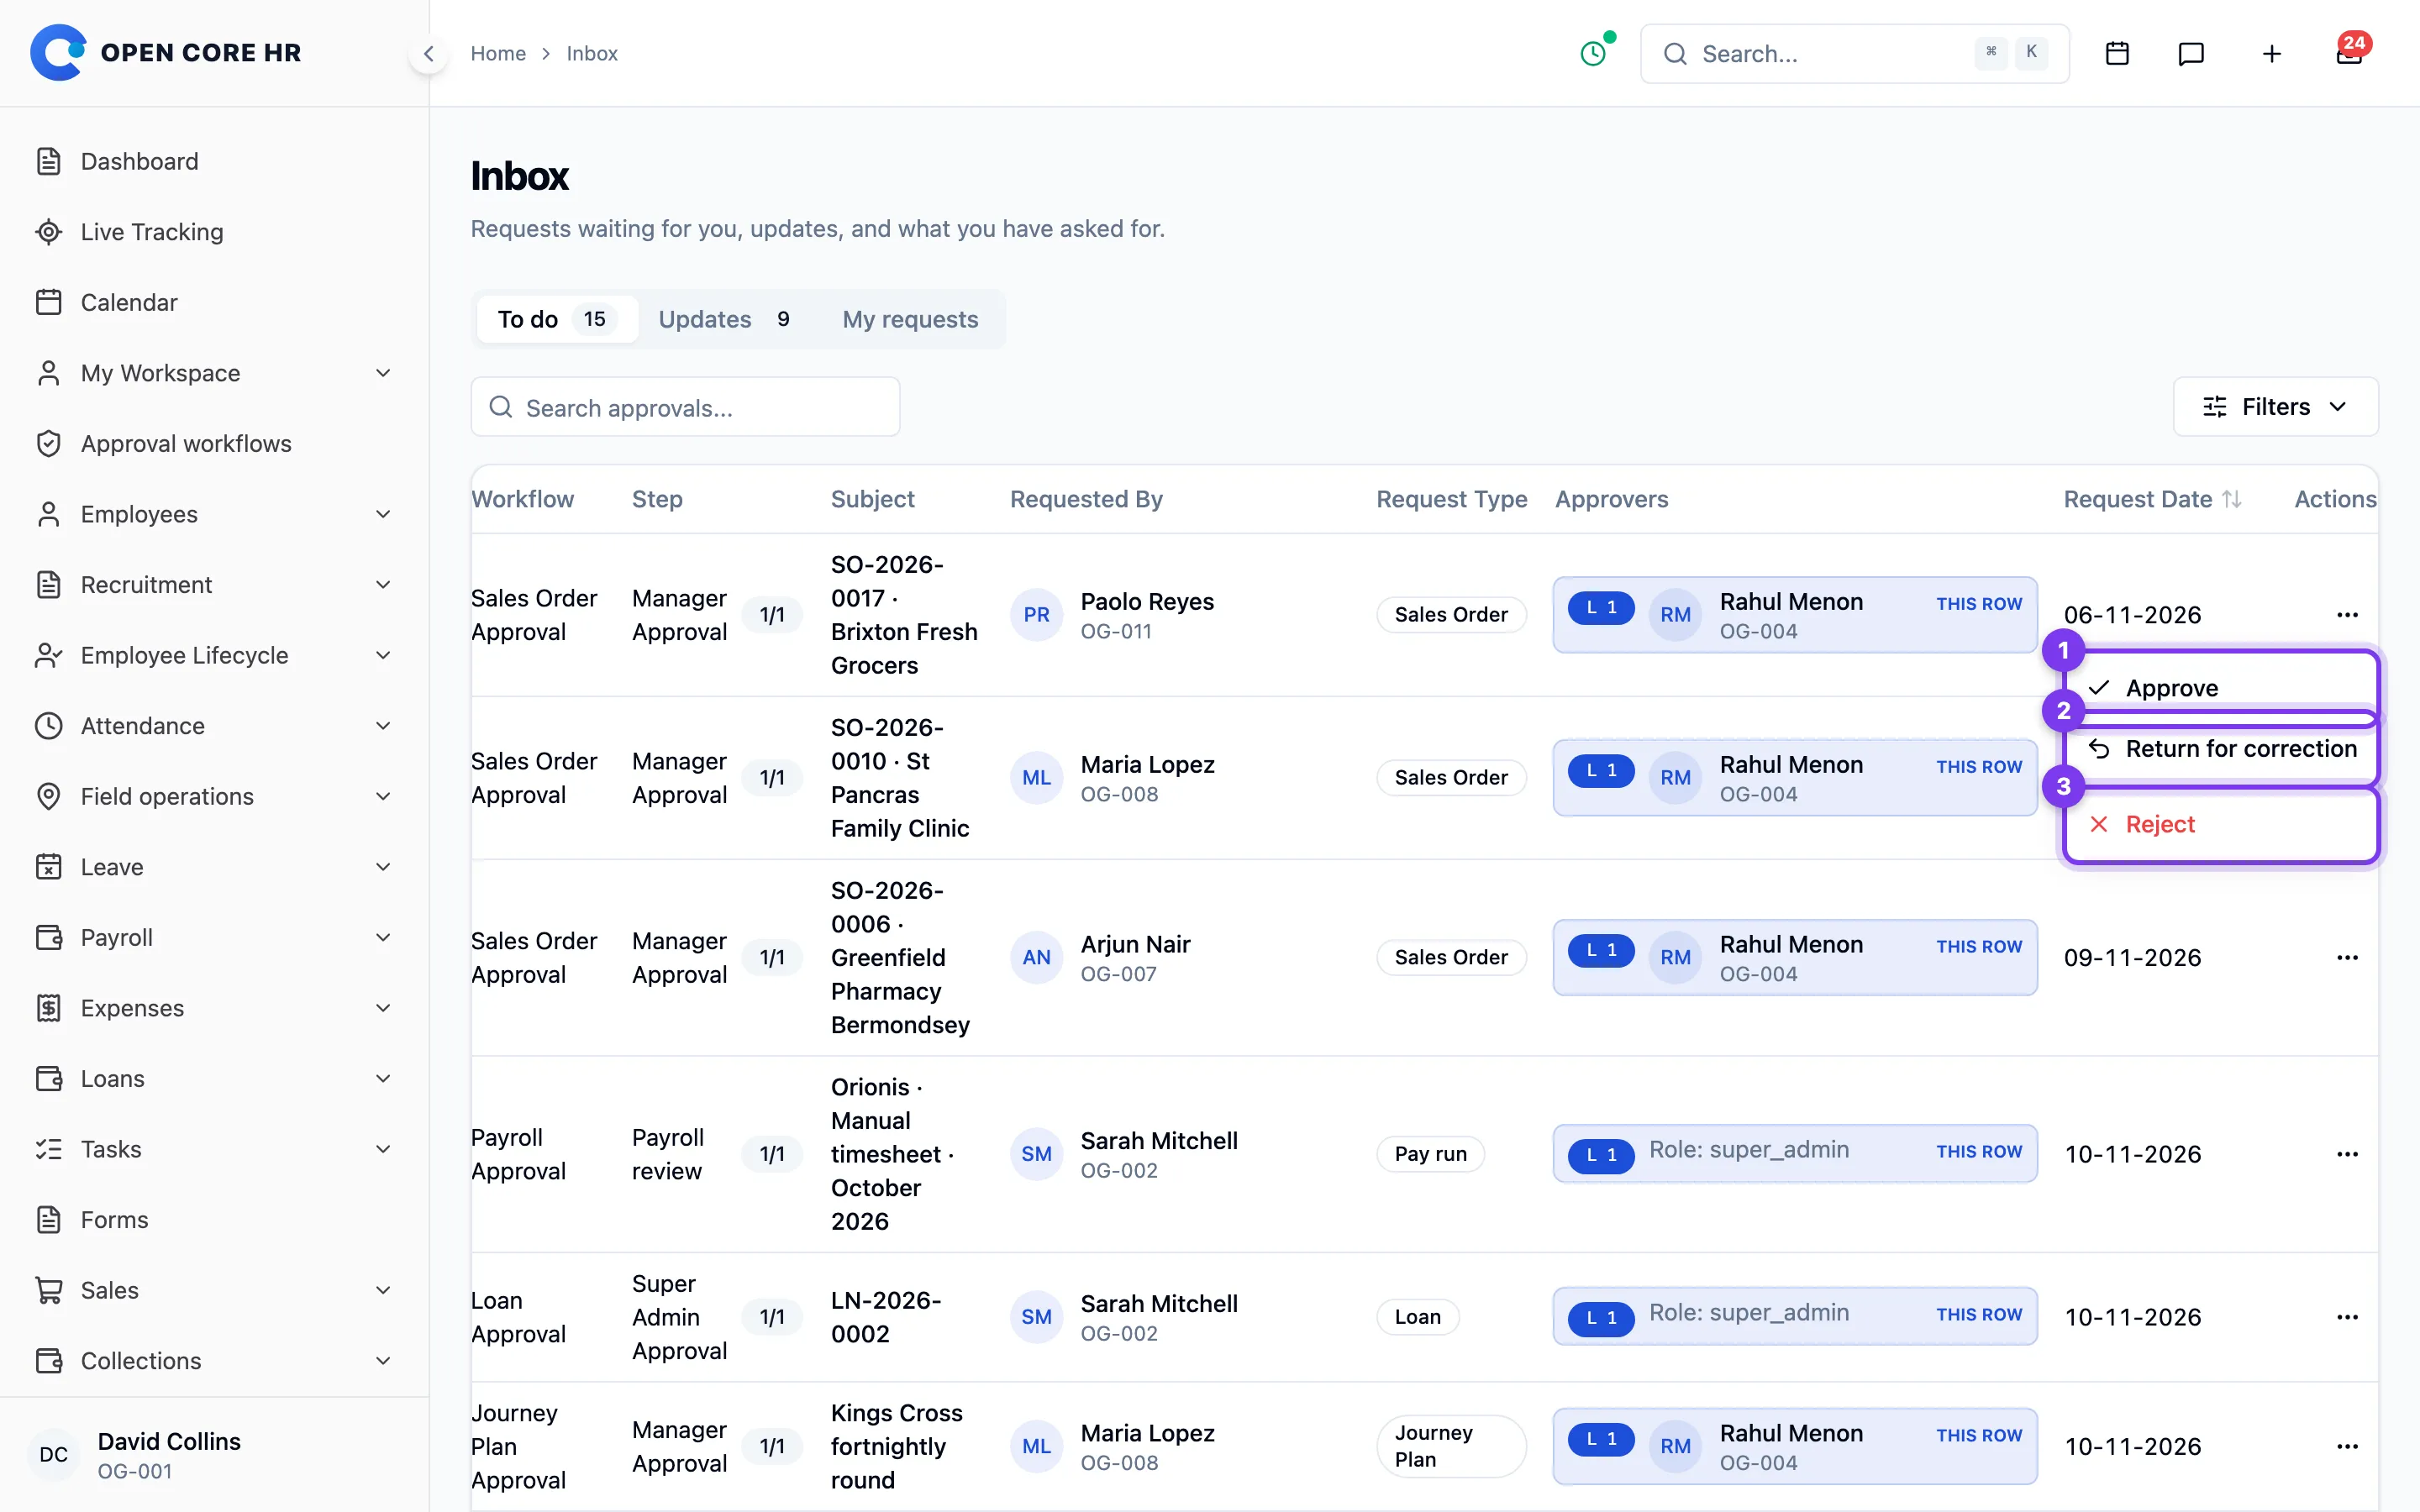
- Open Inbox → To do and find the leave request.
- Click Reject for that request.
- Enter a reason in Notes — this field is required.
- Click Reject.
The employee is notified, and any comp-off days they had reserved are released.
Cancel an approved request
- Open Leave Management → All Leave Requests, choose View for the Approved request, then click Cancel on its detail page.
- Optionally add Notes (optional) in the dialog.
- Click Cancel Leave.
The leave balance is restored, any comp-off days are released, and the employee is notified.
Tips
- Only Pending requests can be approved or rejected; only Approved requests can be cancelled.
- An approved leave that has already started or passed can't be cancelled.
- The leave screens don't offer approve or reject; use the approval inbox. See Approving and rejecting a request.
- The cancel button only appears if your role allows it.
Creating leave for an employee
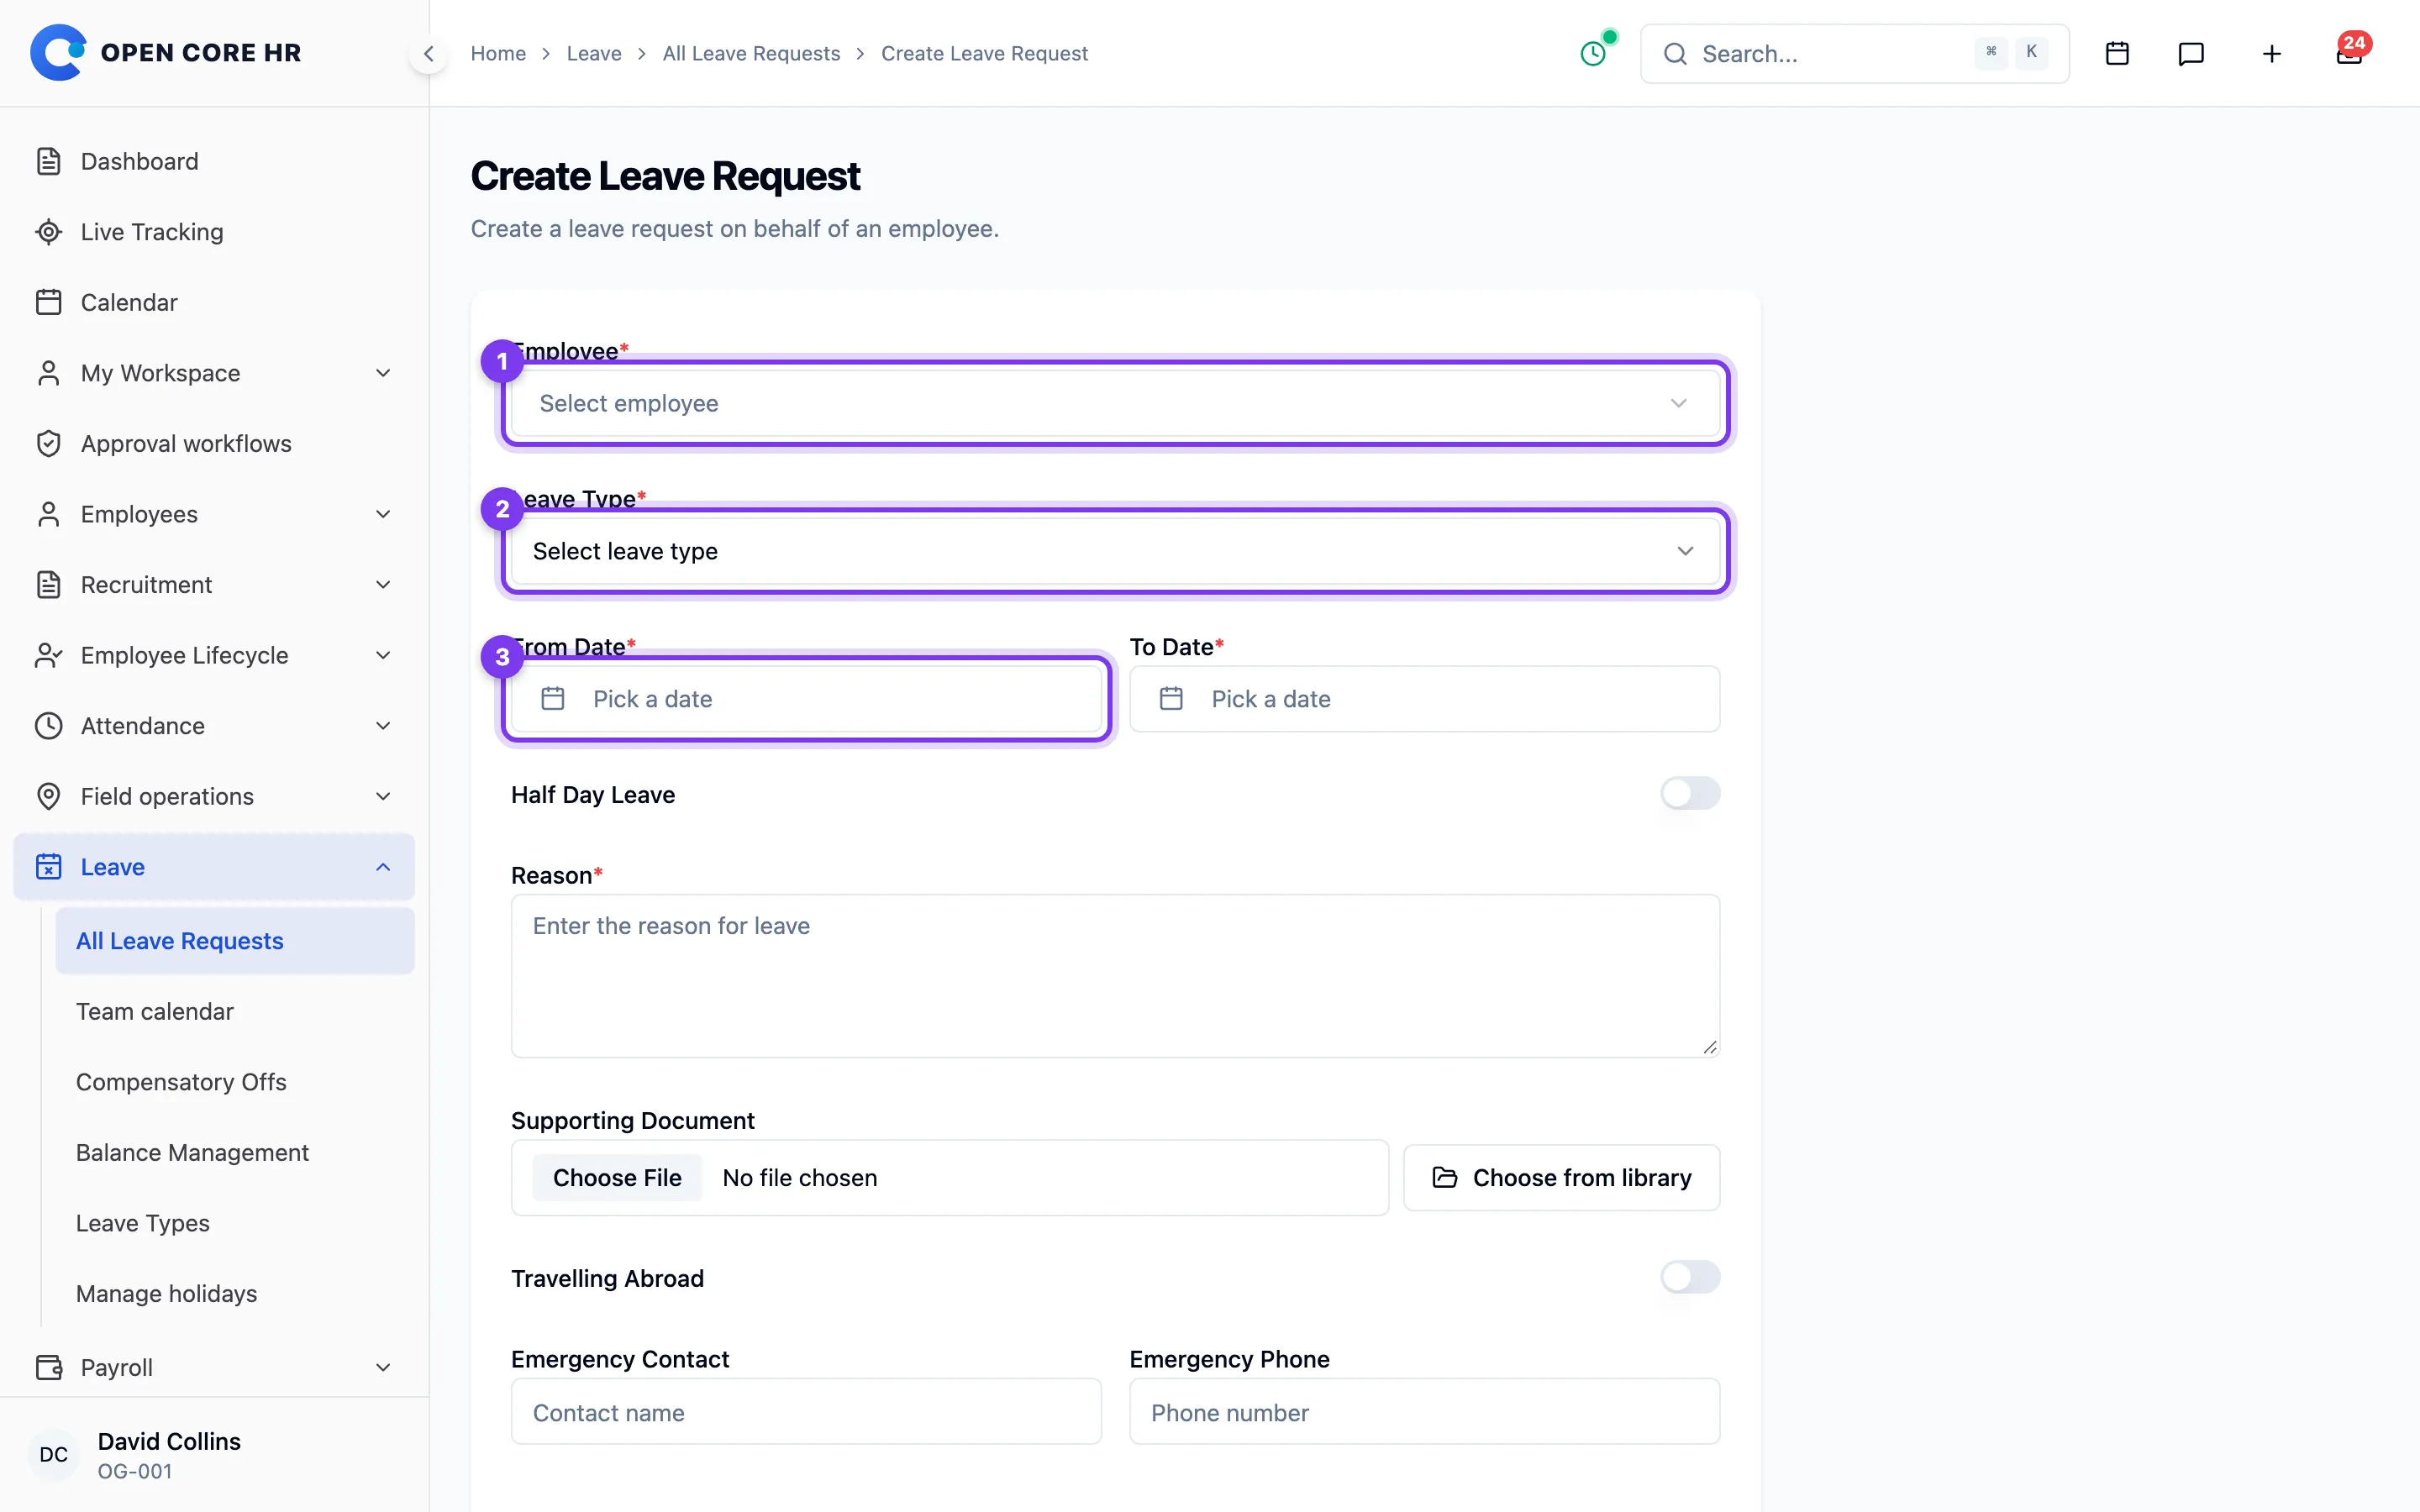
If your role allows it, you can submit a leave request on behalf of an employee. Open Leave Management → All Leave Requests and click Add Request at the top right.
Steps
- Open Leave Management → All Leave Requests and click Add Request.
- Pick the Employee.
- Pick the Leave Type.
- Set the From Date and To Date. The screen shows the calculated number of working days (weekends and holidays excluded) once both dates are set.
- If it's a half day, turn on Half Day Leave and choose First Half or Second Half.
- Enter a Reason — this is required.
- Optionally attach a Supporting Document (PDF, JPG, or PNG).
- If the employee will be travelling abroad, turn on Travelling Abroad and enter the location.
- Optionally fill in Emergency Contact and Emergency Phone.
- Click Create Leave Request.
Tips
- The Add Request button only appears if your role can create leave for other people.
- After it's created, the request shows up in the All Leave Requests list and follows the normal approval flow — see Reviewing a leave request.
Employee leave calendar
The Employee Leave Calendar shows who is off on which days, in a month grid, so you can spot clashes before approving leave. It opens at /leaves/team — reach it from the leave area of the workspace.
Steps
- Open the Employee Leave Calendar.
- Use the filters to focus the view:
- Status — Approved, Pending, or All Statuses.
- Leave Type — pick a type, or leave it on All Leave Types.
- The employee picker — pick one employee, or leave it on All Members.
- Use the ‹ and › arrows above the grid to move between months, or click Today to jump back to the current month.
- Click an employee's name inside a day cell to open a Leave Details pop-up for that request.
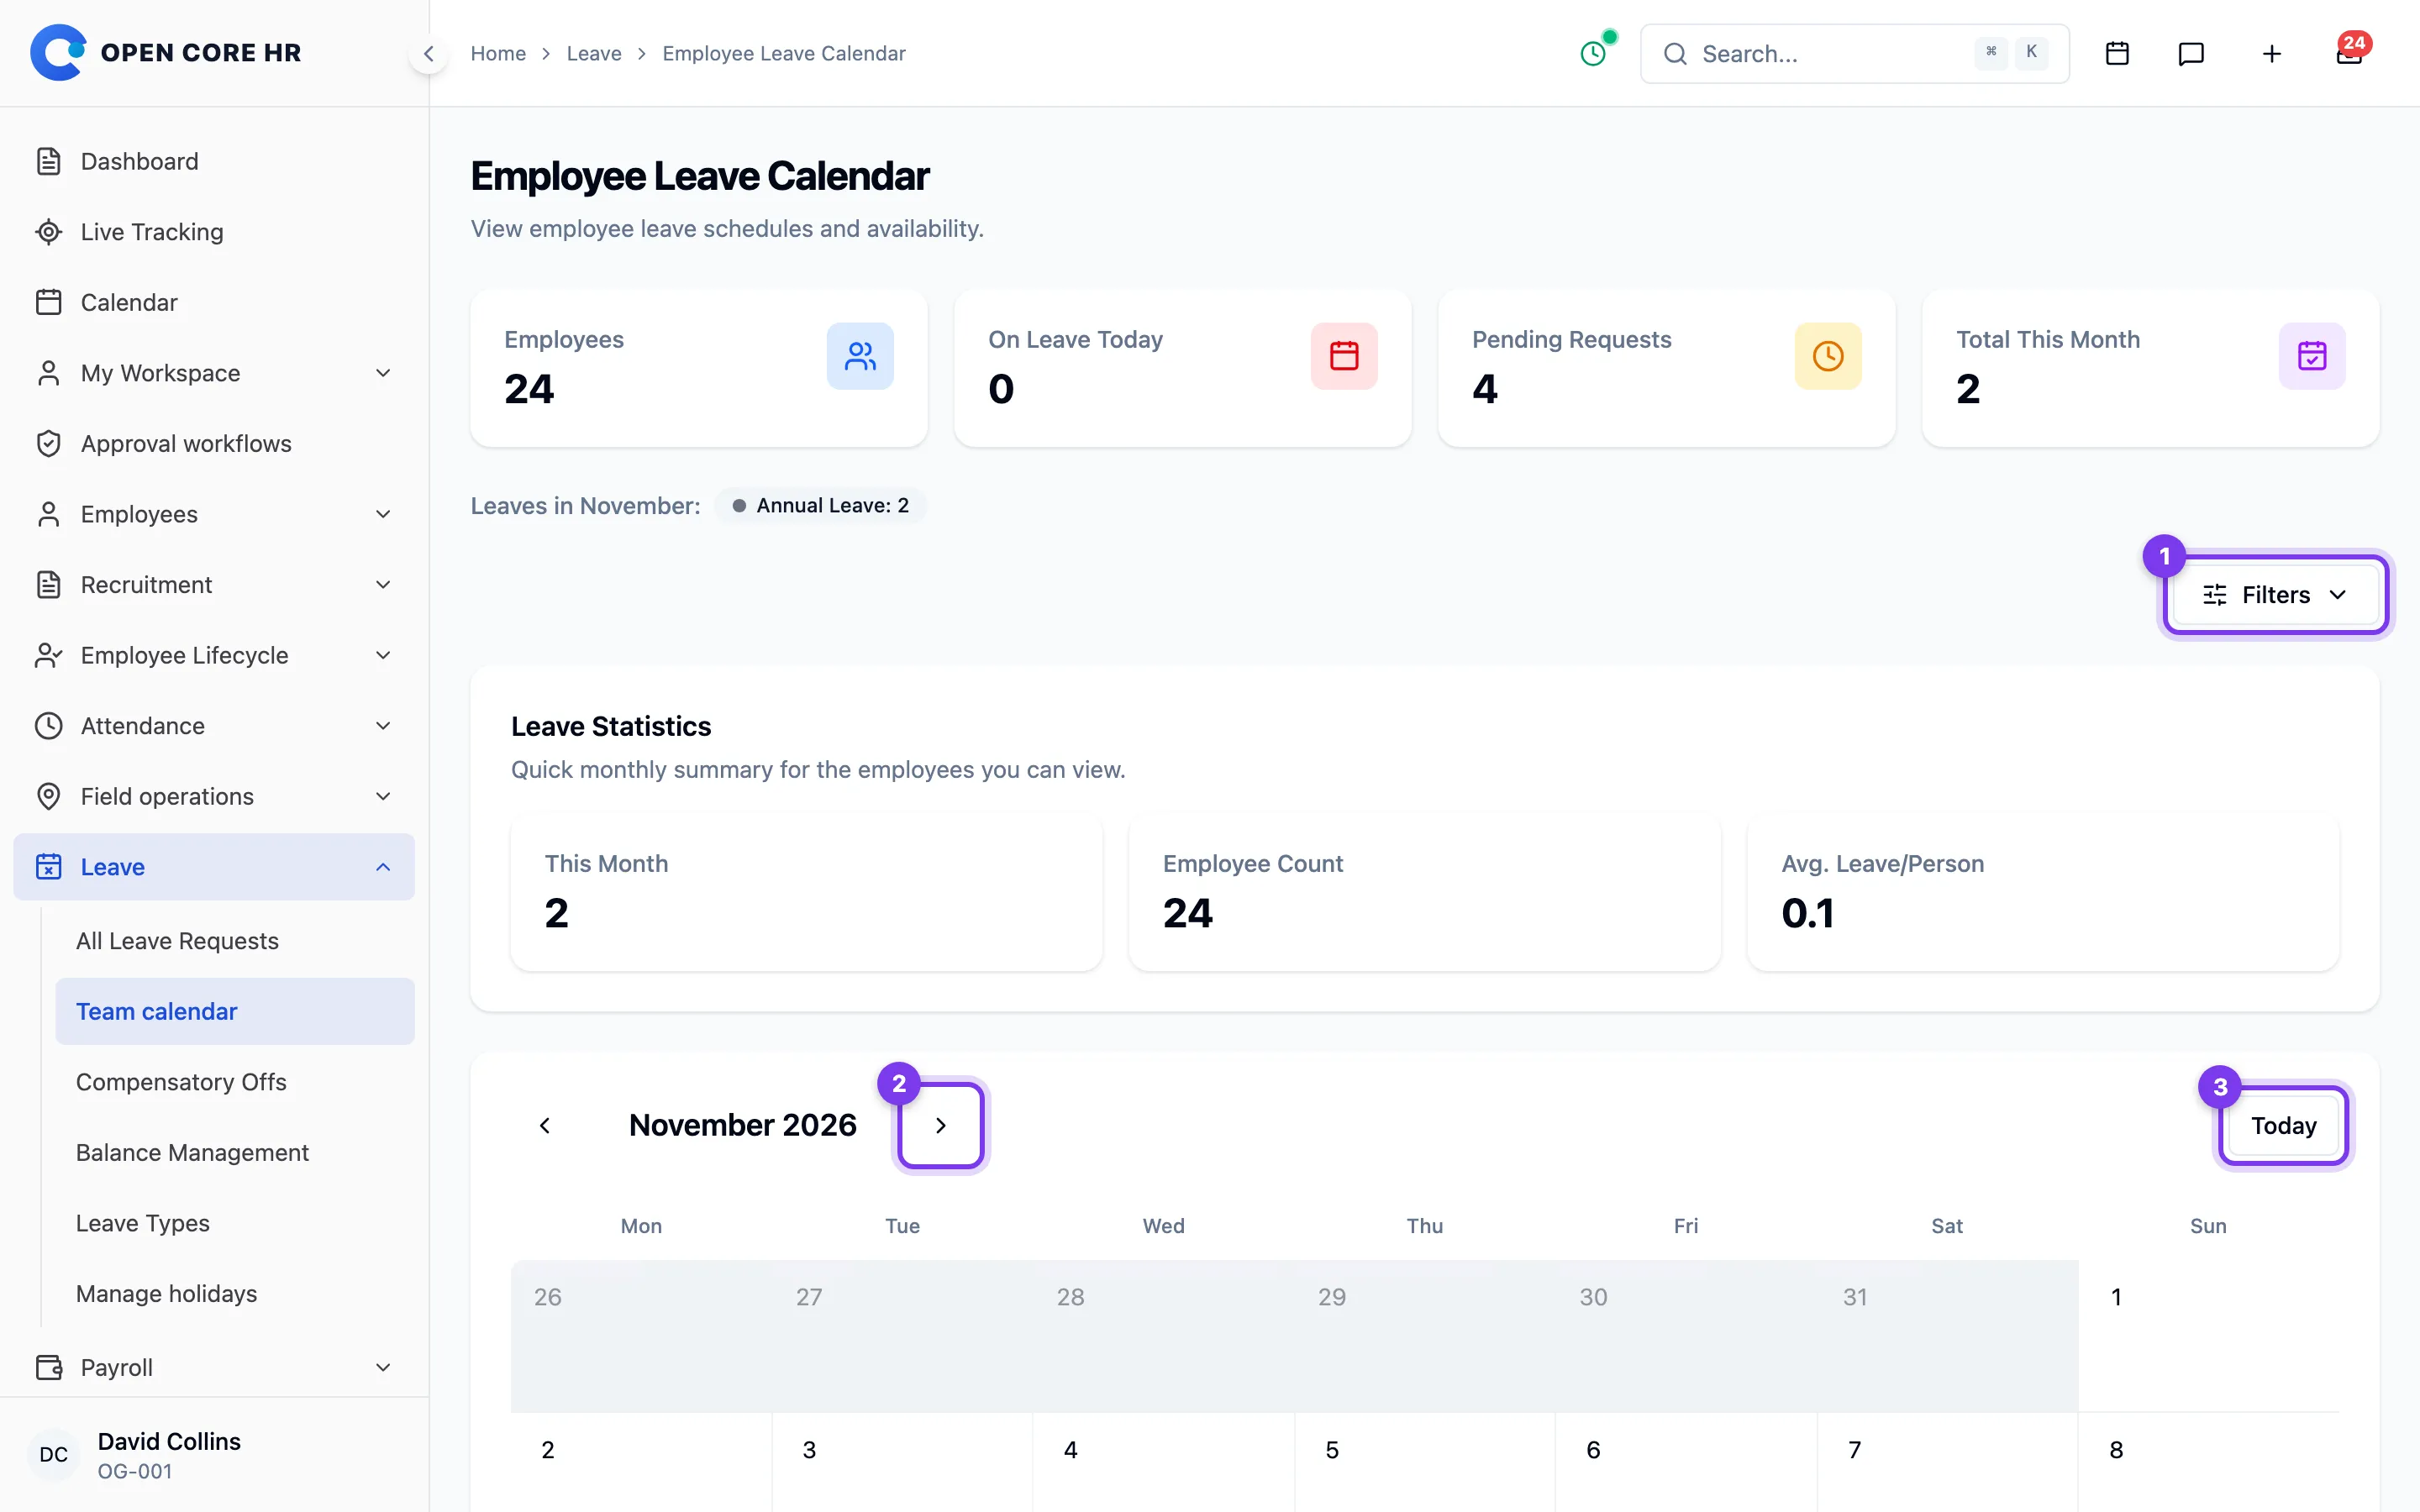
Planning coverage
Select a day or employee to review the leave dates, status, and reason. Use the calendar to identify overlapping leave before approving requests or arranging coverage.
Tips
- Half-day leaves are marked with "1st Half" or "2nd Half" next to the leave type in the On Leave Today panel.
- The employees shown depend on your role and reporting relationships.
Compensatory offs
A compensatory off ("comp off") is time off an employee earns by working extra. The Compensatory Offs screen lets you review those requests and see who has comp-off days available. Pending requests are approved or rejected in the approval inbox. Open Leave Management → Compensatory Offs from the left menu.
Steps
- Open Leave Management → Compensatory Offs.
- Use the filters above the table to narrow the list:
- Status — Pending, Approved, Rejected, or All Statuses.
- Employee — pick one person, or leave it on All Employees.
- Usage Status — Available, Used, Expired, or All Usage.
- From Date / To Date — limit by the date the extra work was done.
- Use the Search compensatory offs... box to find requests.
- To open a request, choose View from the row's actions menu. If your role allows, its details page lets you edit or delete a Pending request.
- To approve or reject a Pending request, open Inbox → To do — see Approving and rejecting a request.
Reviewing earned days
Check the worked date, hours, reason, and expiry date before deciding on a request in the approval inbox. Four hours convert to half a comp-off day. Admins with permission can edit pending requests from their details.
Tips
- Only Pending comp-off requests can be approved or rejected.
- An approved comp-off has an expiry date; once it's past, its usage status shows Expired.