All guidesAdministration
Settings
Configure general, security, code prefix, localisation, signature and app update settings.
The Settings screen is where you manage company-wide options for the whole workspace. Open Settings from the application navigation.
Choose the settings to change
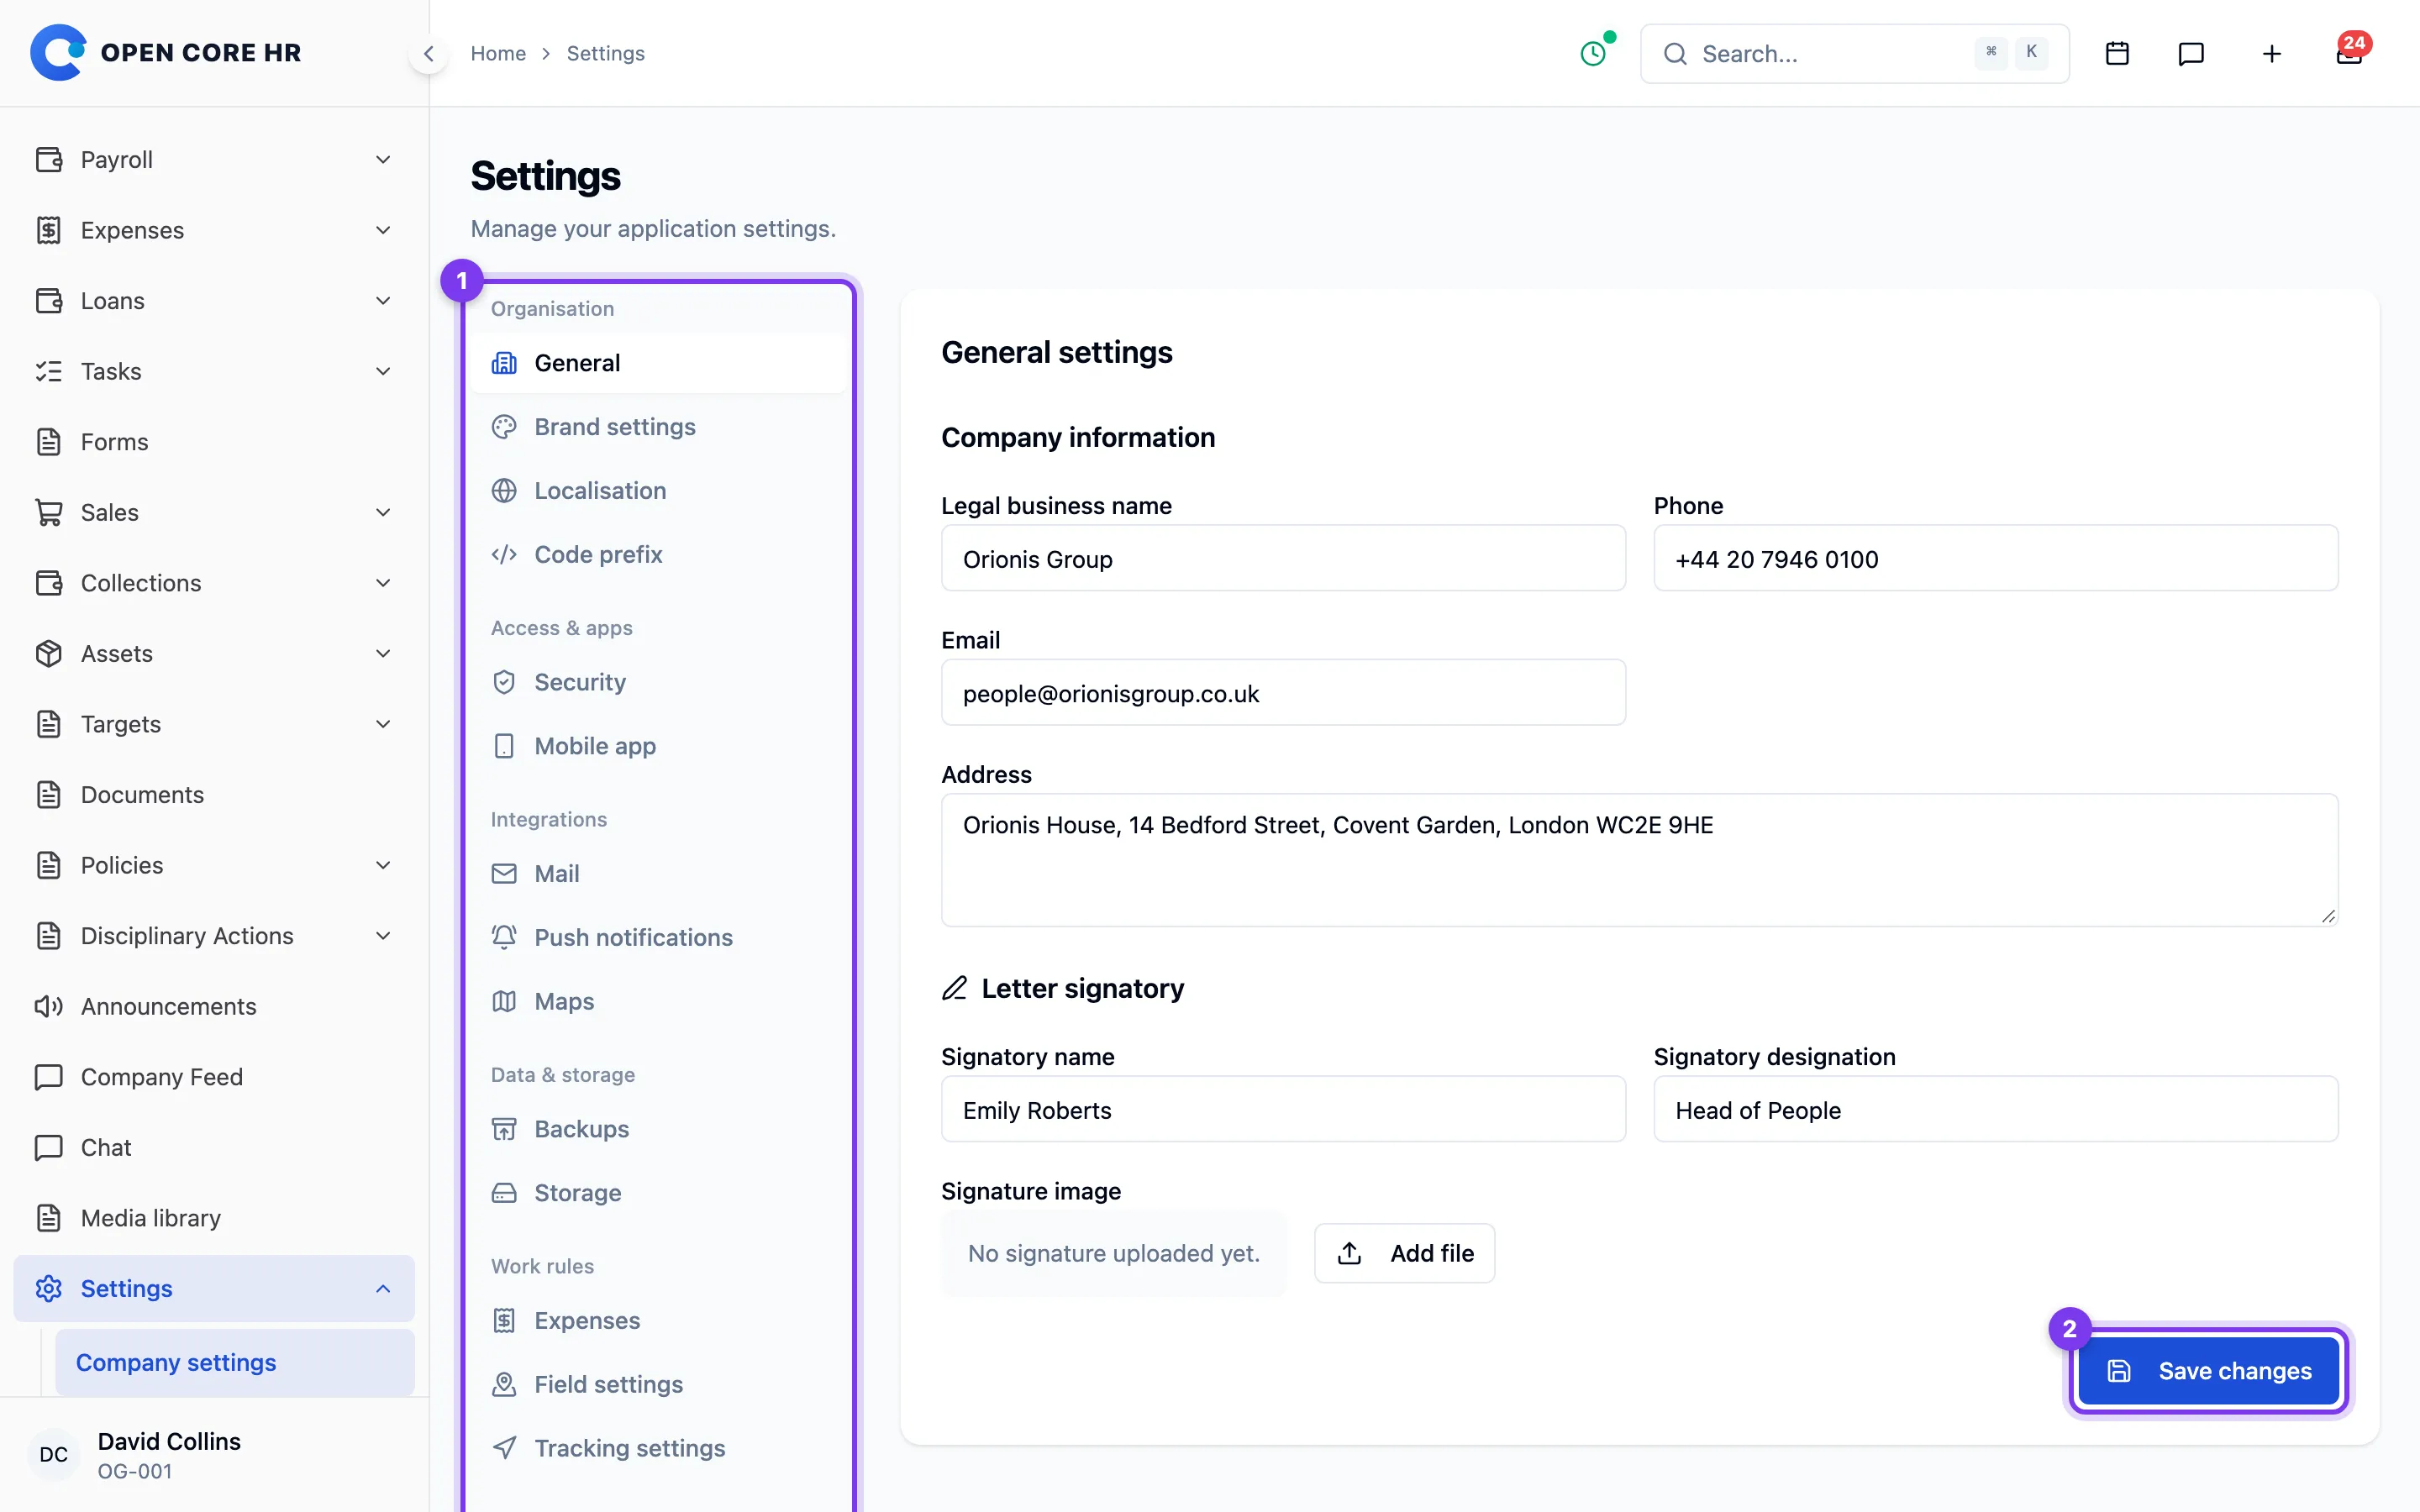
Choose the section for the settings you need. Some sections require an enabled module:
-
General — company information (legal business name, address, phone, email), the two Attendance check-in rules, and the Letter Signatory (name, designation, and signature image used on generated lifecycle letters).
-
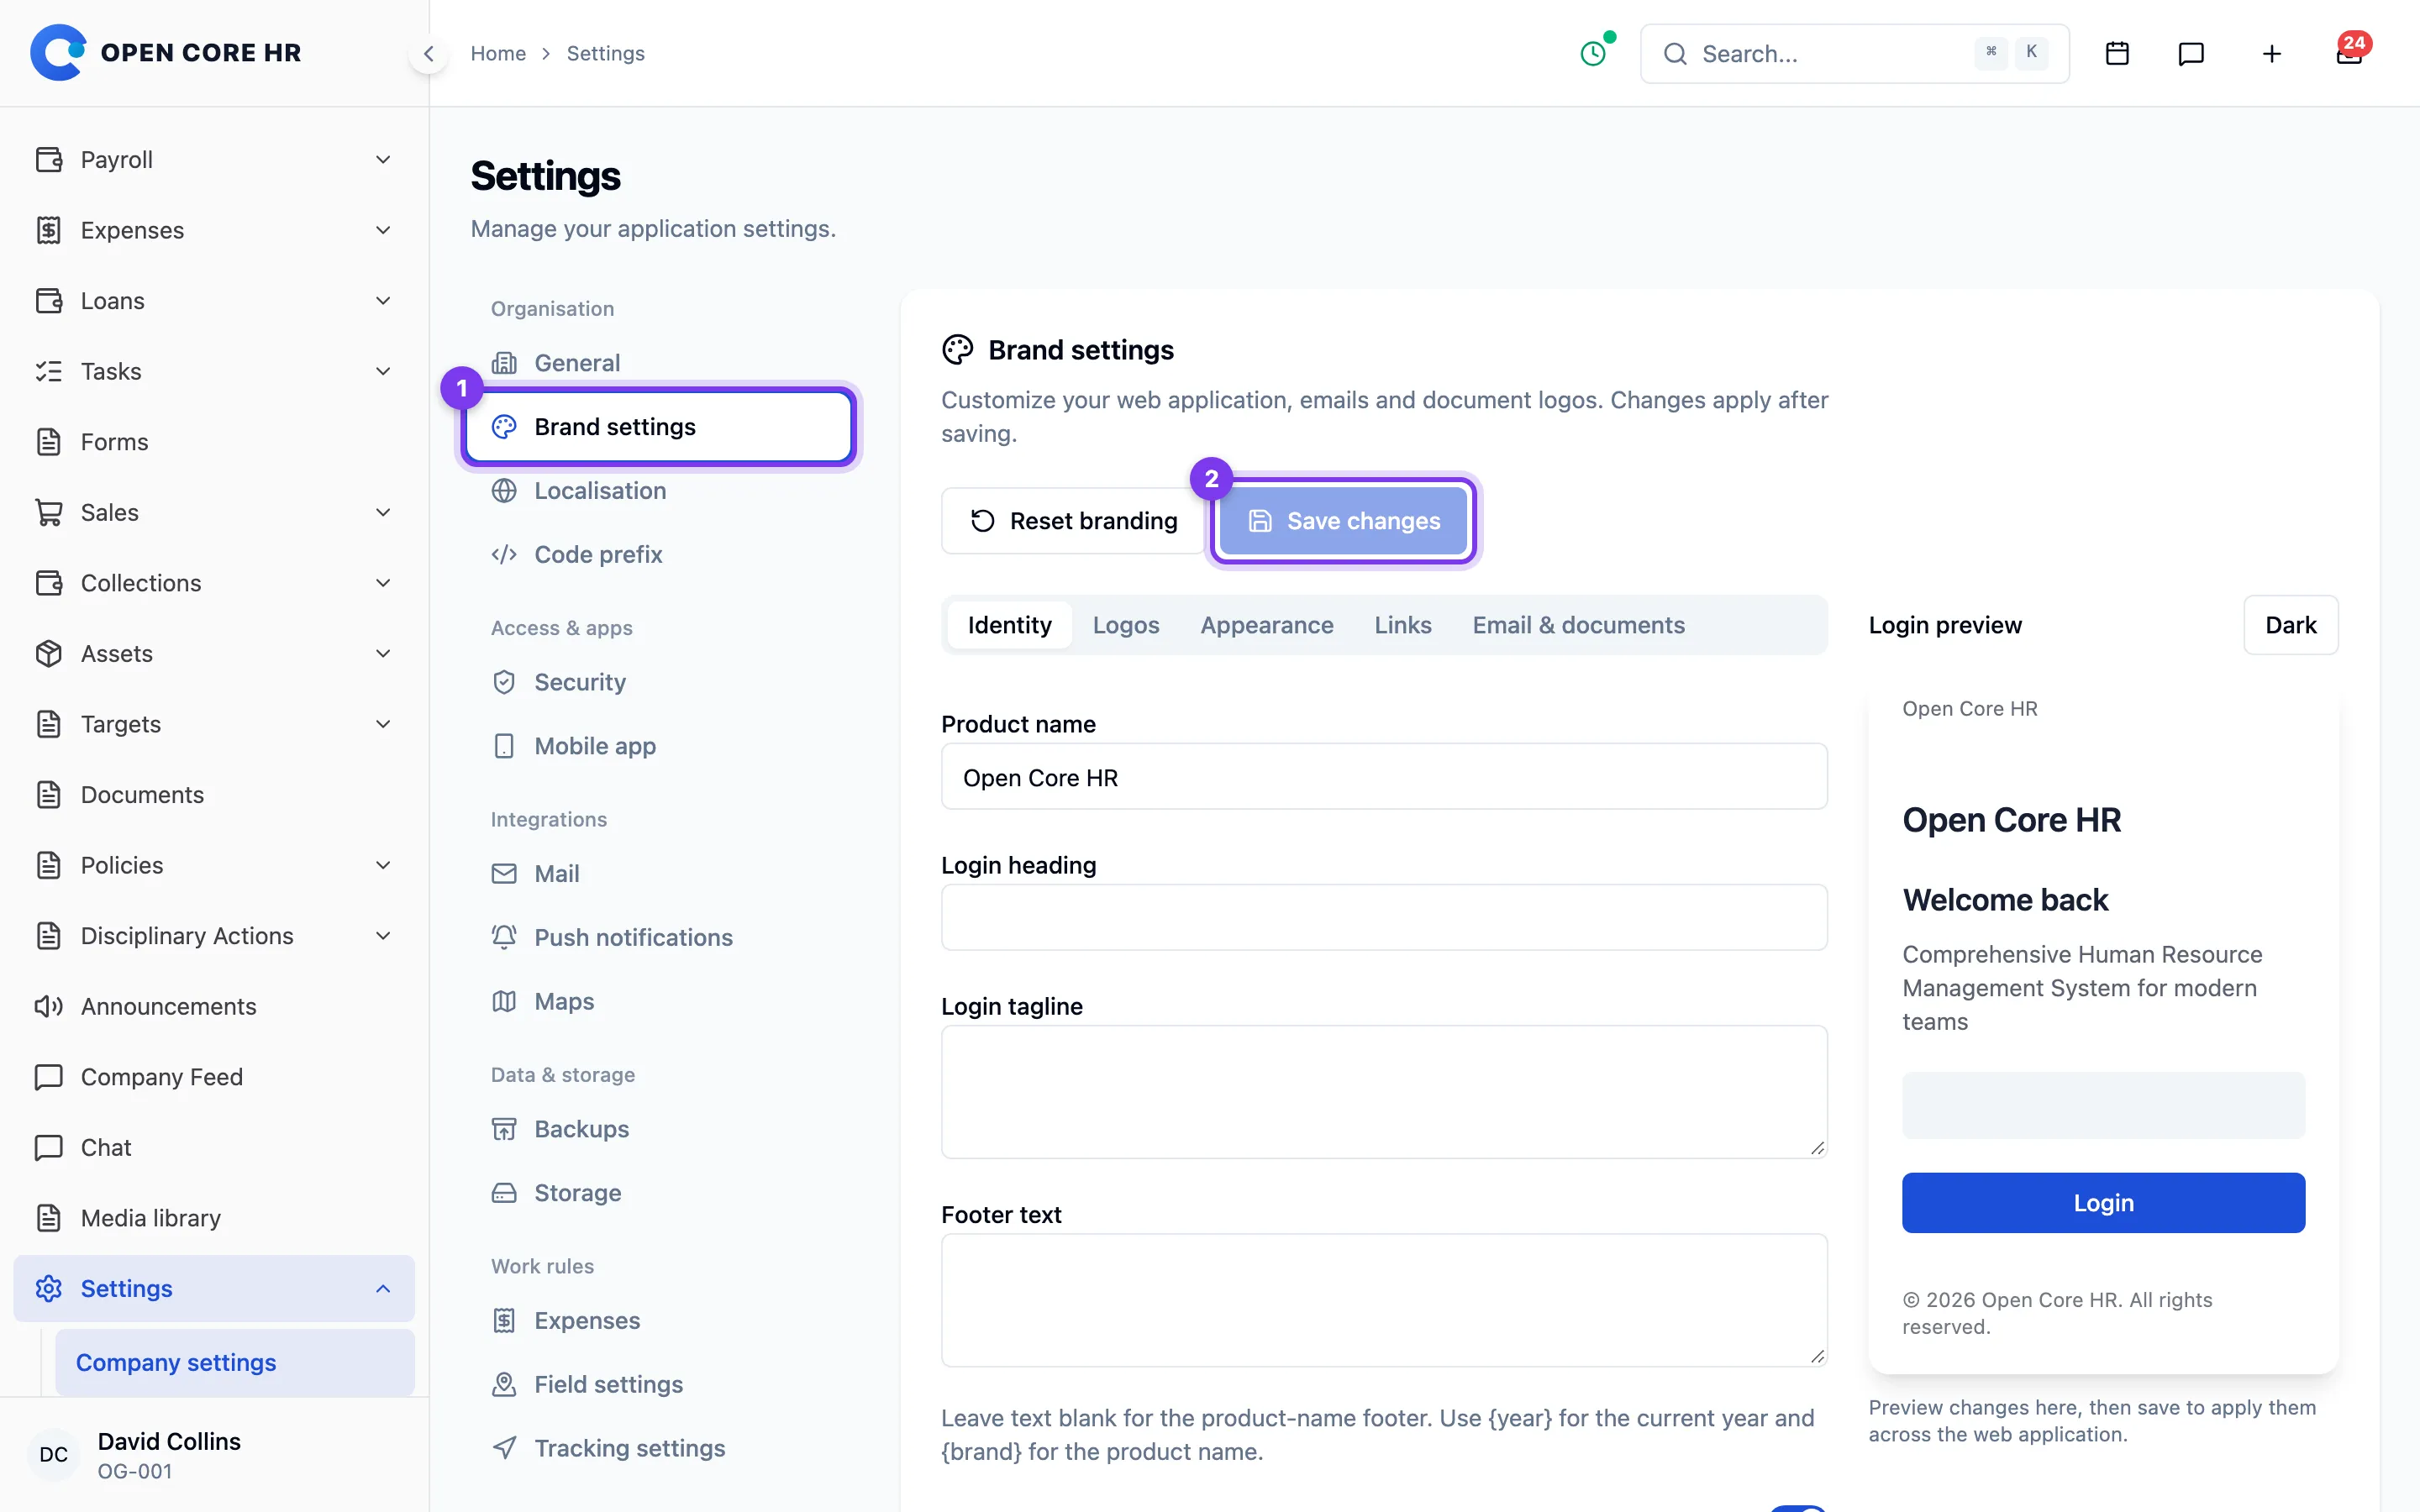
Brand settings — the web product name, logos, colors, login text, footer, help/legal links, email logo and default document logo. See the instructions below.
-
Security — Google reCAPTCHA for web login, with separate v2 and v3 configuration. See the setup steps below.
-
Localisation — currency and number formatting, timezone, date and time formats, distance unit, dialling code and the shortest and longest phone number accepted.
-
Code Prefix — the prefixes used to build codes for employees, departments, designations, locations, shifts and holidays, plus enabled module masters.
-
Recruitment — the HR notification email addresses for new applications, the careers website address used in application tracking links, when missed interviews are reported, and when probation-ending reminders are sent.
-
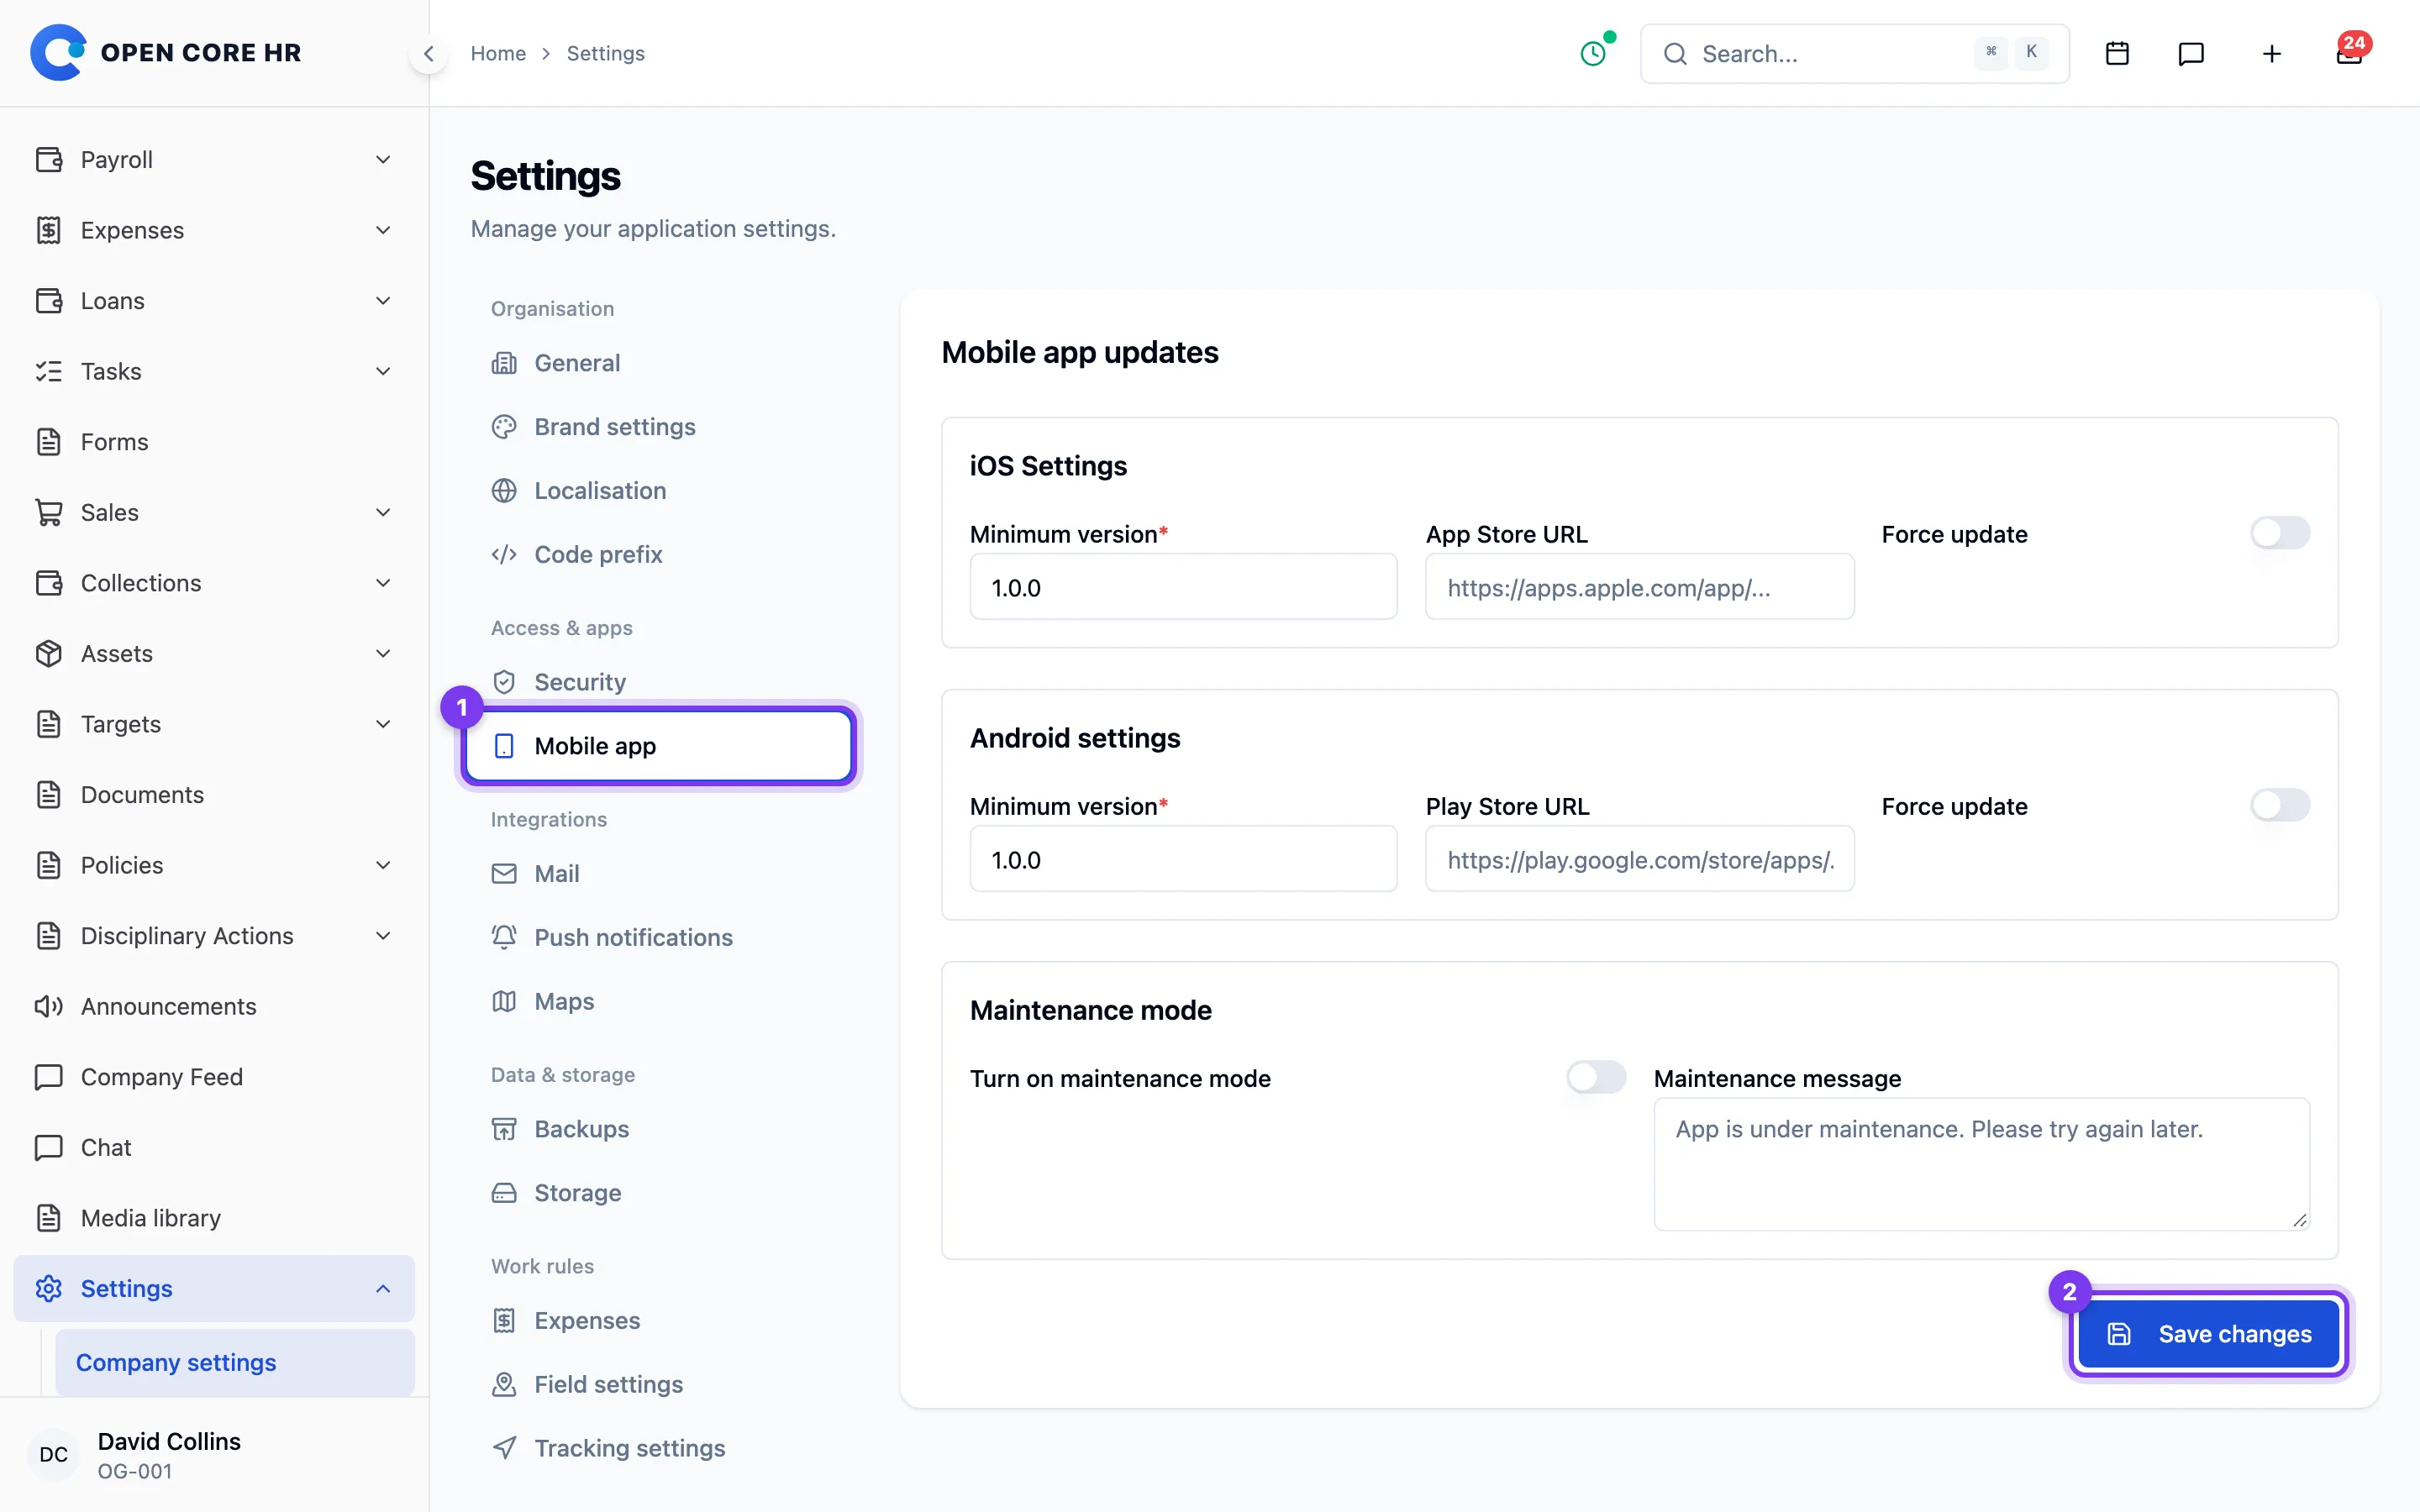
Mobile App — minimum app versions and force-update options for iOS and Android, plus maintenance mode and its message.
-
Mail — how email is sent: provider, SMTP credentials, sender name and address, and a test email. See Mail settings.
-
Push notifications — the Firebase service account used for mobile push notifications. See Push notifications.
-
AI — the connection to your AI provider (Claude, Gemini, OpenAI or a self-hosted model) and its connection test. Switches, access and limits are on the AI menu. See AI in Open Core HR.
-
Storage — file storage connections, the active provider and upload limits. See Storage settings.
-
Expenses — the maximum age of an expense, in days, when it is submitted. Items dated earlier are refused at submission; drafts are still saved. Enter 0 for no limit. The limit applies on web and mobile.
-
Joining and exit tasks — the default tasks added to every onboarding and separation, and which of them must be done before completion. Requires the Employee Lifecycle module. See Default joining and exit tasks.
-
HR assistant — what Ask HR answers from, whether it may prepare requests, and the questions it could not answer. Requires the HR assistant add-on. See HR assistant.
-
Feed — birthday, work anniversary and optional welcome posts, automatic posting or review through Approvals, and the notification audience. Requires the Feed module.
-
Calls — Agora credentials, call token lifetime and when unanswered calls become missed. Requires the Calls module.
-
Loans — loan number prefix, maximum repayment period, deduction day and automatic closing. Requires the Loan module.
-
Webhooks — delivery timeout, retries and log retention. Super administrators only; requires the Webhooks module.
Each tab has its own Save Changes button, so you save one tab at a time.
Customize your web branding
You need permission to manage settings to save or reset branding. Branding applies to the whole installation. It does not change the mobile application or the legal business name in General.
- Open Settings → Brand settings.
- Enter the product name and any custom login text. Leave the login heading or tagline blank to use the translated defaults.
- Choose logos for light and dark backgrounds, and a square browser/navigation icon. Upload a PNG or JPG, or choose an image from your media library. Images must be no larger than 2 MB or 4096 × 4096 pixels. A library selection becomes a separate branding copy.
- Set the colors and default theme. The preview shows unsaved changes; it does not change the application until you save. A user's own theme choice takes precedence over the default.
- Set any support, privacy, terms and help links, then select Save changes. Refresh another open browser tab to see the updated branding. No build or code change is needed.
Saved brand images are publicly accessible so they can appear before login and in emails. Upload only images intended for public display. Private employee files remain protected.
The footer accepts {year} and {brand} placeholders. Leave it blank for the default product-name copyright text. Turning off the copyright footer keeps configured support and legal links available.
Use complete HTTPS URLs for links. A custom help URL is used directly, including for old /docs bookmarks; it does not add a documentation path. Leaving it blank uses the installation's documentation destination. Changing this link does not rebrand the externally hosted manual.
Under Email & documents, you can select separate email and document logos. They use the light-background logo when no separate image is selected. The email sender name and address are set in Mail settings.
The document logo appears on newly rendered plain letters, payslips and policy manuals. Existing letterheads, employer details and saved PDFs are preserved. Replacing a logo does not rewrite previously generated files.
Reset branding restores Open Core HR's default branding and removes the installation's custom branding copies. It keeps company details, letterheads and original media-library files. If saving fails, keep the draft open, correct any field errors or storage connection problem, and try again.
Protect web login with Google reCAPTCHA
You need permission to manage settings. Protection is off initially and applies to web login, including demo sign-in buttons. Mobile app login, password recovery and public forms do not use it in this release.
- Open Settings → Security. Choose Google Cloud for a new integration, or Classic site key and secret key for an existing compatible integration. Your server administrator can help create the Google credentials.
- Enter the allowed hostnames, one per line, such as
hr.example.com. Do not enter a protocol, port, path or wildcard. The current browser hostname must be listed here and allowed in Google's key settings. For Google Cloud, enter the project ID and restricted server API key. - Choose one reCAPTCHA version and enter its site key. The selected version applies to every protected area. v2 — Checkbox asks the visitor to complete a checkbox challenge. v3 — Score-based runs when the visitor submits the form; scores below Minimum v3 score are rejected. Start at
0.5and review real traffic in Google before adjusting. Classic connections also require its matching secret key. - Select Test V2 or Test V3 for your chosen version. Complete the checkbox when shown, then select Verify configuration. This verifies the draft on the current hostname without changing active protection.
- Under Protected areas, enable Web login. Turn on Enable reCAPTCHA, then select Save within ten minutes of a successful test.
- Keep your current administrator session open and check sign-in in a separate private browser window.
Only the selected version is active. Previously entered keys are retained when you switch versions or connections; switching does not require you to configure both versions. Saved secrets are never shown again. Leave a secret field blank to retain it; use Remove saved credential to clear it. Changing a key, connection, hostname list or the applicable v3 threshold requires another test before saving with protection enabled. Saving a disabled configuration is allowed without a test.
If a test fails, check the key type, credentials and domain restrictions. For Cloud connections, also check that the reCAPTCHA Enterprise API is enabled and that the project can create assessments within its current quota. A successful setup test does not guarantee every visitor will pass v3; the score depends on the individual attempt.
If verification becomes unavailable, sign-in is blocked while protection is enabled. Signed-in administrators can disable Enable reCAPTCHA and save. If nobody can sign in, use the server recovery command. If another administrator changes these settings while you edit, reload and review your draft before saving.
Publish a landing page
Requires the Landing Page feature and permission to Edit and publish landing page. A super administrator enables it from Modules. When enabled, visitors see a starter home page at the installation's root address. Signed-in users continue to their dashboard. Disabling the feature restores the login entry point and keeps your saved content for later.
Open Settings → Landing page → Open landing page editor, or Landing page in the navigation. The page inherits the installation's logos, colors, theme, copyright and support/legal links from Brand settings. Change those there; the landing page editor controls only its own content.
- Edit headings, descriptions, buttons and section items. Show or hide sections and use the move controls to change their order. The header and footer stay in place. The gallery and testimonials appear only when they contain images or entries.
- Upload your own hero, gallery or sharing images, or select them from the media library. PNG, JPG and WebP images may be up to 4 MB and 6000 × 6000 pixels. A selected library file becomes an independent copy. Captions describe gallery images for visitors using screen readers.
- Select Save draft, then Preview draft to check desktop and phone layouts. Saving does not change the live page. Unsaved edits must be saved before previewing or publishing.
- Select Publish and confirm to replace the live content with the saved draft. View live page opens the public page even when you are signed in.
Button destinations accept complete HTTPS URLs, local paths such as /auth/login, or section links such as #features. Buttons pointing to a hidden section are hidden too. Contact details are optional; this page does not collect enquiries or newsletter subscriptions.
Under Search & sharing, set the page title, description and optional sharing image. A blank title uses the brand name. Search indexing is off by default, and draft previews always request no indexing. The published page and its published images remain publicly accessible regardless of that setting. Write page content in the language intended for your audience; changing the interface language does not translate your saved content.
Draft images require editor permission. Replacing an image in a draft keeps the current live image available until you publish. If a save fails, correct the reported fields or storage connection and retry; your draft edits remain on screen. If another editor has saved since you opened the page, copy your pending changes before reloading and applying them to the newer draft.
Tips
- If your role doesn't allow managing settings, you may be able to view this screen but not save changes.
See also
- General settings
- Localisation settings
- Code prefixes
- Feed settings
- App update settings
- Authorized signature
General settings
The General tab on the Settings screen holds your company details, the automatic check-out time, and the signatory used on generated letters. Open Settings from the gear icon in the top bar, then stay on the General tab.
What you can set
Company Information
- Legal Business Name
- Phone
- Address
These appear on generated lifecycle letters and other company documents. The web product name, email identity and logos are managed separately in Brand settings.
Attendance
- Only allow registered devices — refuse a check-in from a phone the employee has not registered.
- Block check-in until documents are uploaded — stop an employee checking in while a mandatory document is still missing.
Letter Signatory
- Signatory Name and Signatory Designation — the name and title printed on generated lifecycle letters (offer, appointment, confirmation, increment, warning, relieving) and shown on the candidate offer-acceptance page.
- Signature Image — the signature picture. See Authorized signature for how to upload it.
Steps
- Open Settings from the gear icon in the top bar.
- Stay on the General tab.
- Update the fields you need.
- Click Save Changes at the bottom of the tab.
Tips
- The company details here feed into generated documents and letters, so keep them accurate.
- The Letter Signatory name and designation are typed in here; the signature image is uploaded separately (the file picker on this tab handles it).
Code prefixes
The Code Prefix tab on the Settings screen sets the text at the start of the codes Open Core HR generates. Open Settings from the gear icon in the top bar, then choose the Code Prefix tab.
What you can set
There is a prefix for each kind of record Open Core HR generates a code for:
- Employee —
EMP-0001 - Department —
DEP-0001 - Designation —
DSG-0001 - Location —
LOC-0001 - Shift —
SHF-0001 - Holiday —
HOL-0001 - Expense Category —
EXP-0001, when Expenses is enabled
Document Type prefixes are configured in the Documents module's settings; the default is DOC.
Leave types, salary components and approval workflows retain their separate business-key policies.
Prefixes contain 1 to 8 letters or digits and are stored in uppercase. TMP is reserved for temporary onboarding identities and cannot be the employee prefix.
Codes are allocated on save using an independent sequence for each entity. Sequences continue past 9999 and do not reset when a prefix changes. Existing codes are never renamed or reused through normal deletion. Gaps are allowed.
Steps
- Open Settings from the gear icon in the top bar.
- Open the Code Prefix tab.
- Type the prefix you want in each field.
- Click Save Changes.
Tips
- Changing a prefix affects codes generated from then on; it doesn't rename codes that already exist.
- Keep prefixes short and consistent so codes stay easy to read.
Localisation settings
Use Settings → Localisation to choose your organization's currency, number formatting, timezone, date formats, distance unit and dialling code. Viewing settings requires settings access; saving requires permission to manage settings.
Choose the application language
Open Languages & translations in the administration navigation. This requires Manage translations and languages permission. Choose the company default and enable the languages people may select. English remains available as the fallback for missing translations.
People can choose a personal language from the web header or Profile → Language in the mobile app. Use company default follows your organization's choice. Language selection does not change currency, number formatting or timezone.
Before signing in, use the language dropdown at the top right of the login page. Switching language preserves the details already entered. After signing in, your saved personal preference or the company default applies.
To change wording, choose the translation language, search for the text and select Edit. Standard sign-in, password and validation messages are included. Keep placeholders such as :name and :attribute unchanged; they are replaced with a person's name, a field label or another value when displayed. Save to publish the wording, or choose Restore default to remove your customization. If someone else changed the same entry, close and reopen it to review their wording before saving again.
Web pages pick up changes on their next visit. The mobile app checks at startup and when returning to the foreground, and keeps downloaded wording available offline. The editor includes standard web, mobile and backend messages. Employee names, policy text and other content entered by your organization remain as entered.
Count messages can have separate forms for zero, one, two, few, many and other quantities. Edit each available form and keep its :count placeholder. The application selects the correct form for the language and quantity.
25 interface languages are included: English, Arabic, Spanish, French, Hindi, Portuguese (Brazil), Indonesian, Chinese (Simplified), Bengali, Urdu, German, Russian, Japanese, Korean, Turkish, Vietnamese, Thai, Filipino, Swahili, Tamil, Telugu, Marathi, Persian, Malay and Italian. Arabic, Urdu and Persian use right-to-left layouts. Administrators enable the languages they need and customize their wording here; further languages can be supplied with the application. Adding a language also requires reviewing its email and PDF template variants.
Translate email and letter templates
Open Mail Templates or PDF Templates with permission to manage templates. Each template has a content language independent of your interface language. Select an existing translation, or create a language draft from the saved content. Save pending changes before switching languages.
Translate the subject and body while preserving variable tokens. Preview the result before activating it. Activation applies only to that language; deactivating it restores the built-in message or letter for that language. Attachments belong to each email language separately and are not copied into a new draft.
Generated letters keep their original language when refreshed after a template edit. Their reference number stays the same, and the template version is recorded. Finalized payslips keep the employee's language at finalization. Employee names, company details and other entered content remain as entered.
Set currency and number formatting
- Choose the Default currency. Selecting a currency fills its standard symbol; you can edit the symbol.
- Choose Decimal places, decimal and thousands separators, digit grouping, symbol position and spacing. Thousands and decimal separators must differ when grouping is enabled. Indian grouping displays numbers such as
12,34,567; None removes grouping. - Check the live preview, including its negative and large amounts. Change the preview amount to try a value relevant to your business.
- Select Save Changes to apply the preferences.
Decimal places affect display only. Currency default uses each amount's currency precision; Show decimals is a shortcut for hiding or restoring decimal places. Calculations, validation and stored amounts retain currency precision. For example, displaying USD 1234.56 as $1,235 does not change the amount owed. Rounded summaries include the exact amount; financial documents retain full currency precision.
Use the selected decimal separator when entering an amount. Correctly grouped pasted amounts are accepted; ambiguous or incorrectly grouped values must be corrected. Hiding decimals does not prevent entering the currency's fractional units.
Changing the default currency does not convert or rewrite amounts. Payroll and compensation records keep their recorded currencies. Records without a separate currency use the current default, so review the effect on existing records before changing it.
PDFs use the configured currency symbol and support Arabic text. If a new language shows empty squares, ask the administrator to install fonts that cover that language on the application server.
Reset preview changes only the sample amount. Use format defaults restores the draft formatting choices without changing the currency or other localisation settings. Discard changes restores the saved form. These actions take effect elsewhere only after saving.
If another administrator saves first, your save is rejected and your draft remains visible. Use Reload saved settings, review the newer values, and reapply your intended changes. Invalid or failed saves leave the saved configuration unchanged.
Saved preferences apply to web views and refresh in the mobile apps at login or when returning to the foreground. Offline mobile apps retain their last saved preferences. Issued payslips and financial letters retain their original formatting when downloaded again. Machine-readable exports retain exact decimal amounts and currency codes, independent of display separators.
Set time, distance and phone preferences
- Timezone controls attendance timestamps, report boundaries and scheduled jobs.
- Date Format, Time Format and Date & Time Format control displayed dates and times. Check their previews before saving.
- Distance Unit selects kilometres or miles for measured distances.
- Dialling Code appears alongside phone fields. Leave it blank to hide it.
Authorized signature
The authorized signature is the signature image printed on generated lifecycle letters (offer, appointment, confirmation, increment, warning, relieving) and shown on the candidate offer-acceptance page. You upload it in the Letter Signatory section of the General tab on the Settings screen.
There isn't a separate tab for this — it lives alongside the Signatory Name and Signatory Designation fields on the General tab.
Steps
- Open Settings from the gear icon in the top bar.
- Stay on the General tab and scroll to Letter Signatory.
- (Optional) Fill in Signatory Name and Signatory Designation.
- Under Signature Image, click Upload (or Replace if a signature is already there).
- Choose a PNG or JPG image. A PNG with a transparent background works best, and the file must be 2 MB or smaller.
The signature uploads on its own — you don't need to press Save Changes for the image (that button saves the other General fields, including the signatory name and designation).
Tips
- Use a clean scan or export of the signature on a transparent background so it sits well on letter templates.
- The signatory name and designation are typed in separately and saved with the rest of the General tab.
App update settings
The Mobile App tab on the Settings screen controls the minimum mobile-app version employees must be on, whether updating is mandatory, and an overall maintenance mode for the app. Open Settings from the gear icon in the top bar, then choose the Mobile App tab.
What you can set
iOS Settings
- Minimum Version (required) — the lowest iOS app version allowed, in the form X.Y.Z (for example, 1.2.0).
- App Store URL — the link employees are sent to in order to update.
- Force Update — when on, employees on an older version can't use the app until they update.
Android Settings
- Minimum Version (required) — the lowest Android app version allowed, in the form X.Y.Z.
- Play Store URL — the update link for Android.
- Force Update — same as for iOS.
Maintenance Mode
- Enable Maintenance Mode — when on, all app access is blocked.
- Maintenance Message — the message shown to employees while maintenance mode is on.
Steps
- Open Settings from the gear icon in the top bar.
- Open the Mobile App tab.
- Set the minimum versions, store links, and force-update switches for iOS and Android.
- If you need to take the app offline, turn on Enable Maintenance Mode and write a Maintenance Message.
- Click Save Changes.
Tips
- Use Force Update sparingly — it locks employees out of the mobile app until they update.
- Turn maintenance mode back off as soon as the work is done so employees can use the app again.