
All guidesAdministration
Organization and master data
Maintain the organization hierarchy, departments, designations and locations.
Master data is the set of building blocks the rest of Open Core HR relies on — departments, designations, levels, locations, shifts, holidays, expense types and policies, and document types. You set these up once (and keep them tidy over time) so that everywhere else in the app — employee records, attendance, expenses, onboarding — can refer to them.
These screens live in the left menu under Settings. Two of them sit directly under Settings, and the rest are grouped in a Master Data submenu.
What's here
Directly under Settings:
- Organization Hierarchy — a read-only view of the org chart, reporting lines and departments.
Under Settings → Master Data:
- Departments — the departments in your organization, optionally arranged in a parent/child structure.
- Designations — job titles, each optionally tied to a department.
- Locations — your offices and sites.
- Shifts — work-schedule definitions (start and end time plus working days).
- Holidays — public and company holidays per location, with import and bulk tools.
- Expense Categories — the kinds of expenses people can claim, with receipt requirements and optional per-item limits.
- Document Types — the documents employees must provide (ID proof, certificates, and similar).
Note: You only see the items your role gives you access to. If something described here isn't in your menu, ask an administrator.
Organization hierarchy
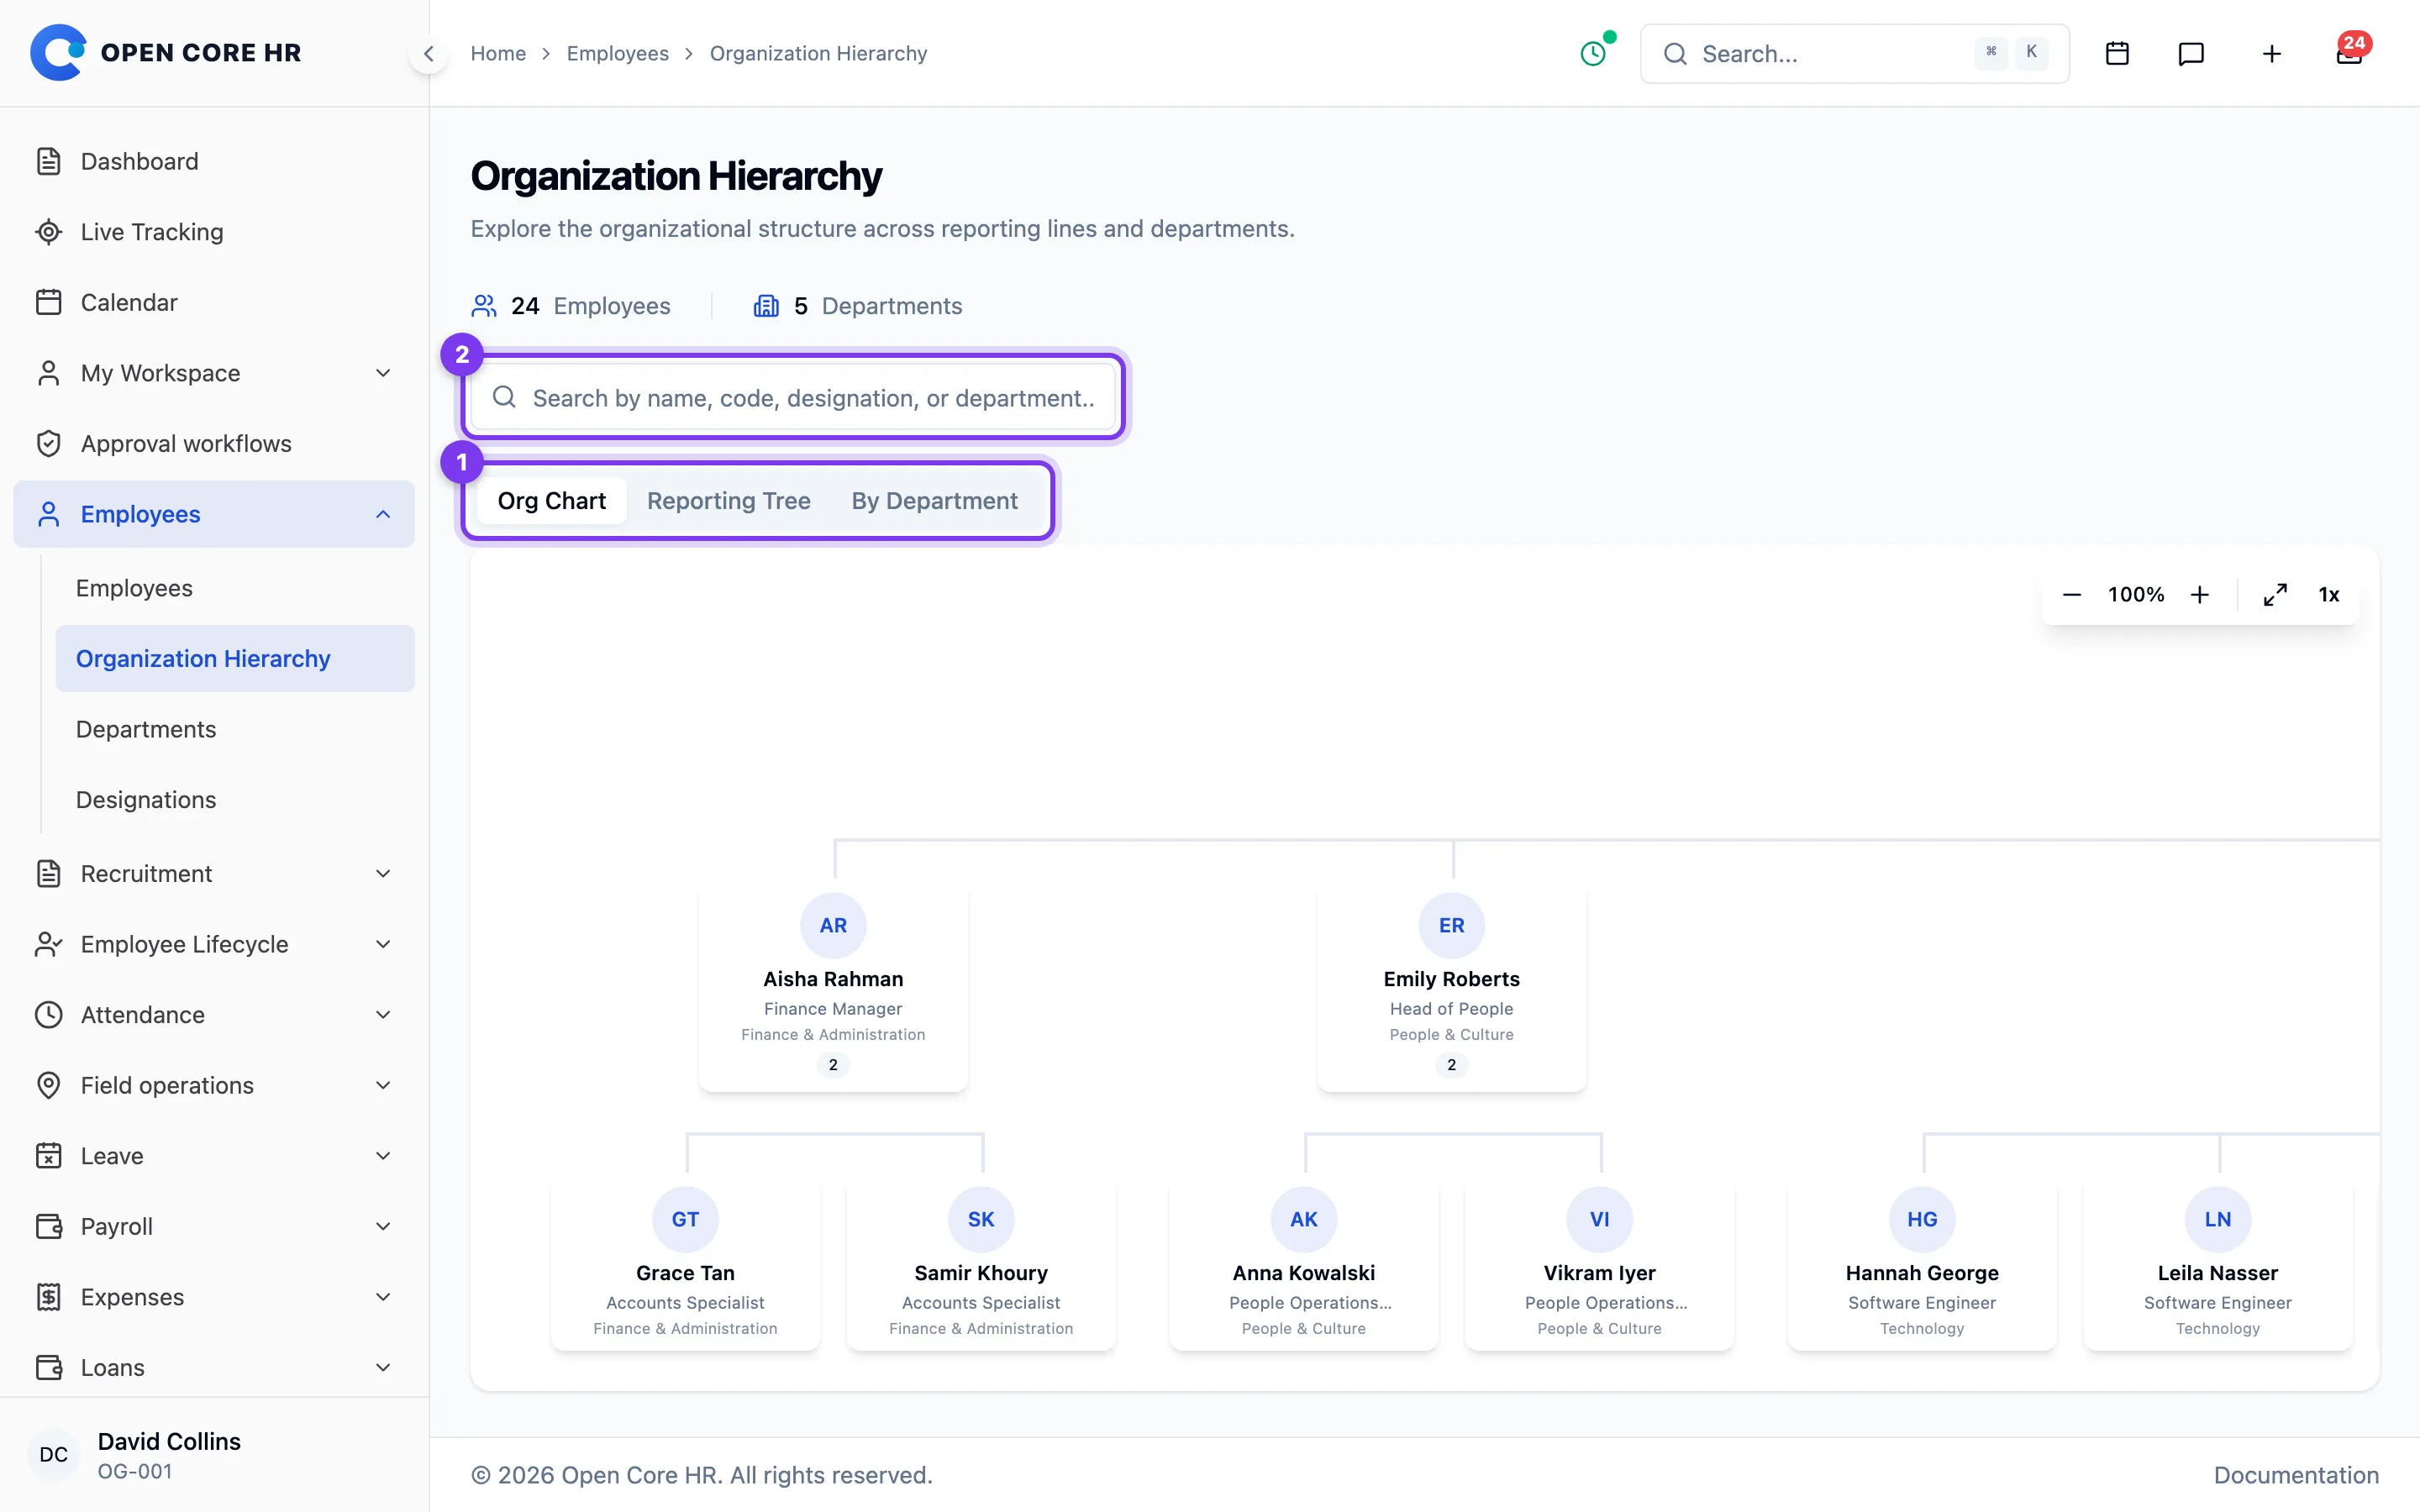
The Organization Hierarchy screen gives you a read-only picture of how your organization is structured — reporting lines and departments. Open it from the left menu under Settings → Organization Hierarchy. It pulls everything from your employee records and departments, so there's nothing to edit here directly.
Finding reporting relationships
Search by name, code, designation, or department. Use Org Chart or Reporting Tree to follow reporting relationships, or By Department to find employees and department heads.
Steps
- Open Organization Hierarchy under Settings.
- Pick the tab that matches what you want to see — the chart, the reporting tree, or a grouping by department or level.
- Type a name, code, designation, or department in the search box to highlight matching people and trim the view to just them and their reporting line.
- Click any person's name to open their employee profile.
Tips
- If the chart looks empty or incomplete, check that employees have a reporting to manager and a department set on their records — that's what builds this view.
- The search affects the Reporting Tree and By Department tabs.
Departments
Departments are the org units you assign people to. You can keep them as a flat list or arrange them in a parent/child structure. Open the screen from the left menu under Settings → Master Data → Departments.
Adding a department
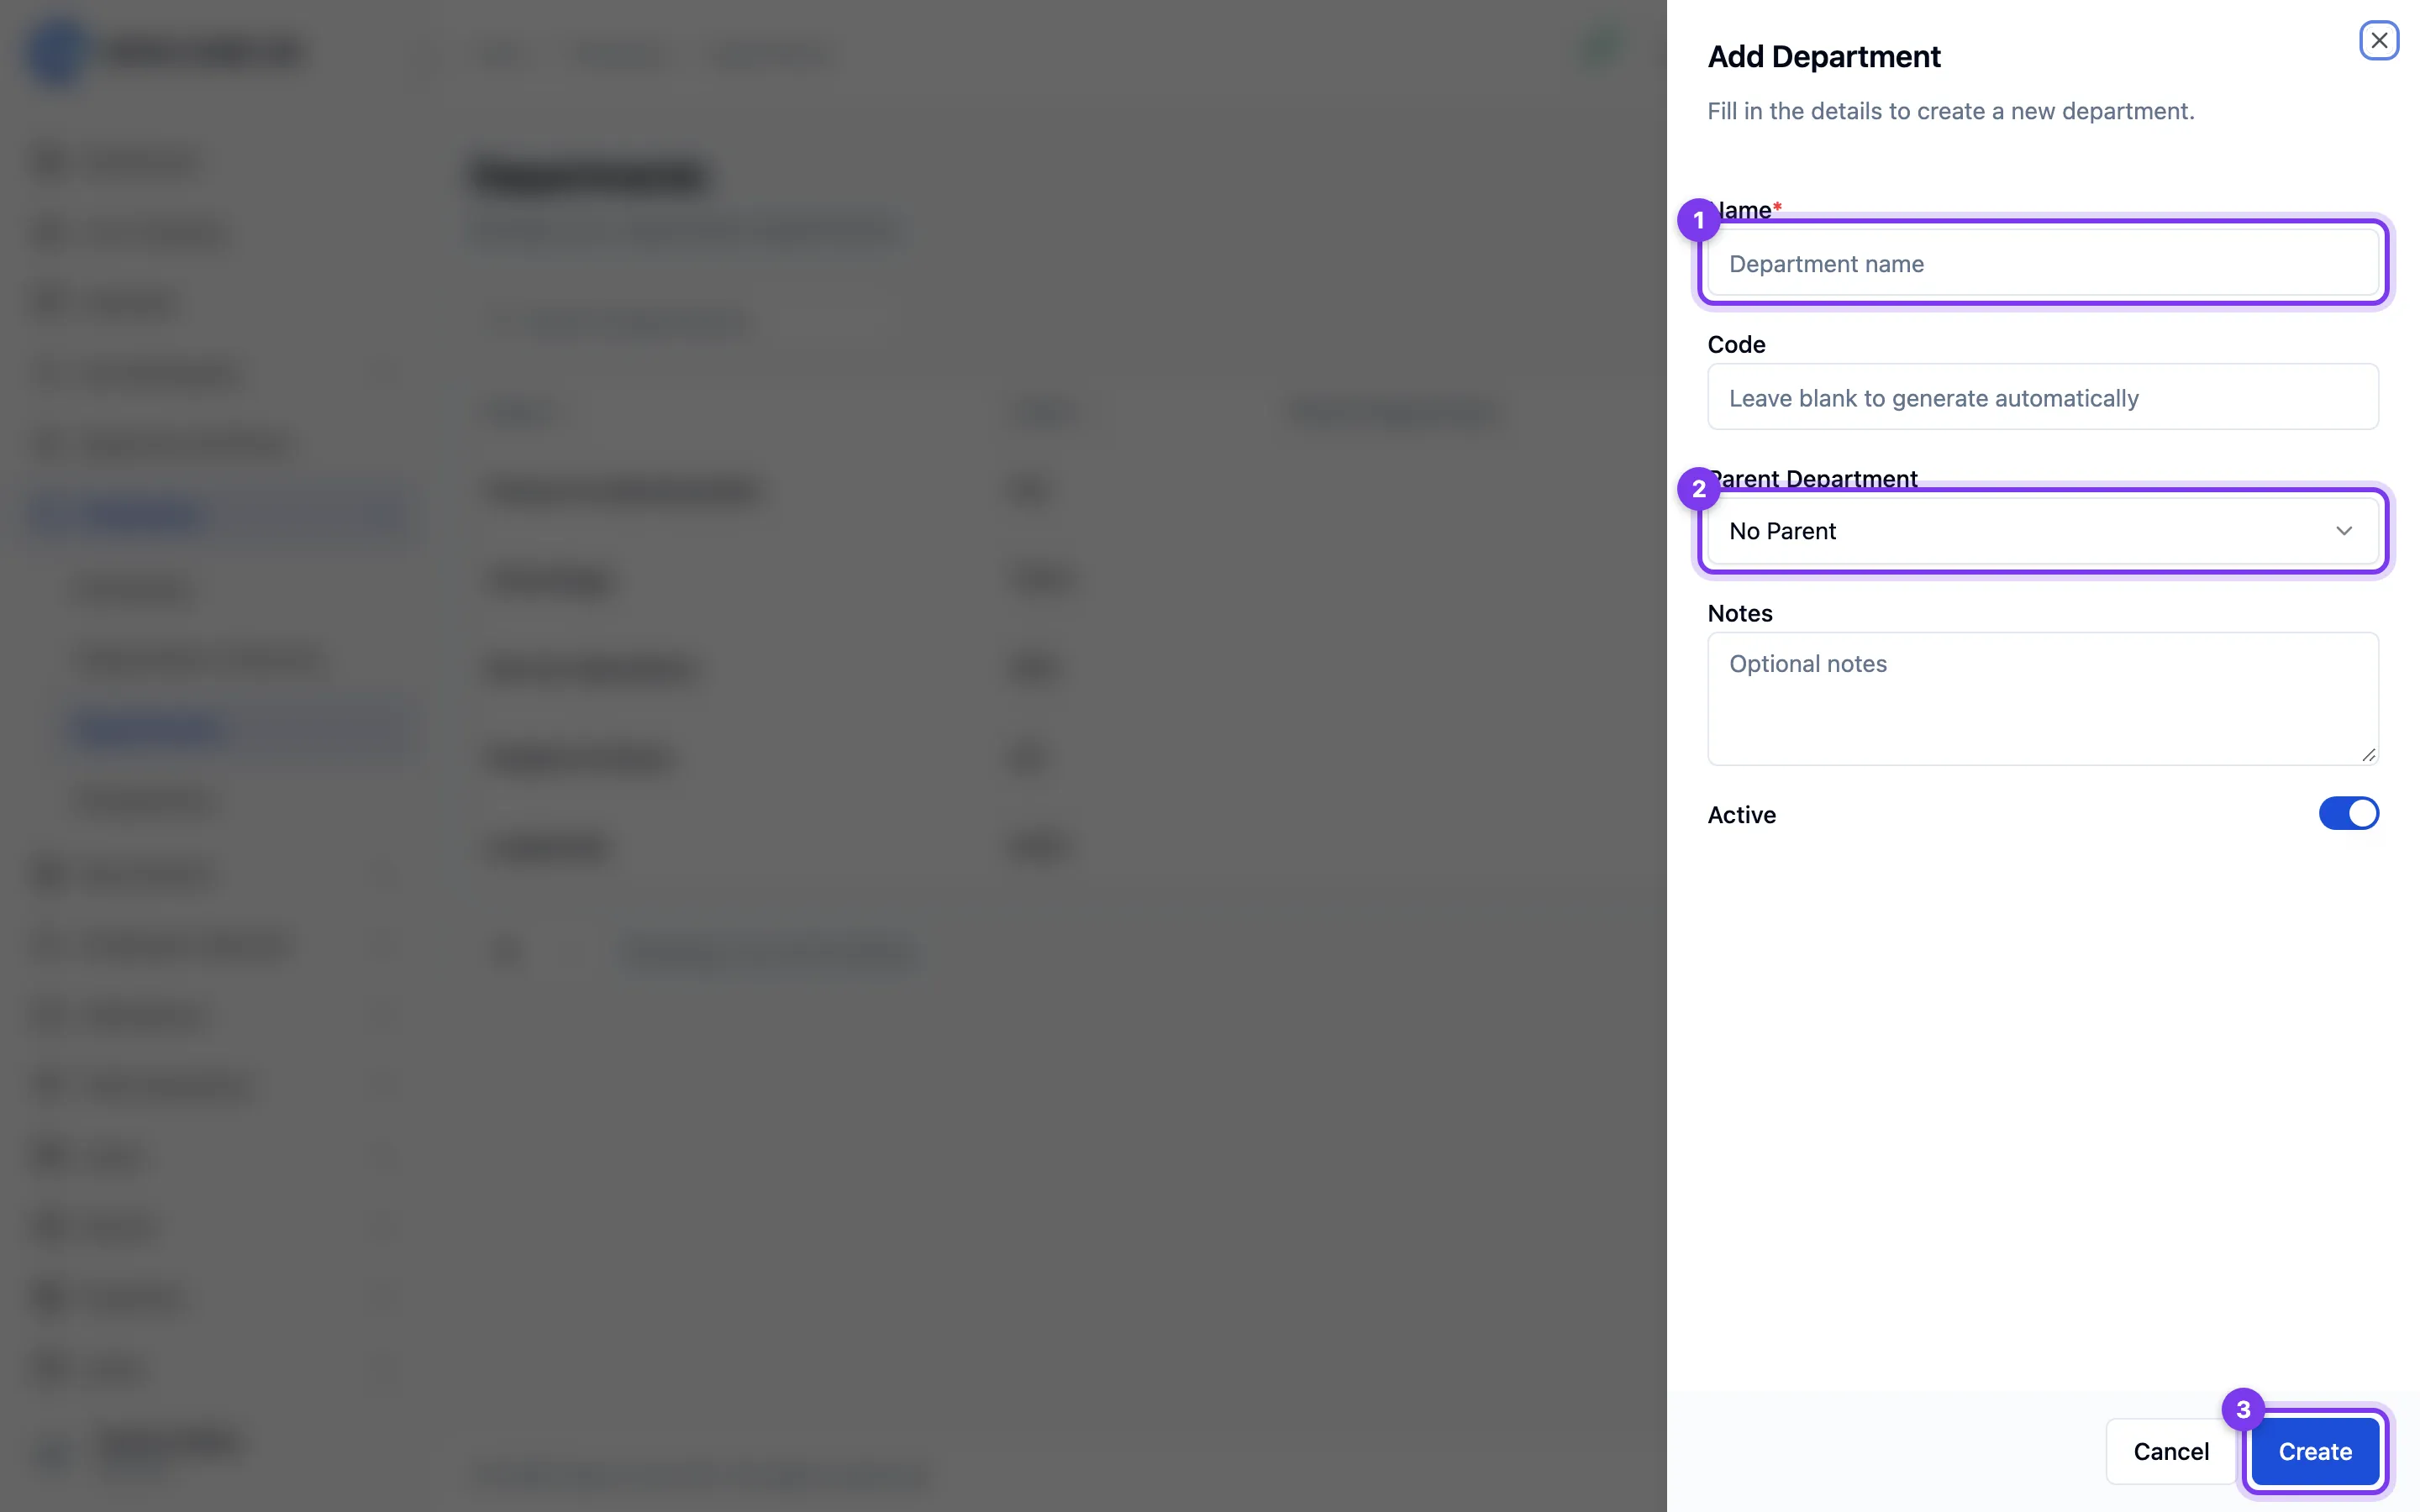
- Click Add department.
- In the Add Department panel, enter a Name.
- Optionally enter a Code, or leave it blank to generate one.
- Optionally pick a Parent Department — choose No Parent for a top-level department.
- Optionally add Notes.
- Use the Status switch to set whether the department is active.
- Click Create.
Editing or removing a department
- Click the pencil icon on a row to open the Edit Department panel, make your changes, and click Update. When editing, the department itself and any departments beneath it won't appear in the Parent Department list (so you can't create a loop).
- Click the delete icon and confirm in the Delete Department dialog to remove it. This cannot be undone.
Tips
- Use the search box above the list to find a department by name or code.
- A department's place in the parent/child structure is what builds the By Department view on the Organization Hierarchy screen.
Codes
Code is optional when creating a record. Leave it blank to generate a code when saving, or supply an existing code of up to 50 characters. Custom codes use uppercase letters, digits, hyphens and underscores; surrounding whitespace is removed. Once saved, the code is read-only and remains reserved when the record is deleted.
Designations
Designations are the job titles you assign to employees — for example "Sales Executive" or "HR Manager". Each one can be linked to a department. Open the screen from the left menu under Settings → Master Data → Designations.
Adding a designation
- Click Add designation.
- In the Add Designation panel, enter a Name and optionally a Code.
- Optionally choose a Department.
- Optionally add Notes.
- Use the Status switch to set whether the designation is active.
- Click Save.
Editing or removing a designation
- Open More actions → Edit on a row to open the Edit Designation panel, make your changes, and click Update.
- Open More actions → Delete and confirm in the dialog ("This will permanently delete the designation") to remove it.
Tips
- Use the search box above the list to find a designation by name or code.
Codes
Code is optional when creating a record. Leave it blank to generate a code when saving, or supply an existing code of up to 50 characters. Custom codes use uppercase letters, digits, hyphens and underscores; surrounding whitespace is removed. Once saved, the code is read-only and remains reserved when the record is deleted.
Locations
Locations are your offices and sites. They're used in other parts of the app — for example holidays are set per location, and company policy documents are attached to a location. Open the screen from the left menu under Settings → Master Data → Locations.
Adding a location
- Click Add New.
- In the Add Location panel, enter a Name.
- Optionally enter a Code, or leave it blank to generate one.
- Optionally add Notes and an Address.
- Use the Status switch to set whether the location is active.
- Click Save.
Editing or removing a location
- Click the pencil icon on a row to open the Edit Location panel, make your changes, and click Update.
- Click the delete icon and confirm in the dialog ("This will permanently delete the location") to remove it.
Tips
- Use the search box above the list to find a location by name or code.
- Keep codes short and consistent — they show up alongside the location name in other screens, such as the Location picker on the Holidays screen.
Codes
Code is optional when creating a record. Leave it blank to generate a code when saving, or supply an existing code of up to 50 characters. Custom codes use uppercase letters, digits, hyphens and underscores; surrounding whitespace is removed. Once saved, the code is read-only and remains reserved when the record is deleted.